-
In the left sidebar, click on the ellipsis next to Apps and select “Manage apps”
-
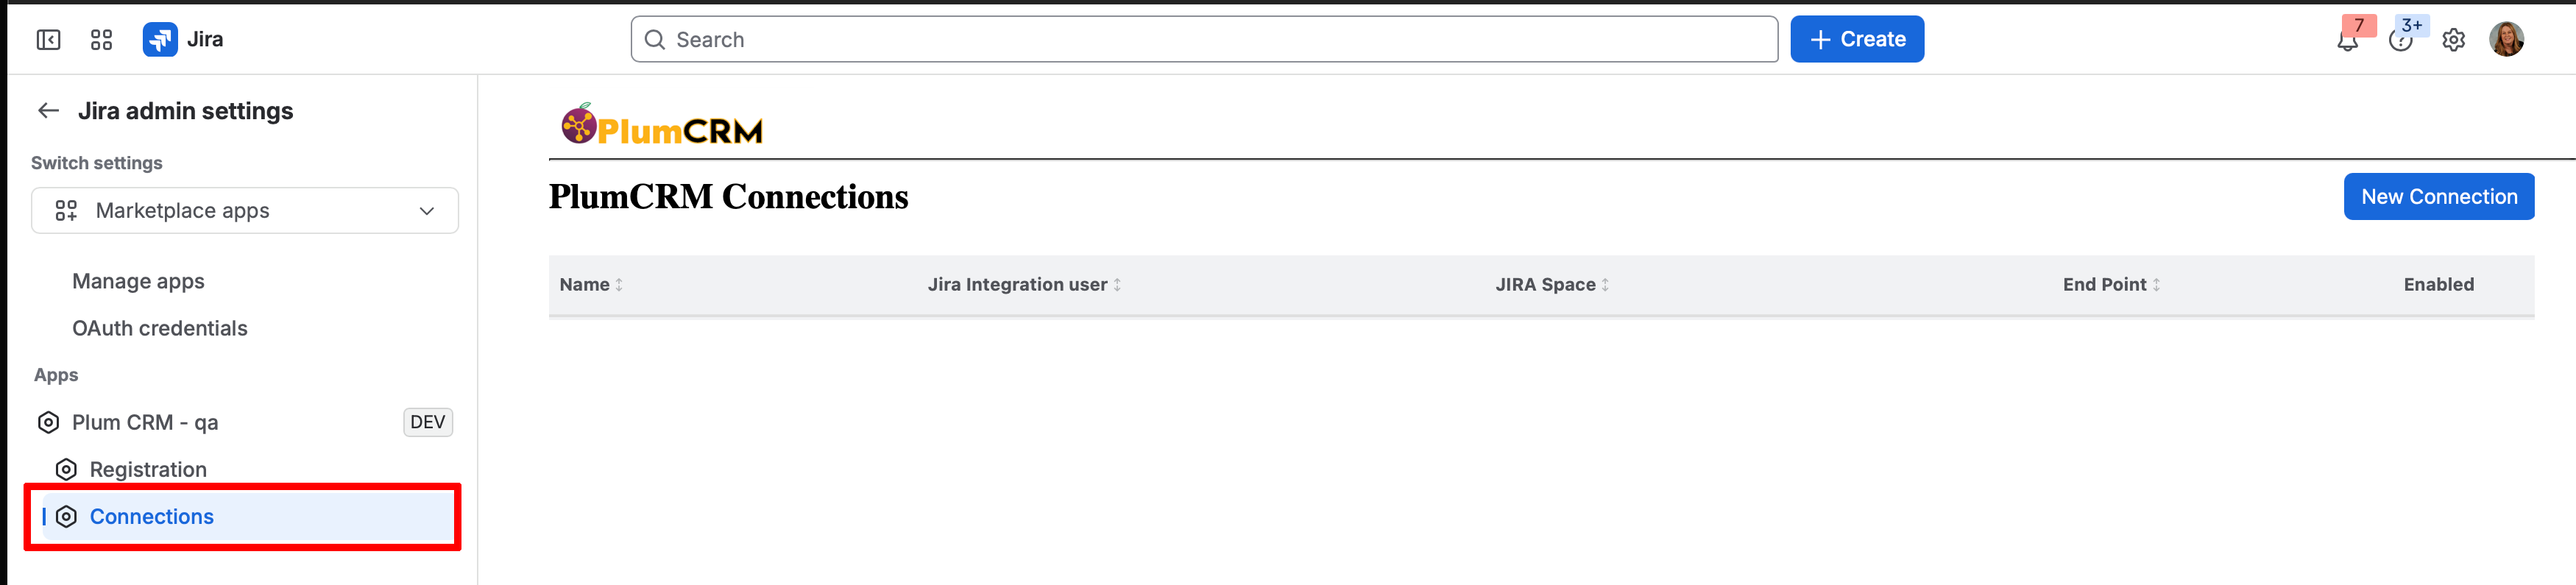
In the left sidebar, click on the “Plum CRM” app and then select “Connection”
-
You will see a page with no connections
-
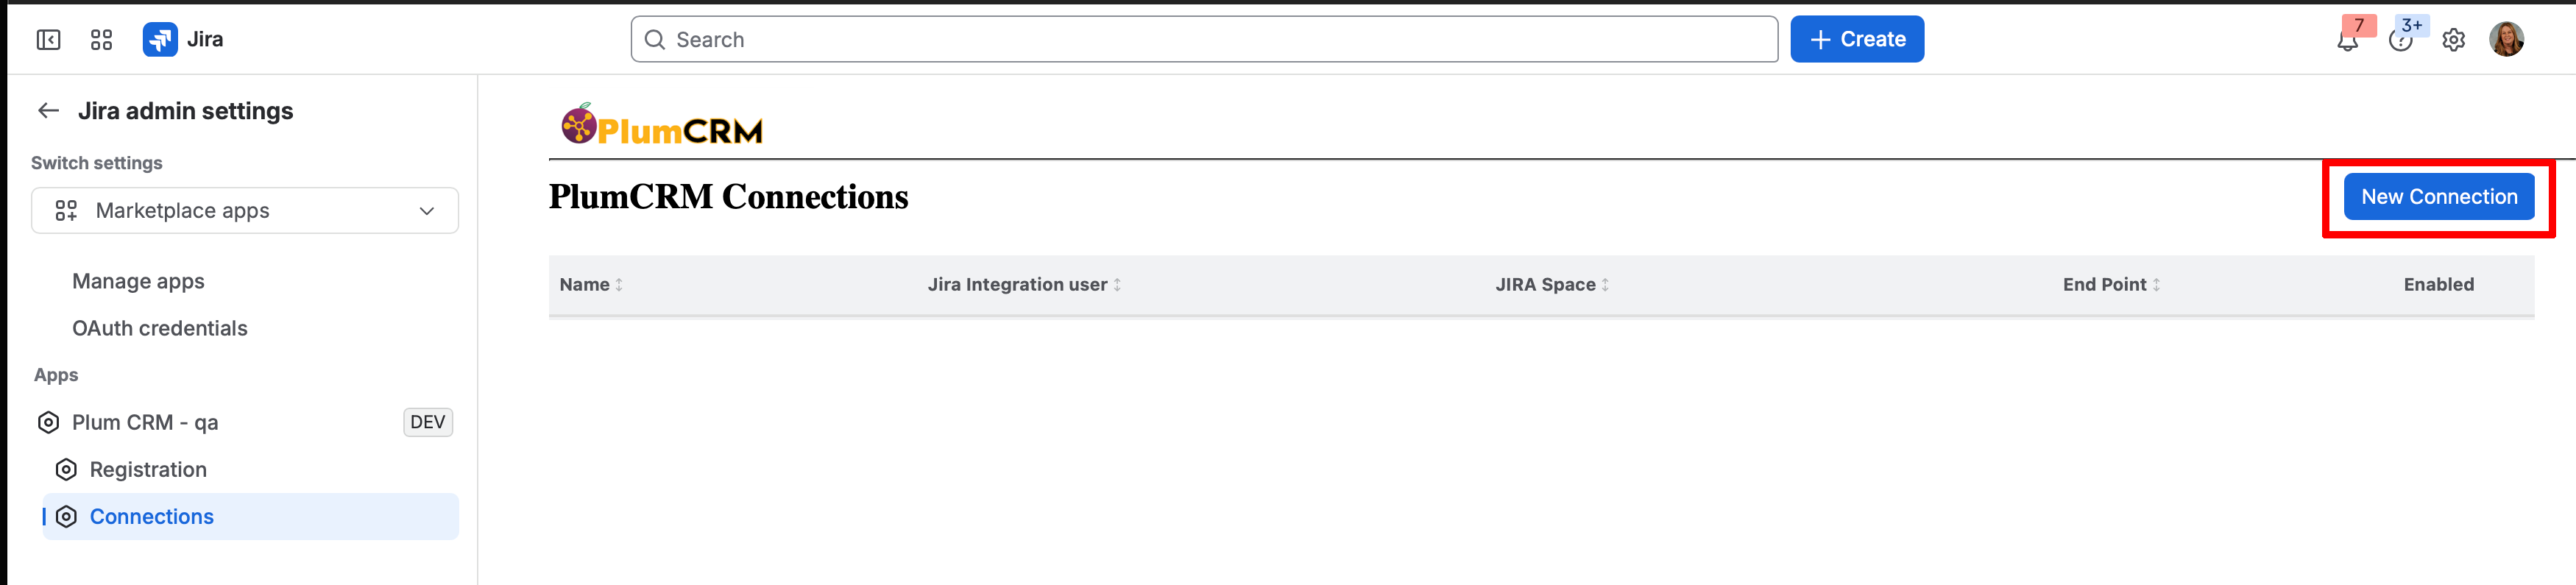
Click on the new Connection button on the top right
-
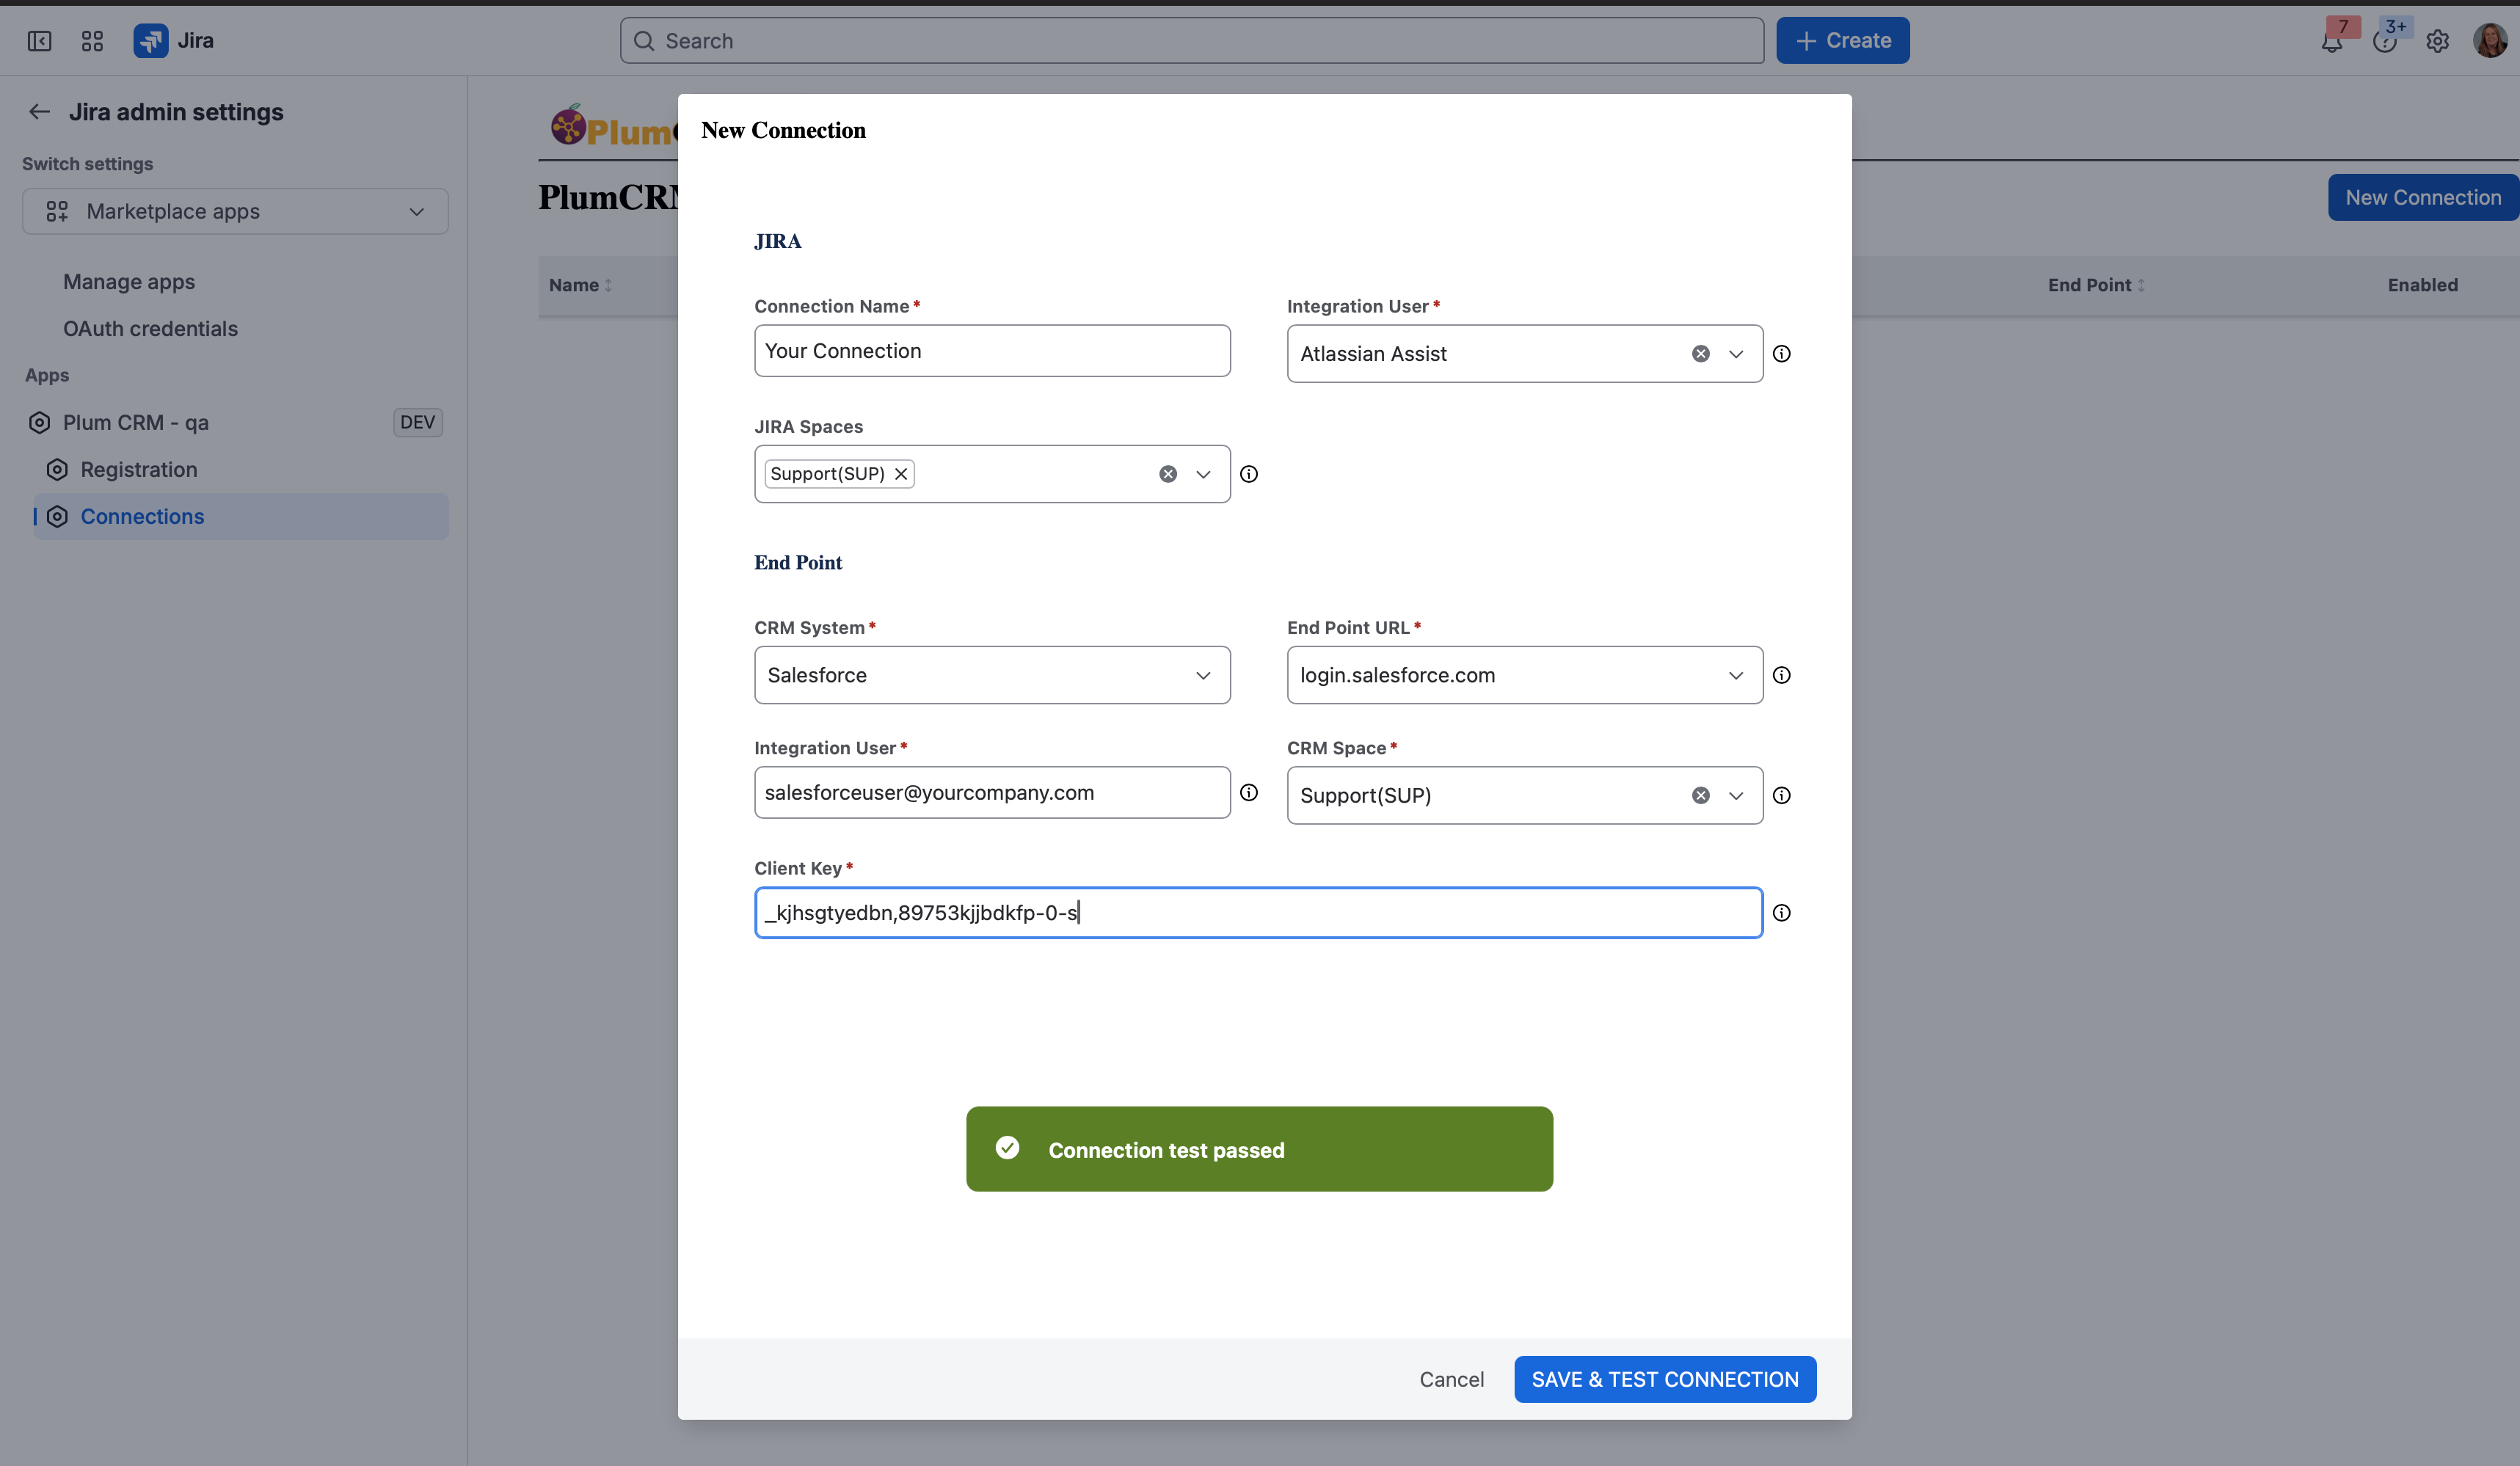
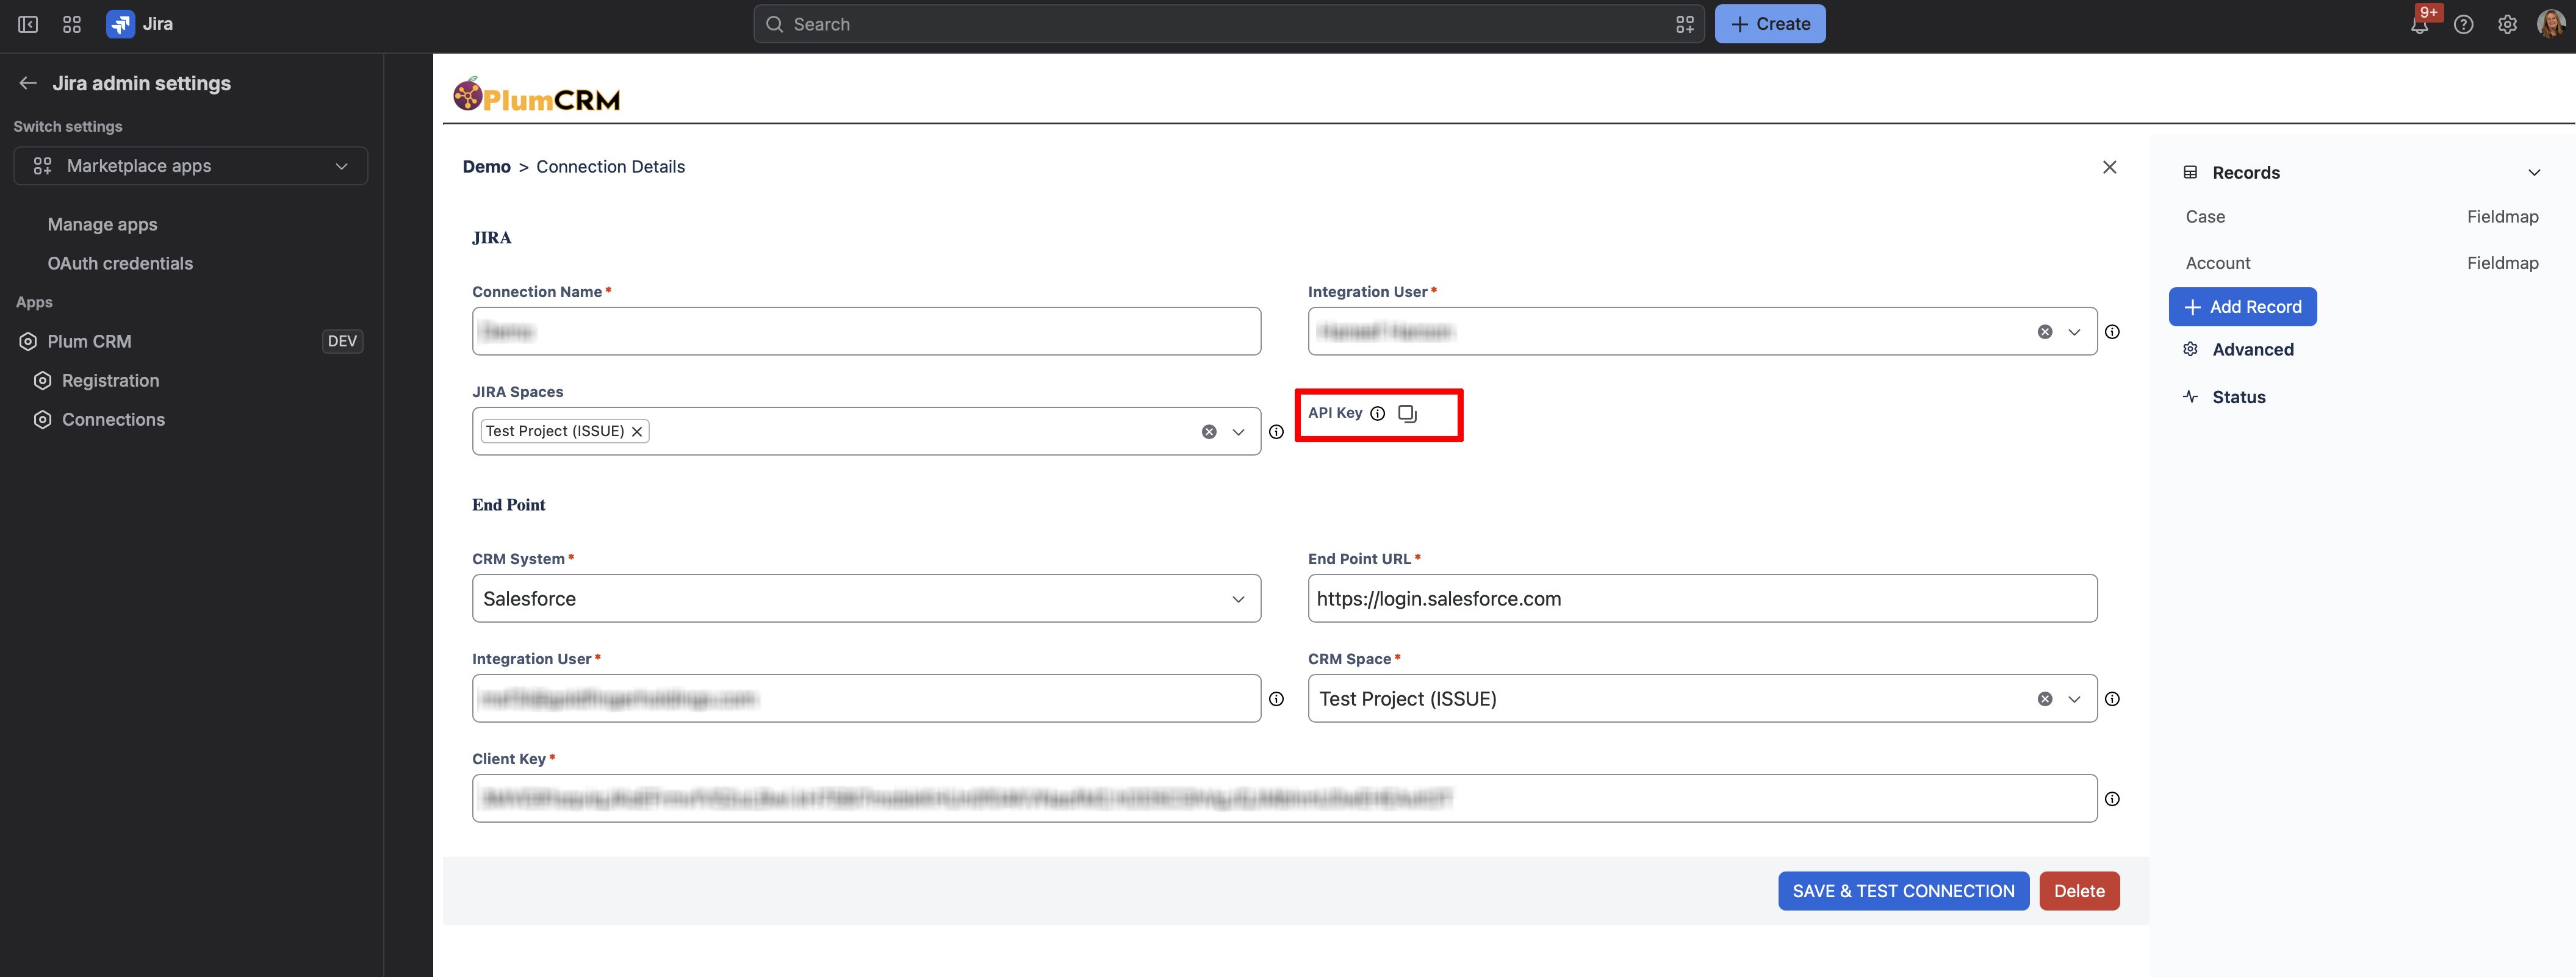
Enter the following:
|
Option Name |
Description |
Notes |
|---|---|---|
|
Connection Name |
Connection Name |
Provide a unique name for your Connection |
|
Jira Integration User |
Pick a service account User from the drop-down |
This account MUST be reserved for data sync |
|
Jira - Jira Space To Sync |
Which space should sync to CRM? Leave this empty to sync all projects. |
|
|
Jira/Sync Service Account |
Enter the account ID of the Jira service account |
This account MUST be reserved for data sync |
|
CRM System |
Pick desired CRM System from the drop-down |
Salesforce or Microsoft Dynamics |
|
Endpoint URL |
Pick CRM System URL from the drop-down |
|
|
Salesforce Integration User |
Username of Salesforce service account to sync data |
This account MUST be reserved for data sync |
|
Jira Spaces |
Default Jira Project |
When creating a new Jira issue from CRM, if you don't specify a project, this value is used. |
|
CRM Space |
Which space will contains new Jira records |
When creating a new JIRA issue from CRM, a space should be selected. For multiple connections to be enabled this is a required field and must be unique to each connection. |
|
Client Key |
|
Created in the first install step described in How to set up Salesforce oauth |
-
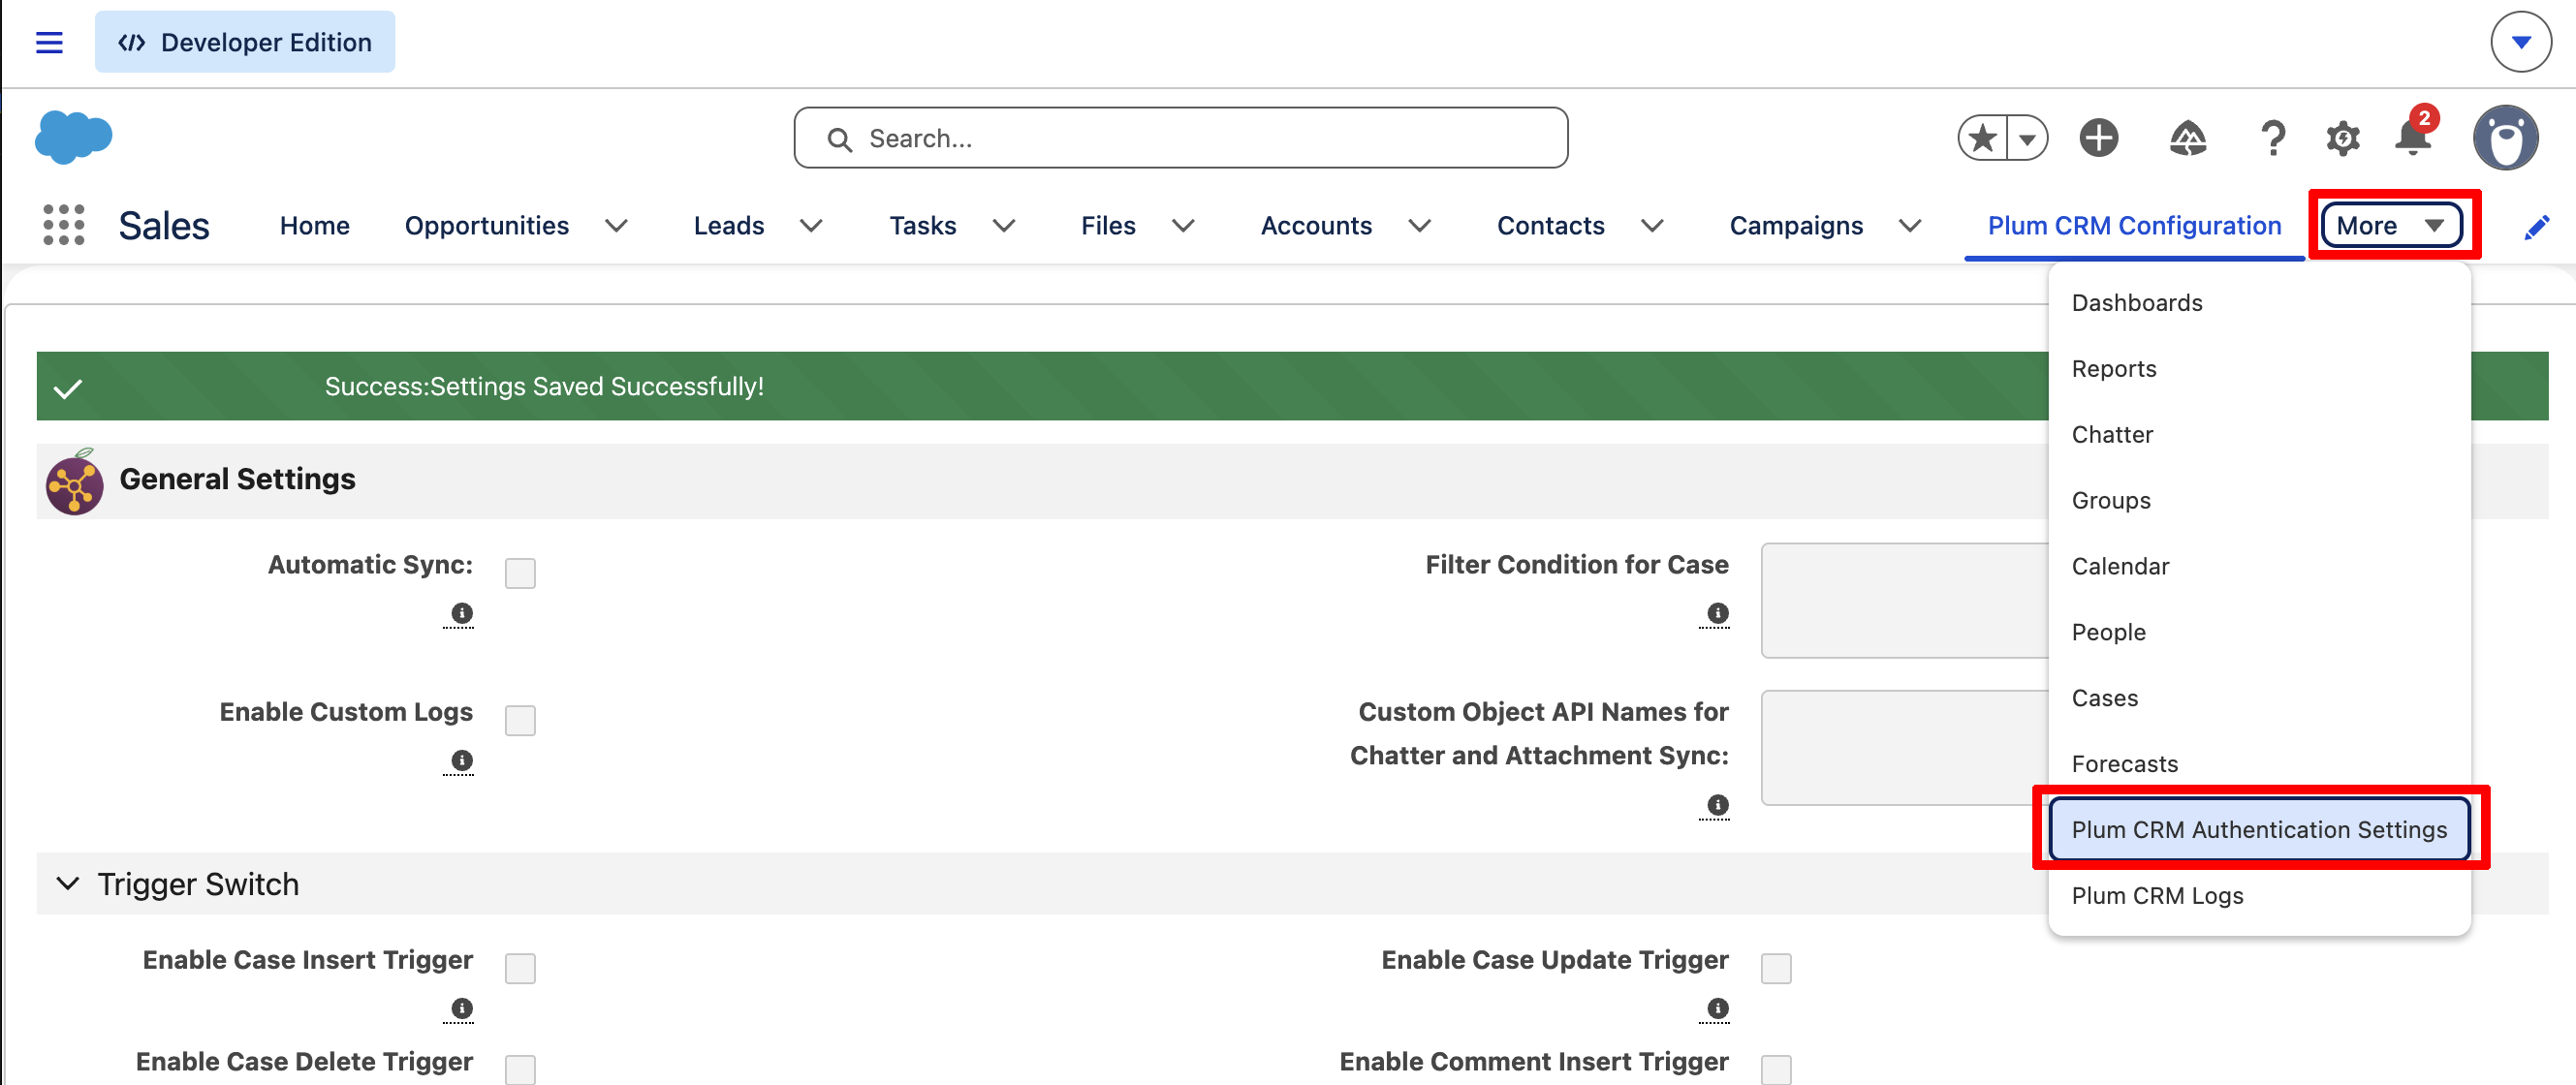
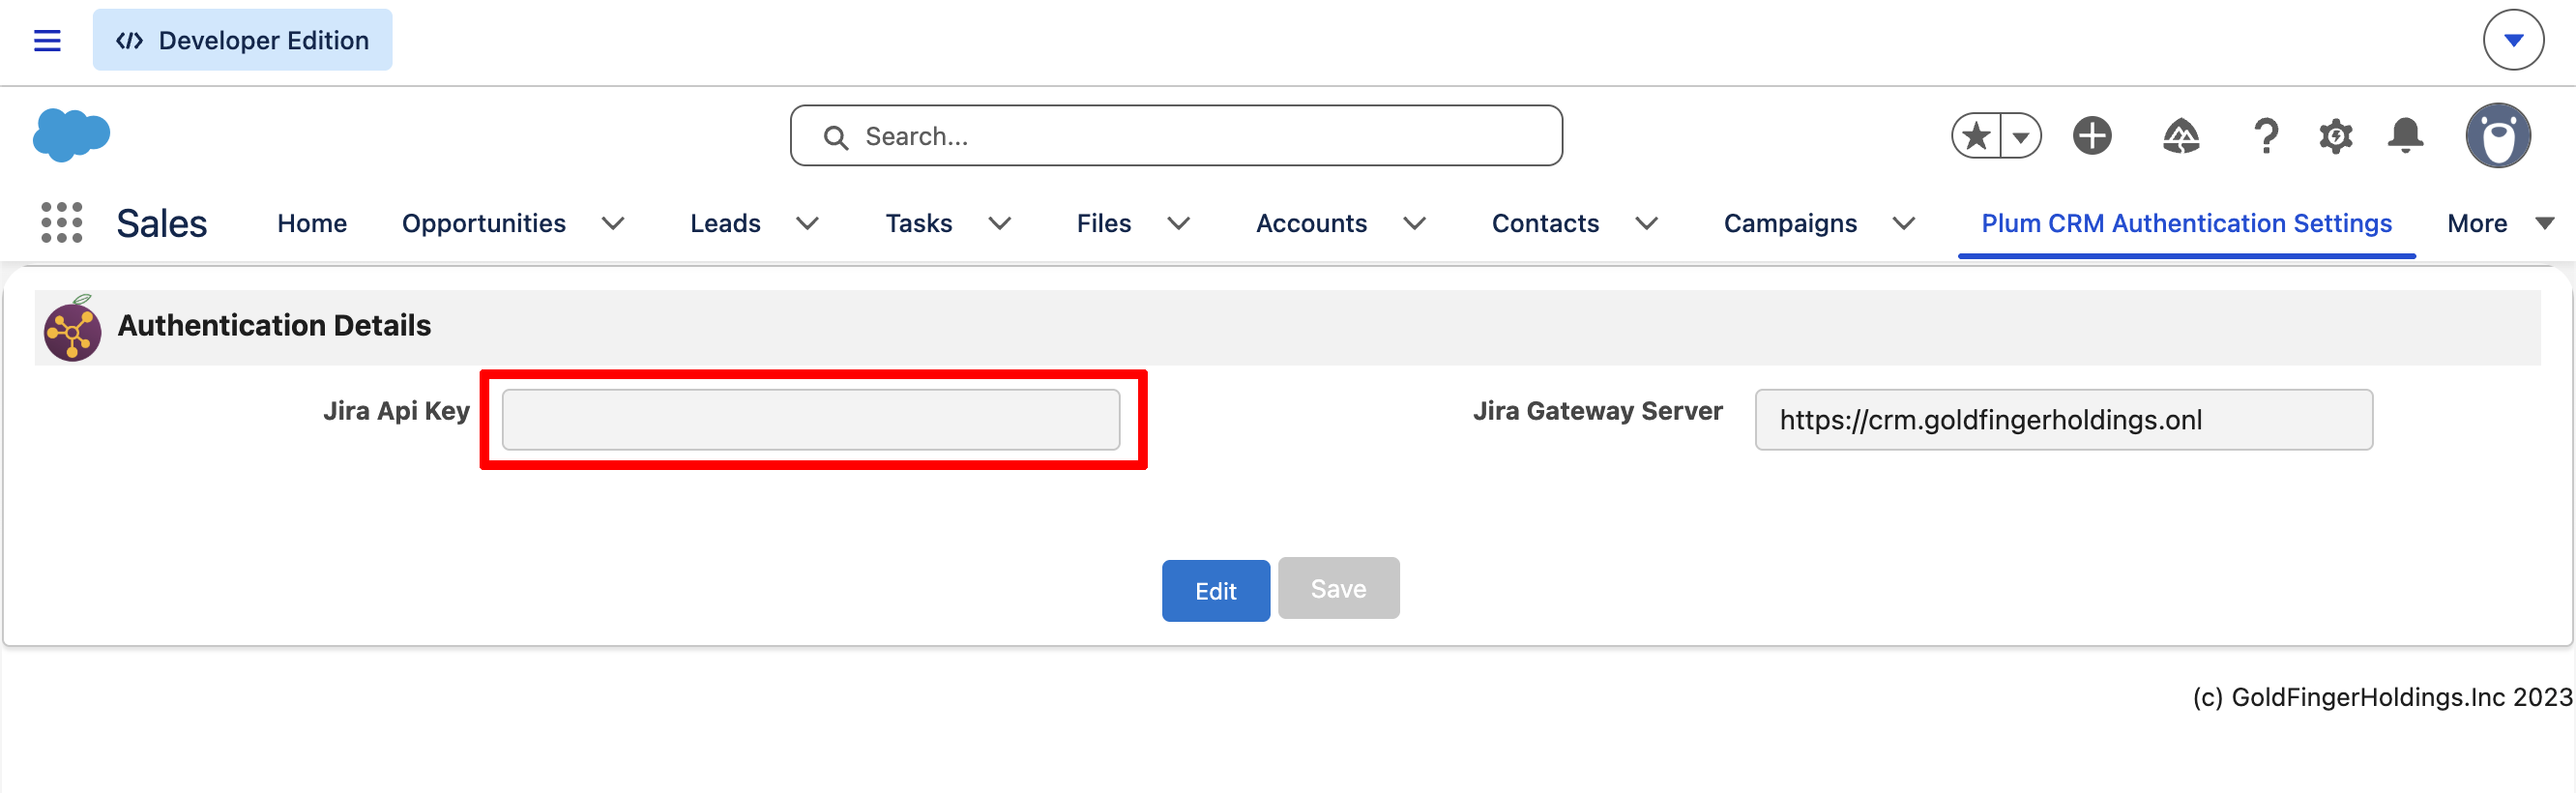
After you test and save the connection, click the copy button for the Plum CRM API key. Return to Salesforce, click on the “More” menu, and select “Plum CRM Authentication Settings.” Click “Edit” and enter the API key in the left-side field (for security purposes, the key will be hidden). Save.
Next Step: Using the Plum CRM app