
Note: Review requirements
Configuration:
-
Immediately after the installation is completed, you will see this screen:
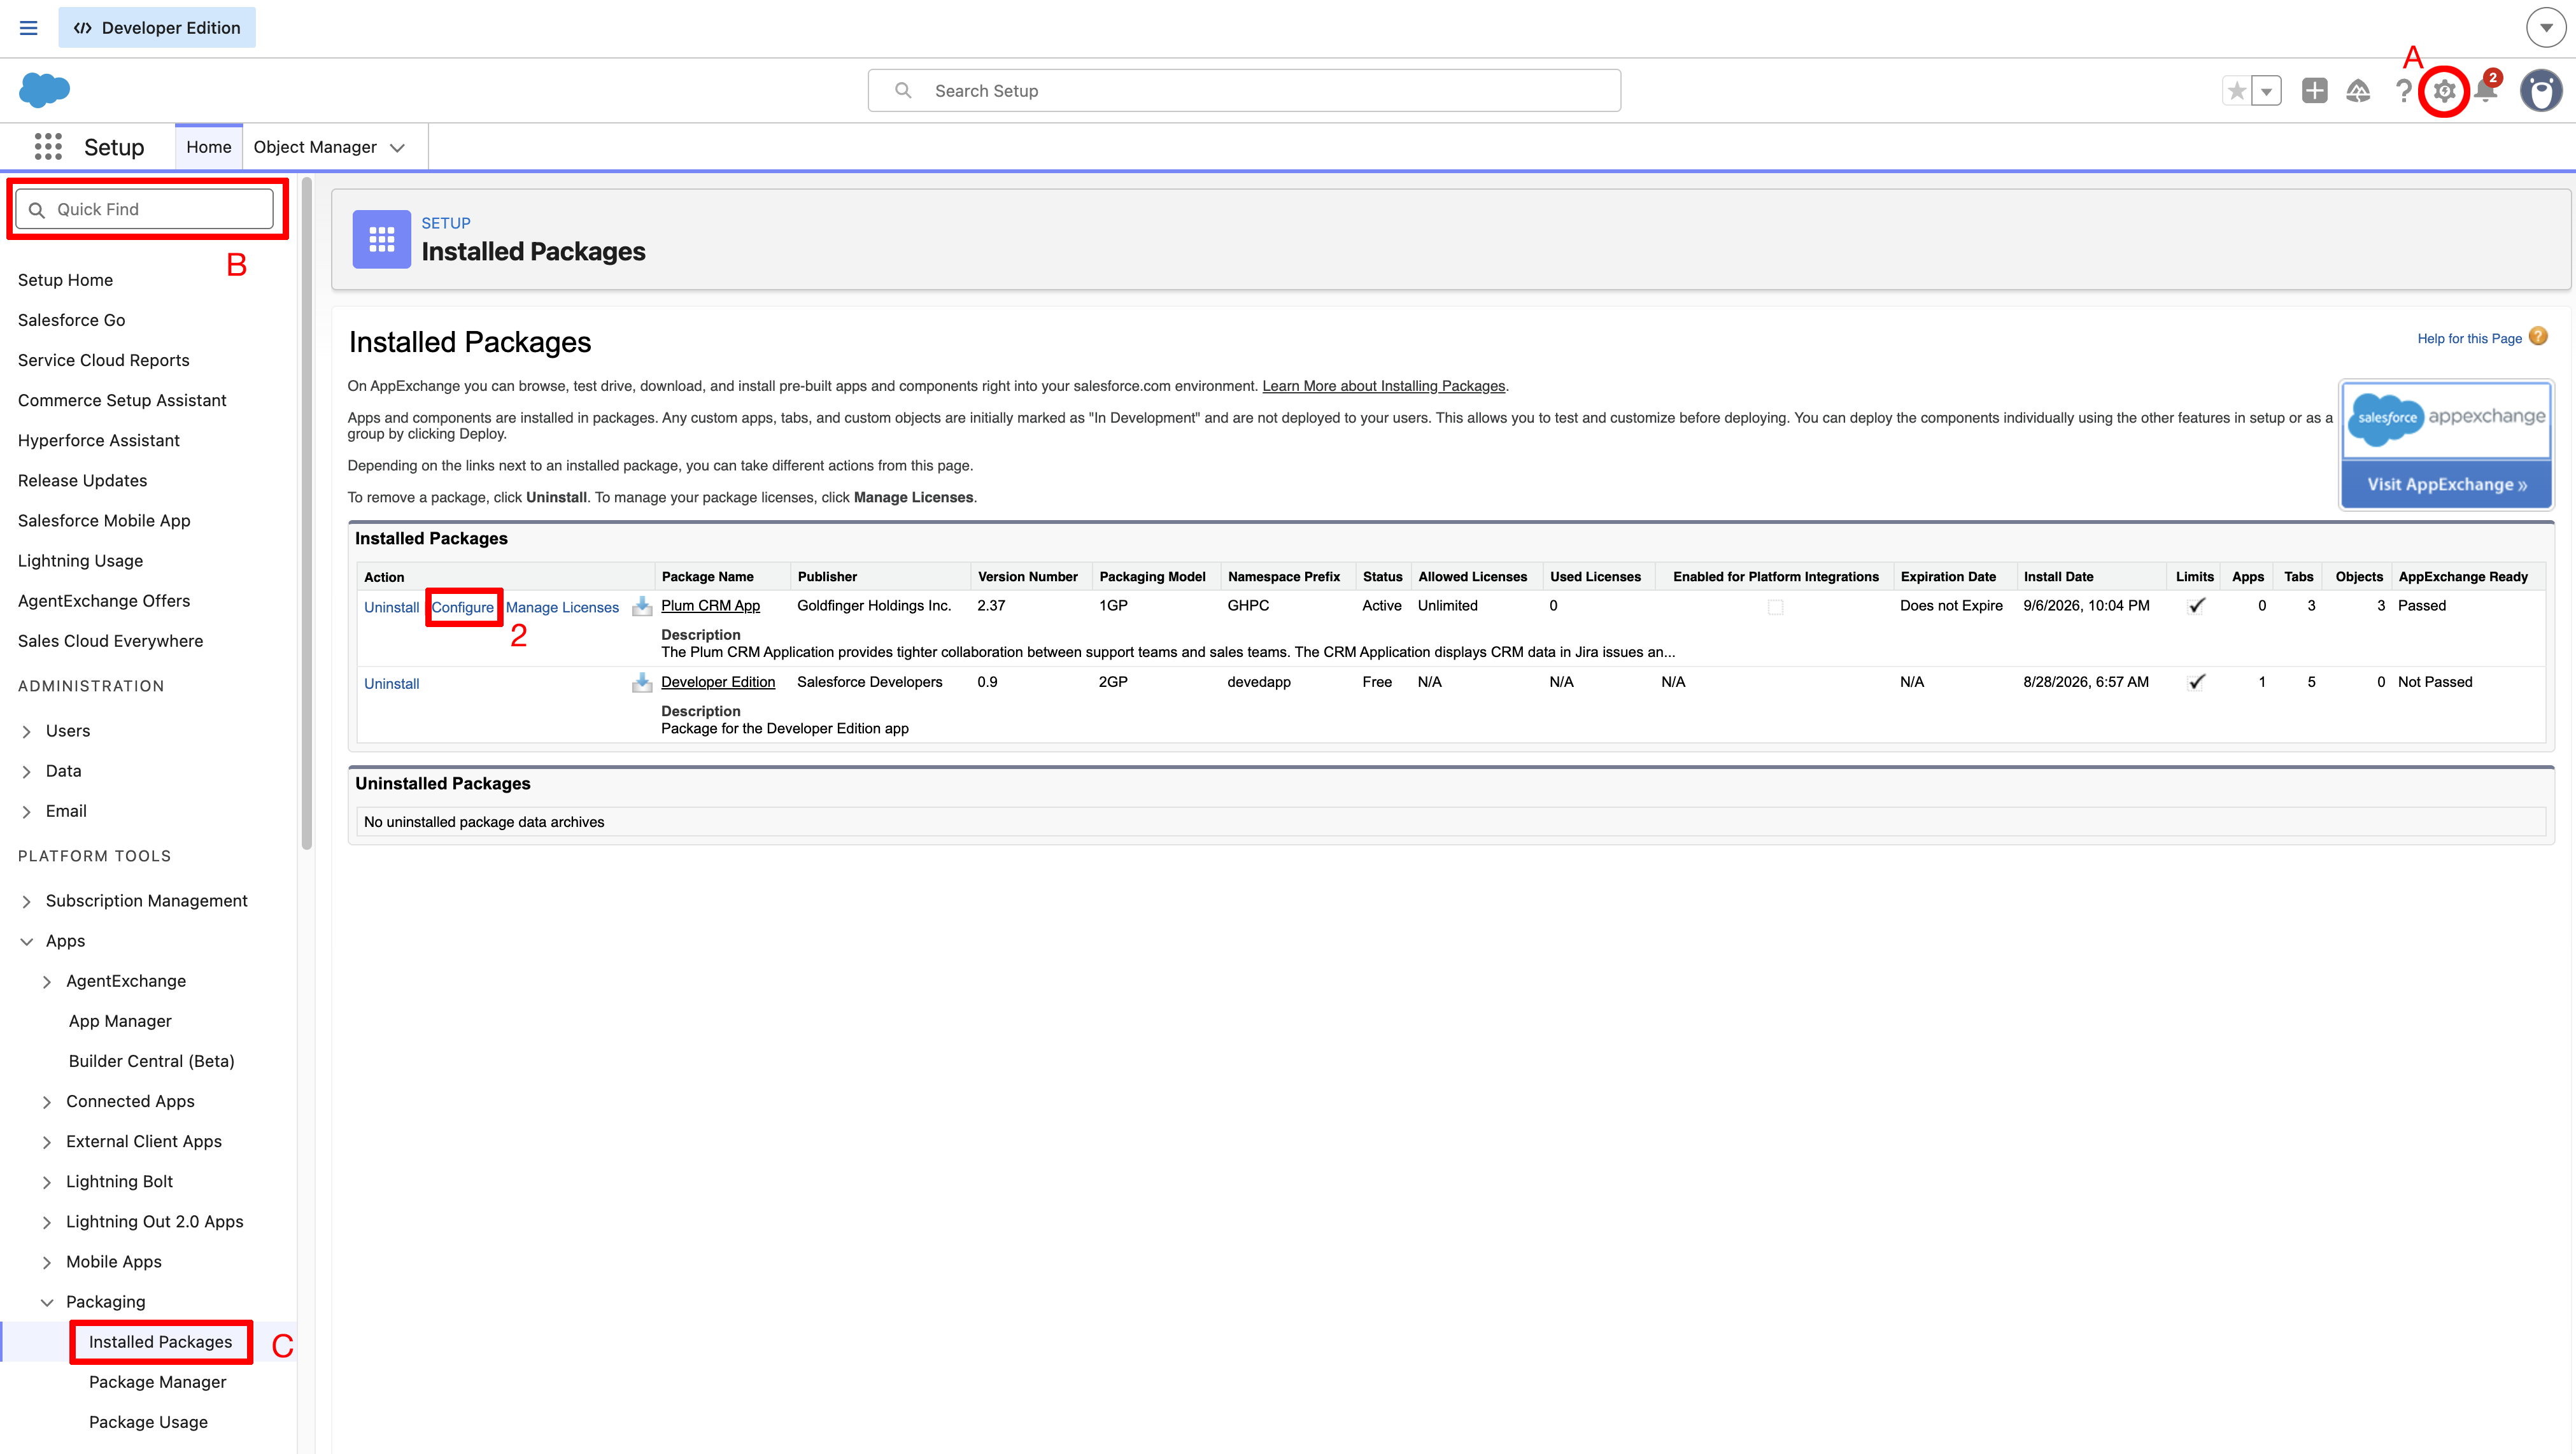
NOTE: If you don’t see this screen, follow these steps:
A. Click on the Gear Icon in the top right corner and select “Setup”
B. Under the App Launcher Icon, in the search box, type “Installed Packages.”
Your list will be filtered, and you will see the link.
C. Click on the “Installed Packages” linkYou should now see the screen at the beginning of Step 1.
-
Click on the “Configure” link on the next screen click on “configure” button (the one on top)
-
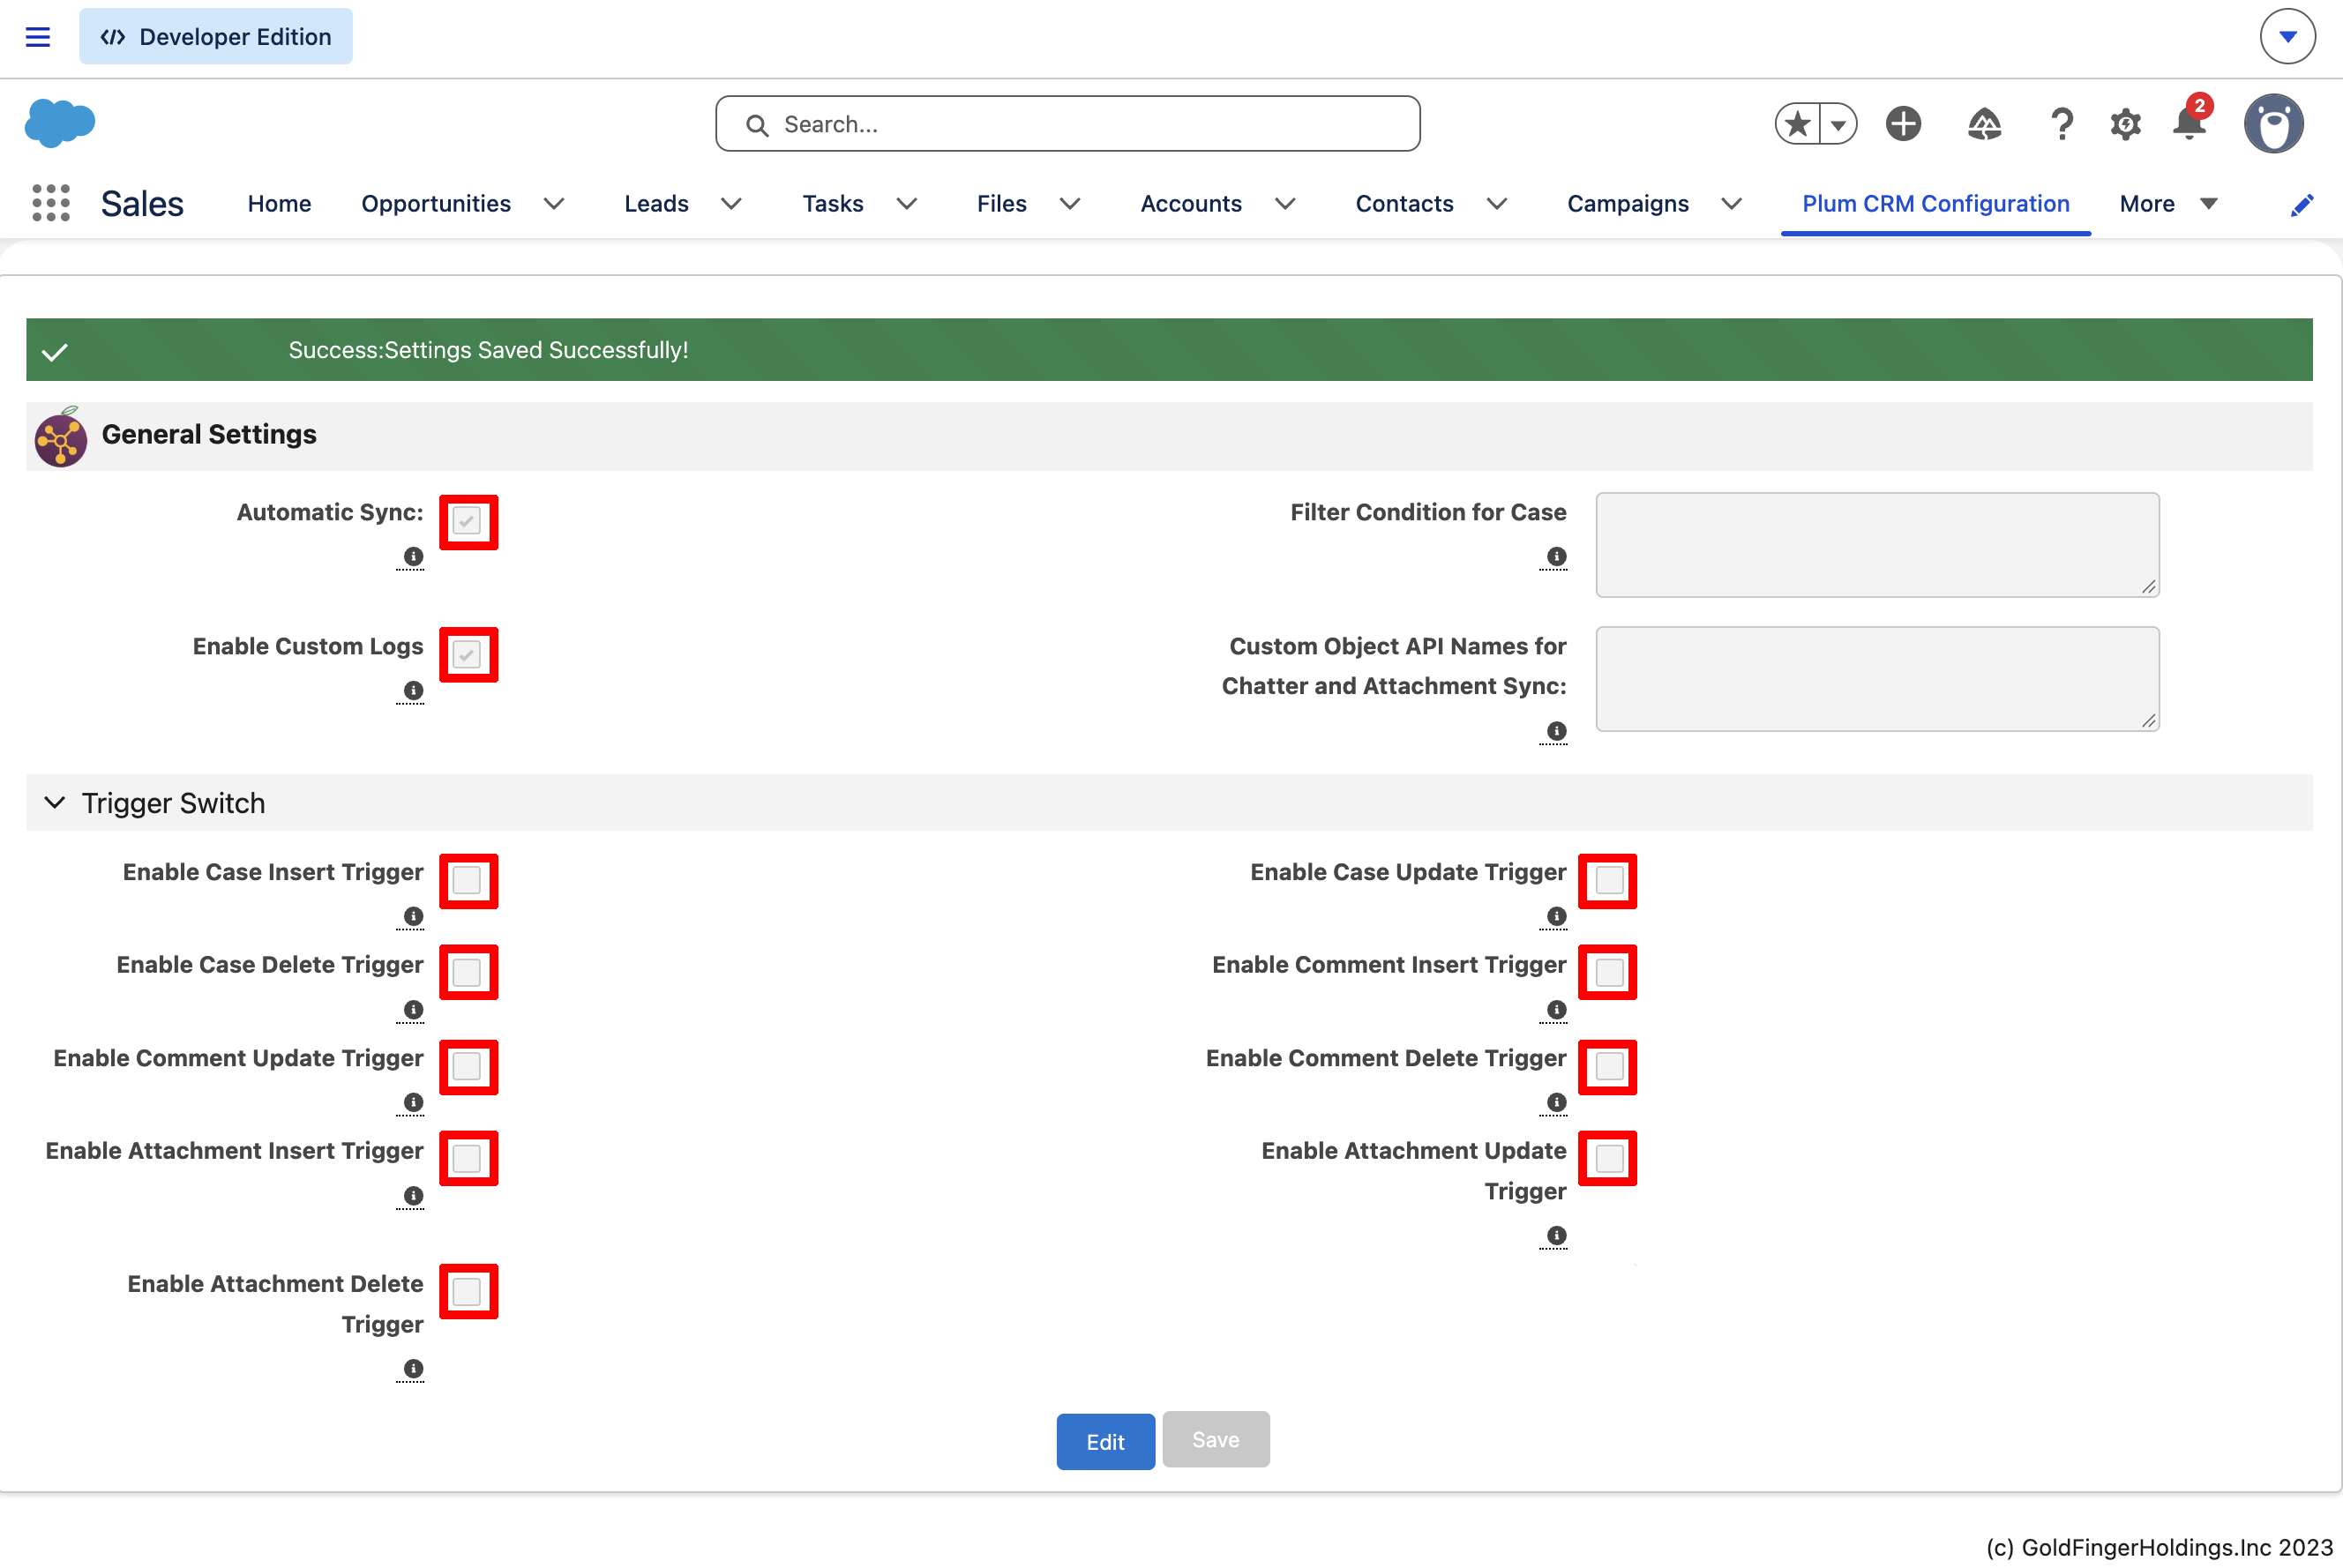
Enter the integration user profile name that you saved before installation.
Configure Oauth Settings:
-
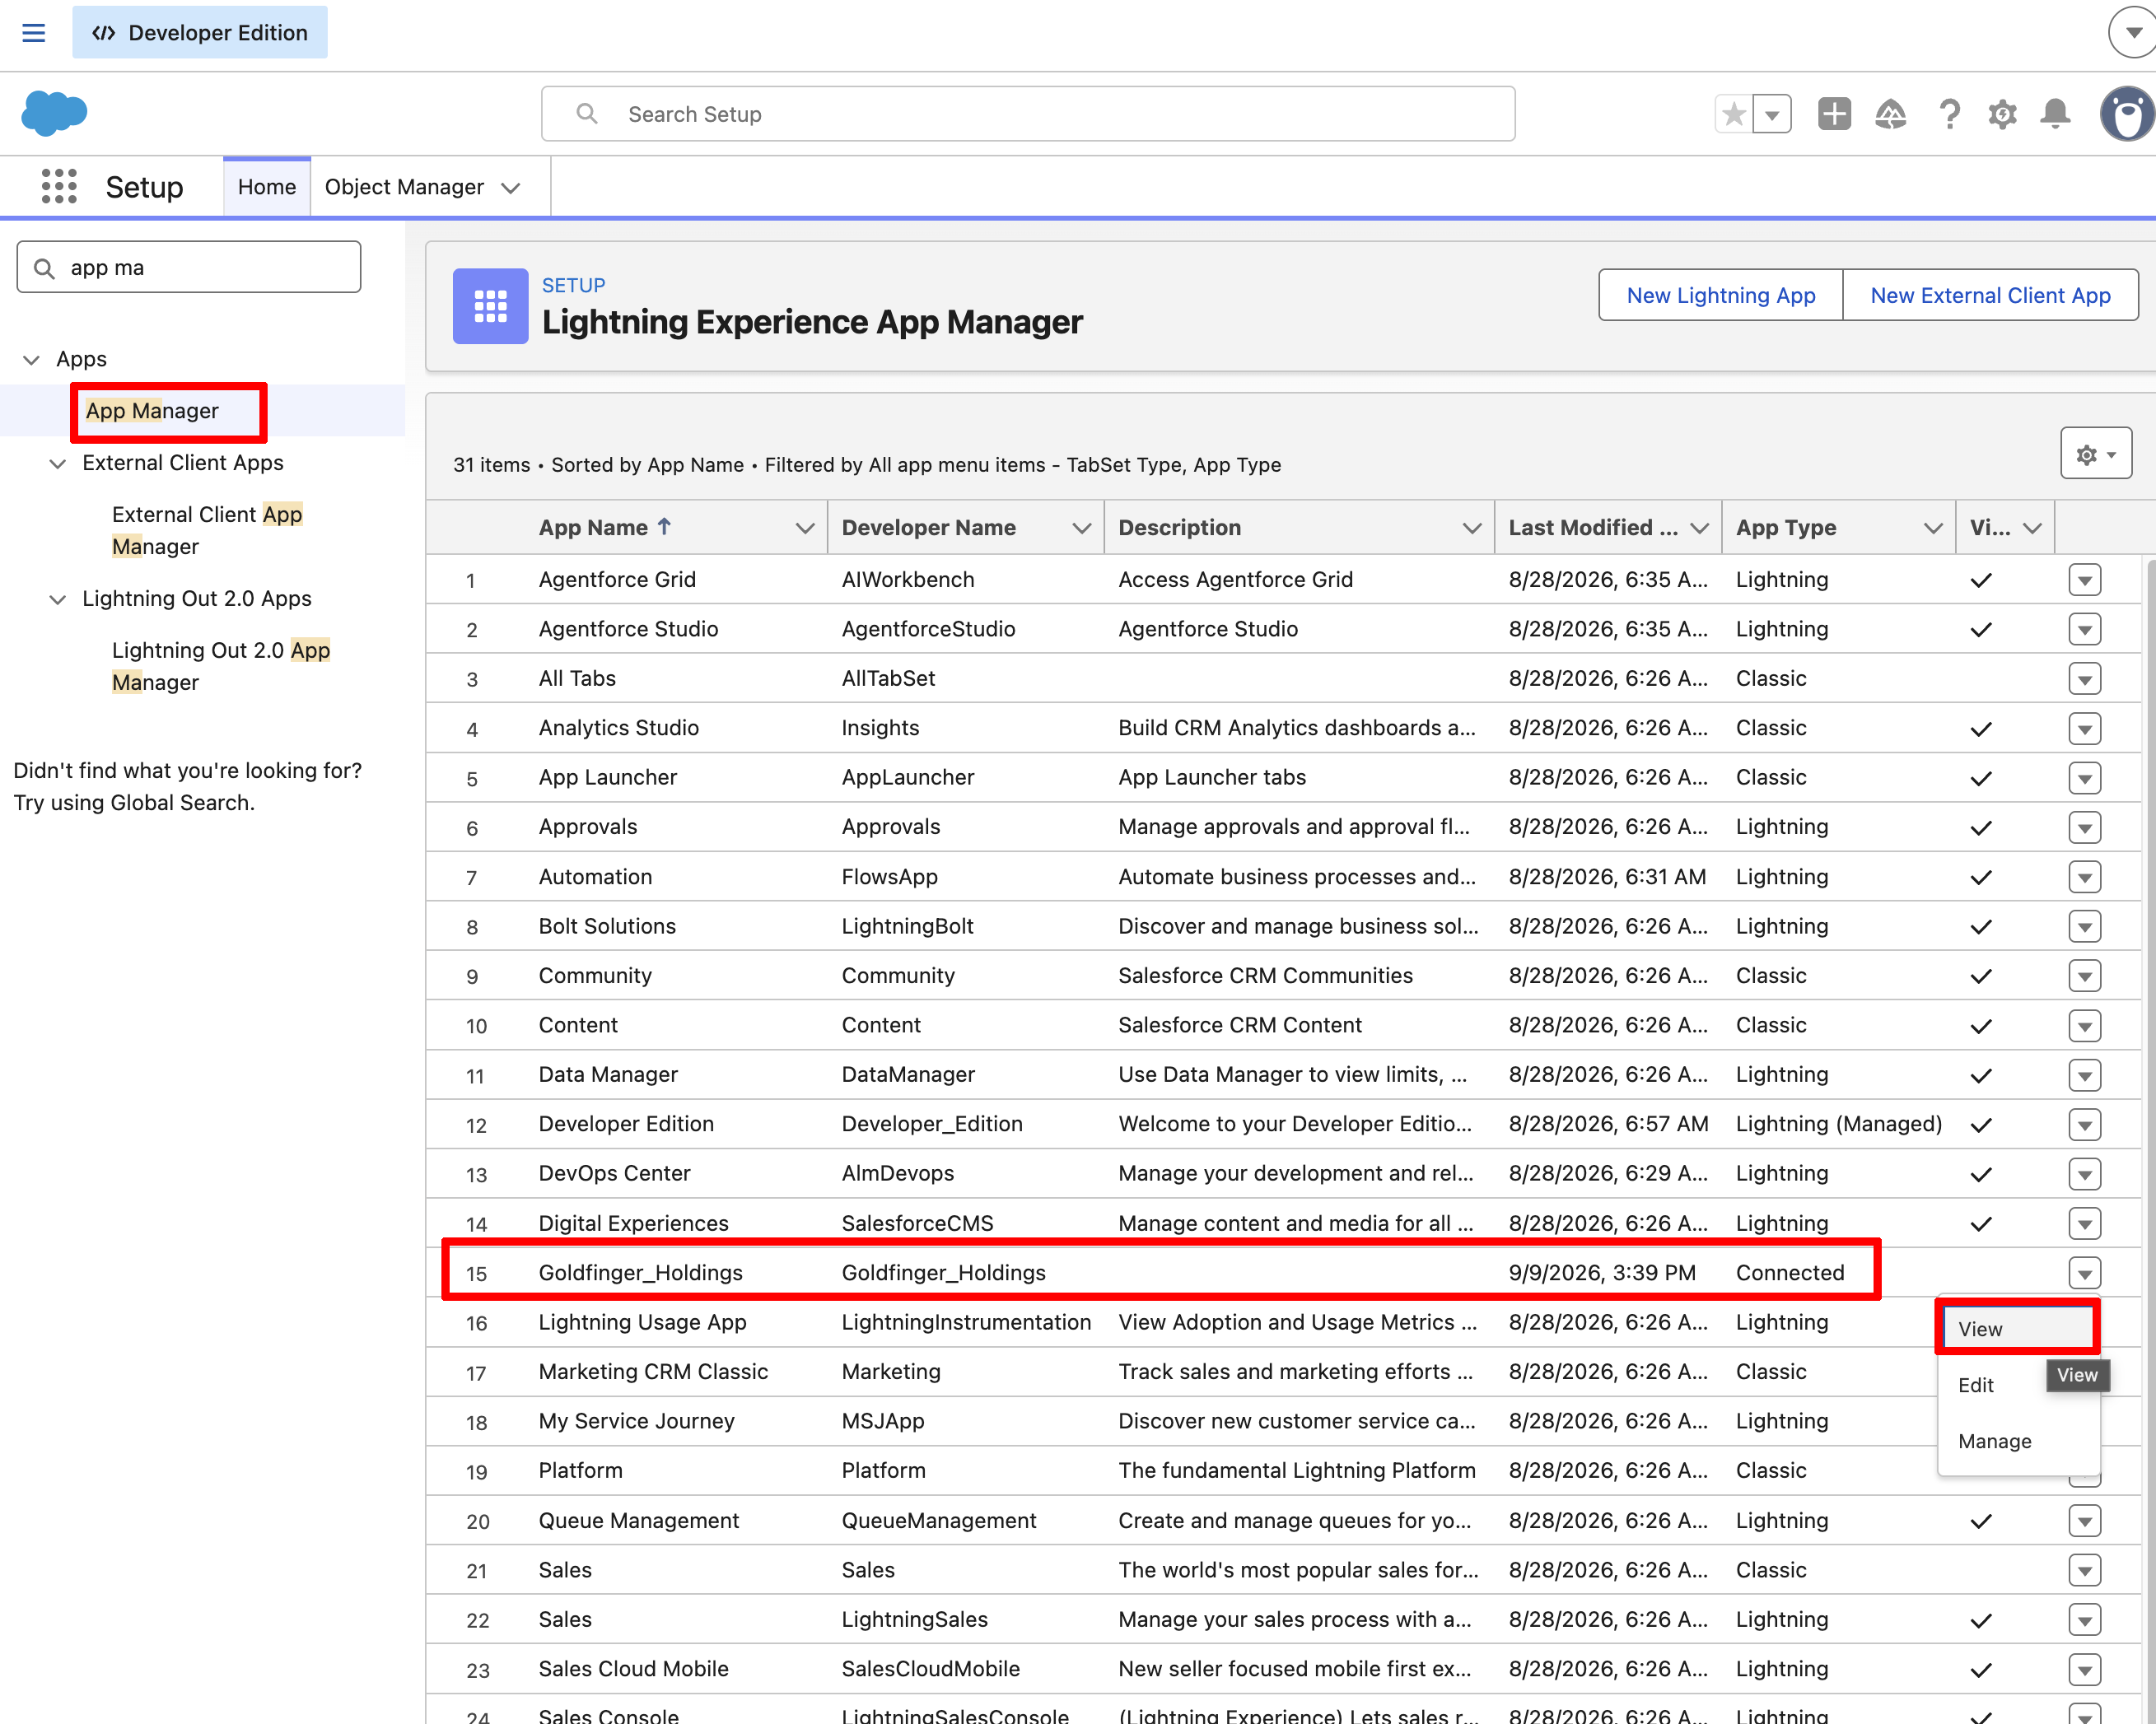
Return to the “Setup” page and in the “Quick Find” field type “app manager”. From the filtered list, click on “App Manager”. On the next screen, locate the “Goldfinger_Holdings” app and, from the right-side picklist, select “View”
-
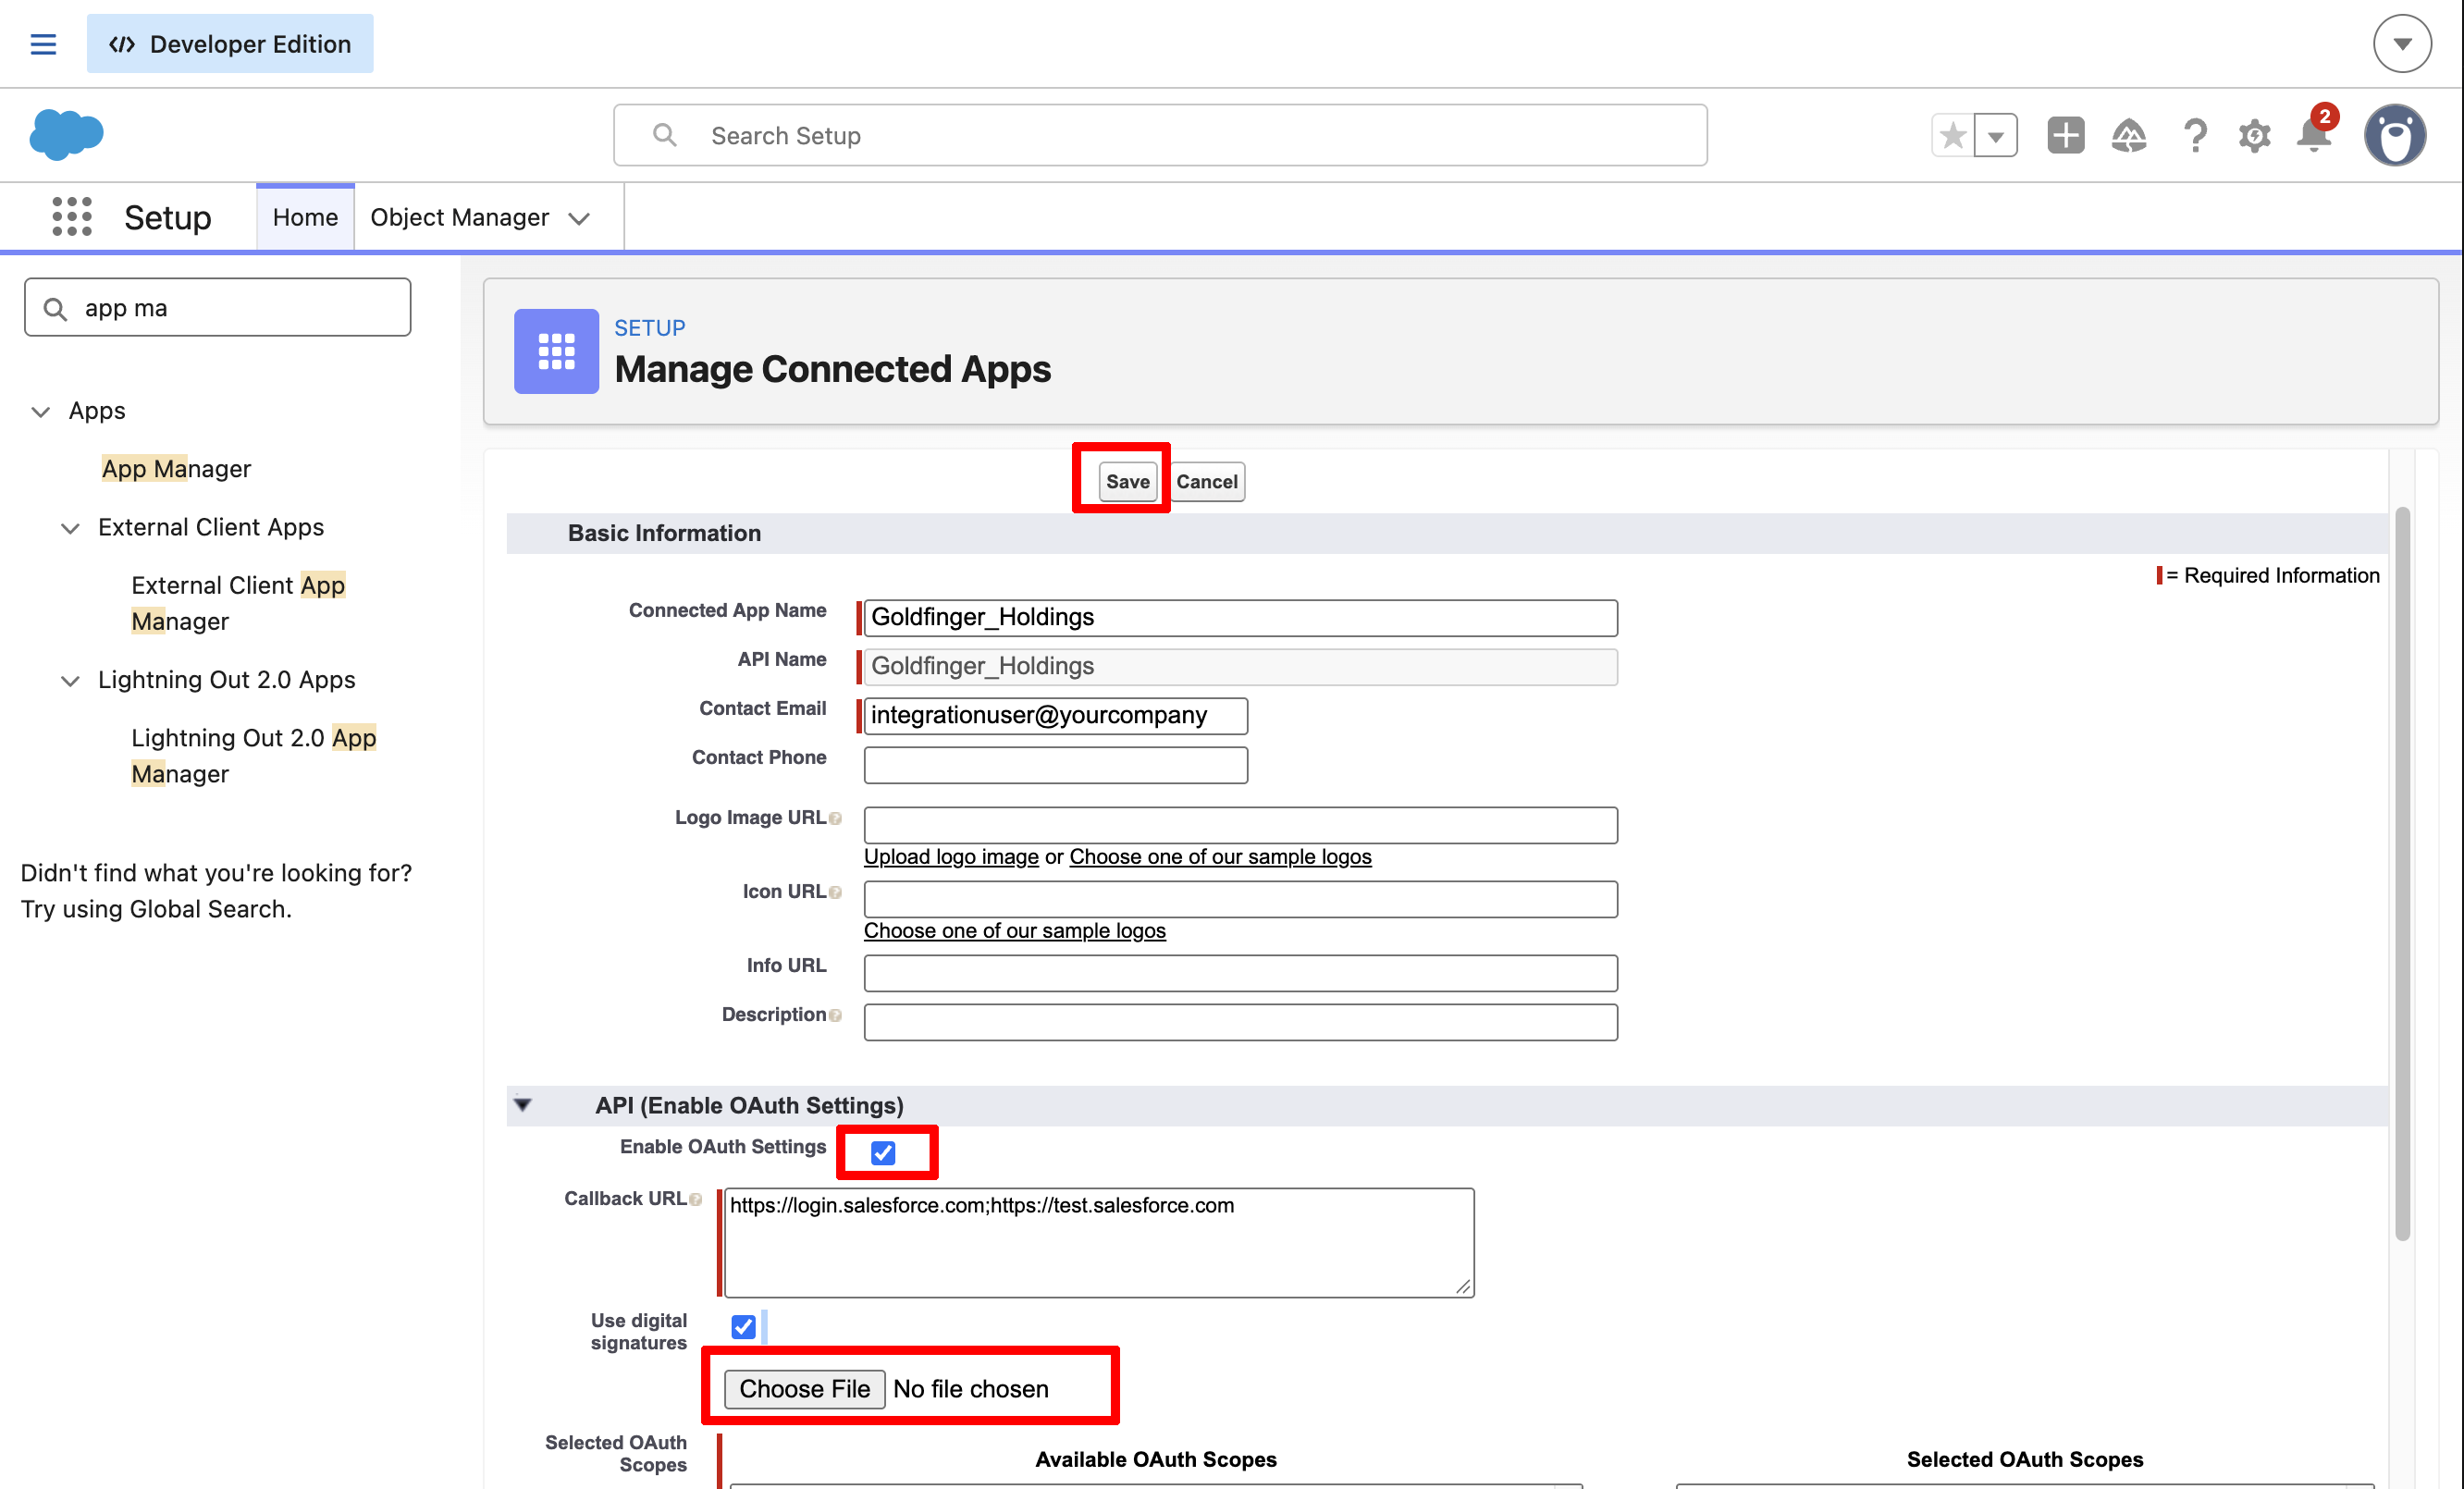
On the next screen, click “Edit,” and on the following screen, click the checkbox “Enable OAuth Settings.” When you do this, you will now see a button to select the certificate you downloaded in the requirements section (https://plumcrm-cert.s3.ap-southeast-2.amazonaws.com/prod_certifcate.zip).
-
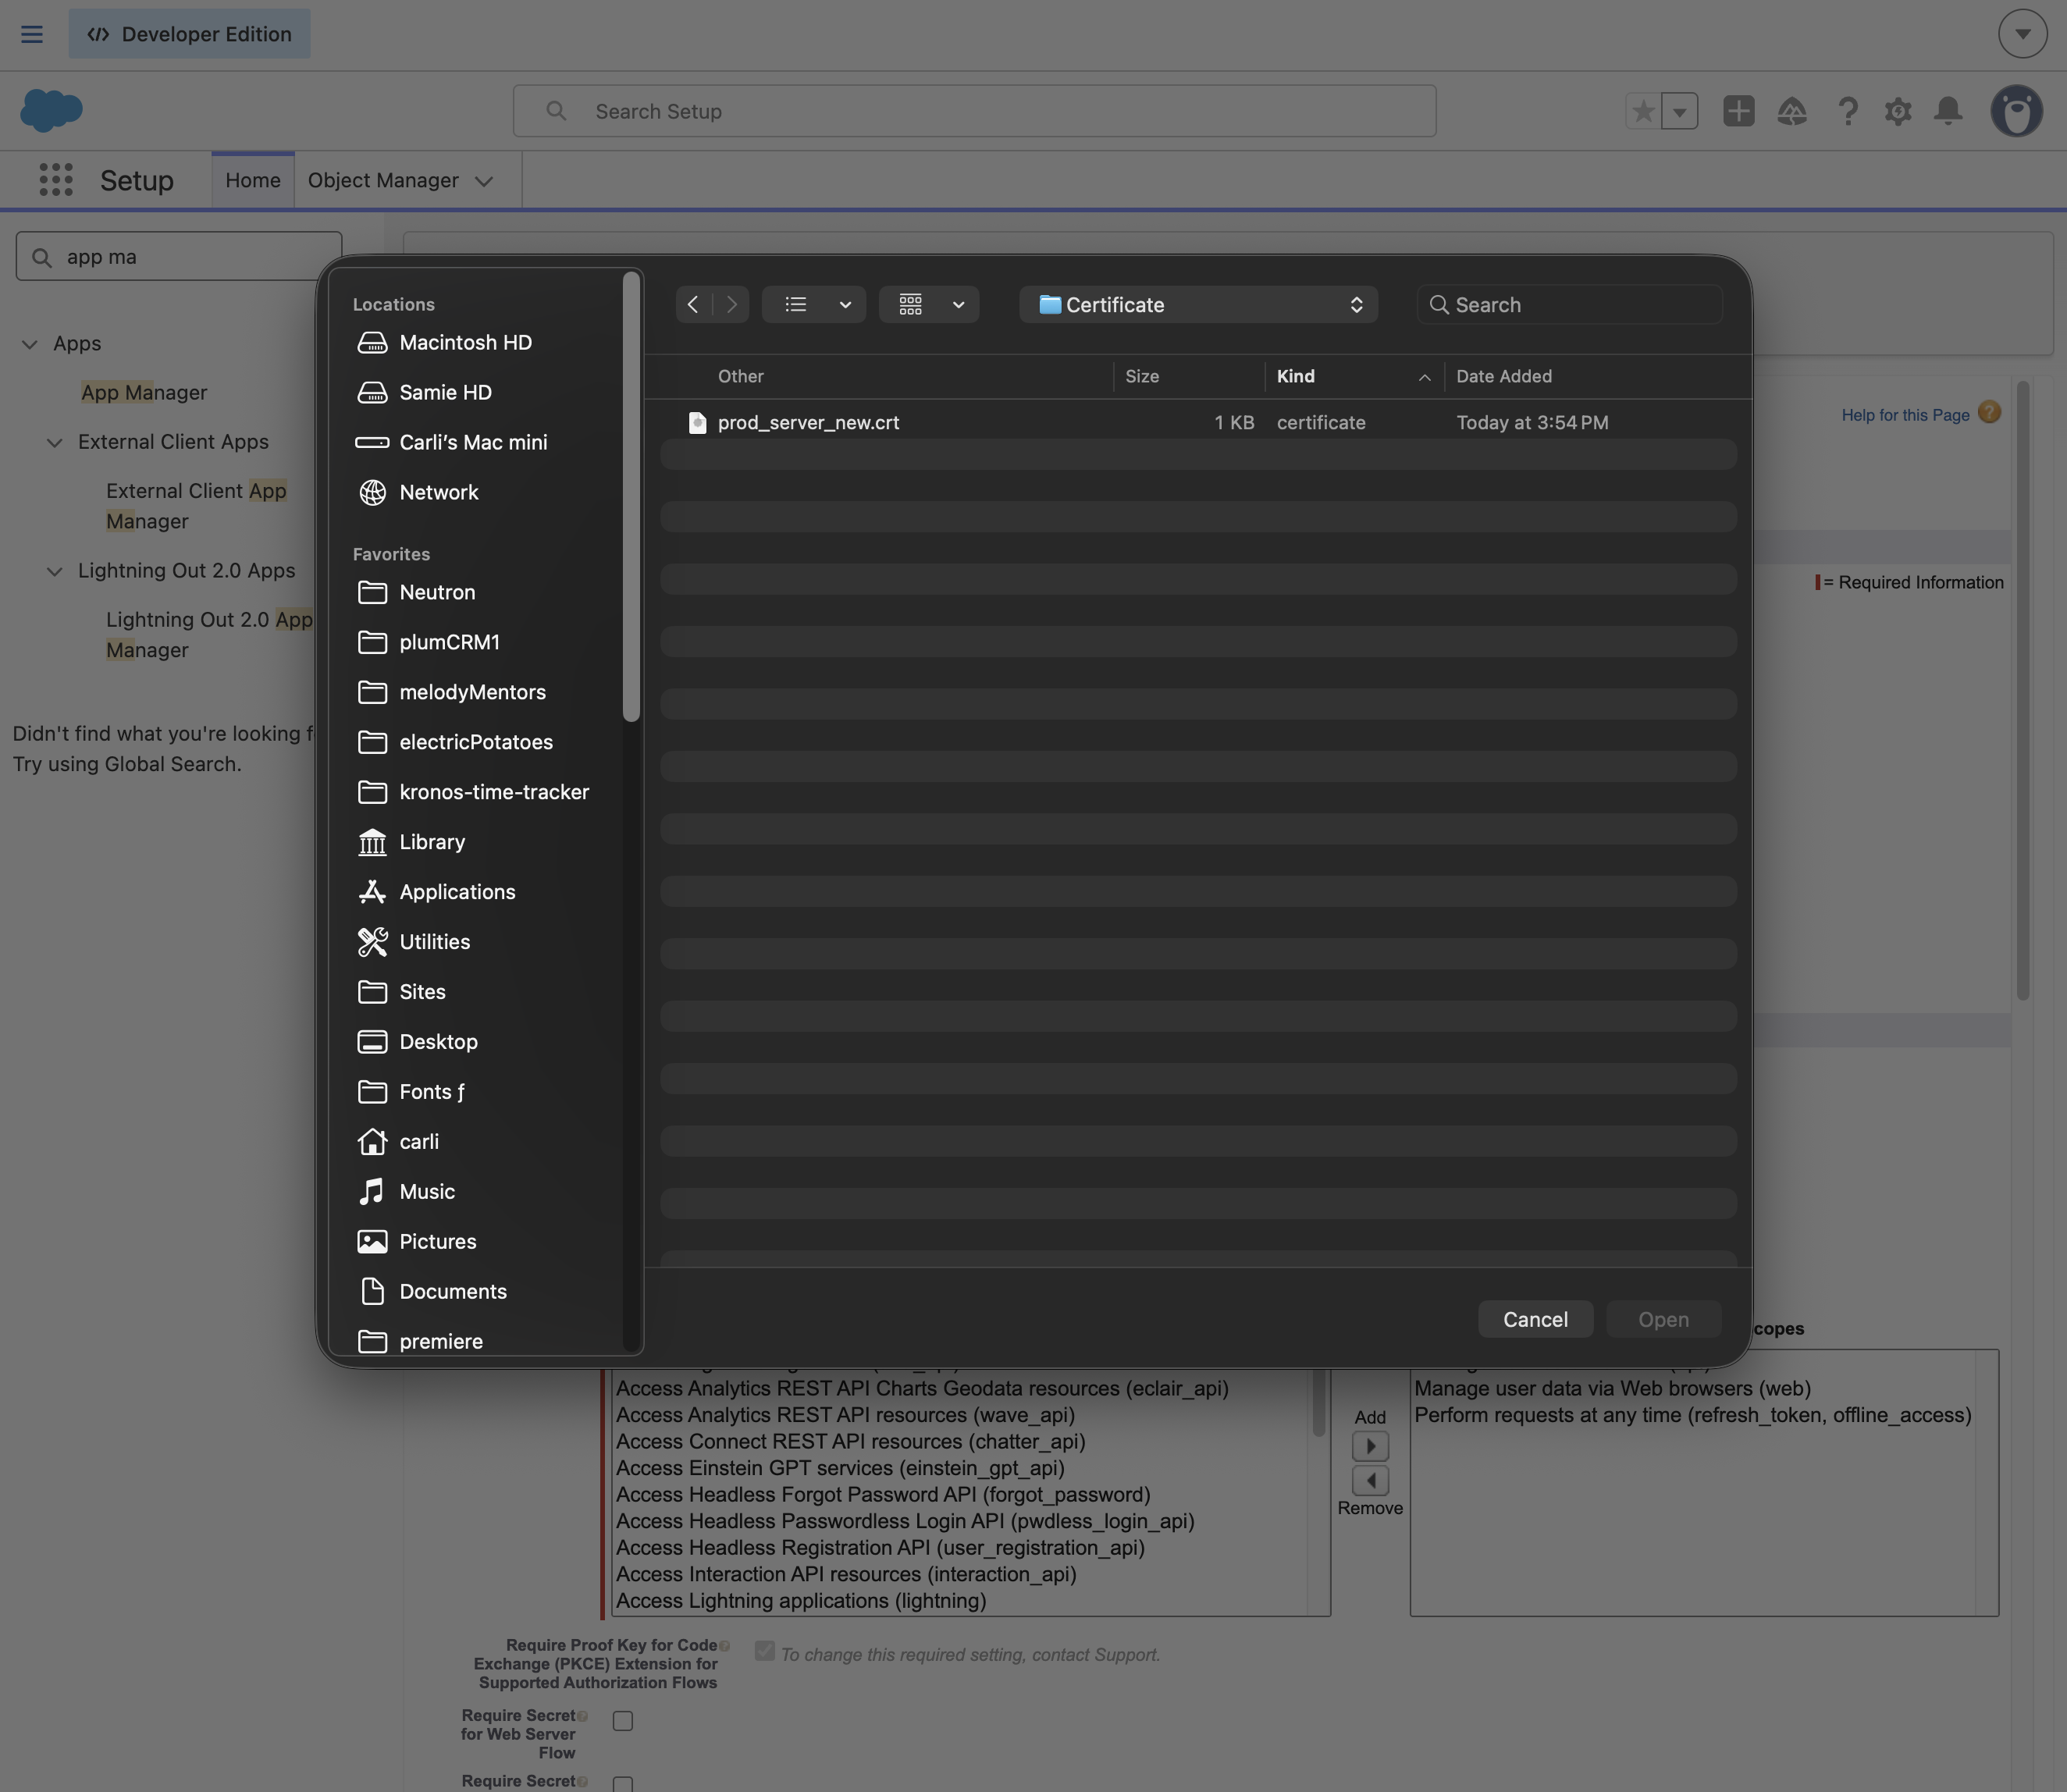
Click the “Choose File” button and navigate to the certificate location. From the modal window, select the certificate file and click “Open”. The modal window will close. Save your settings.
-
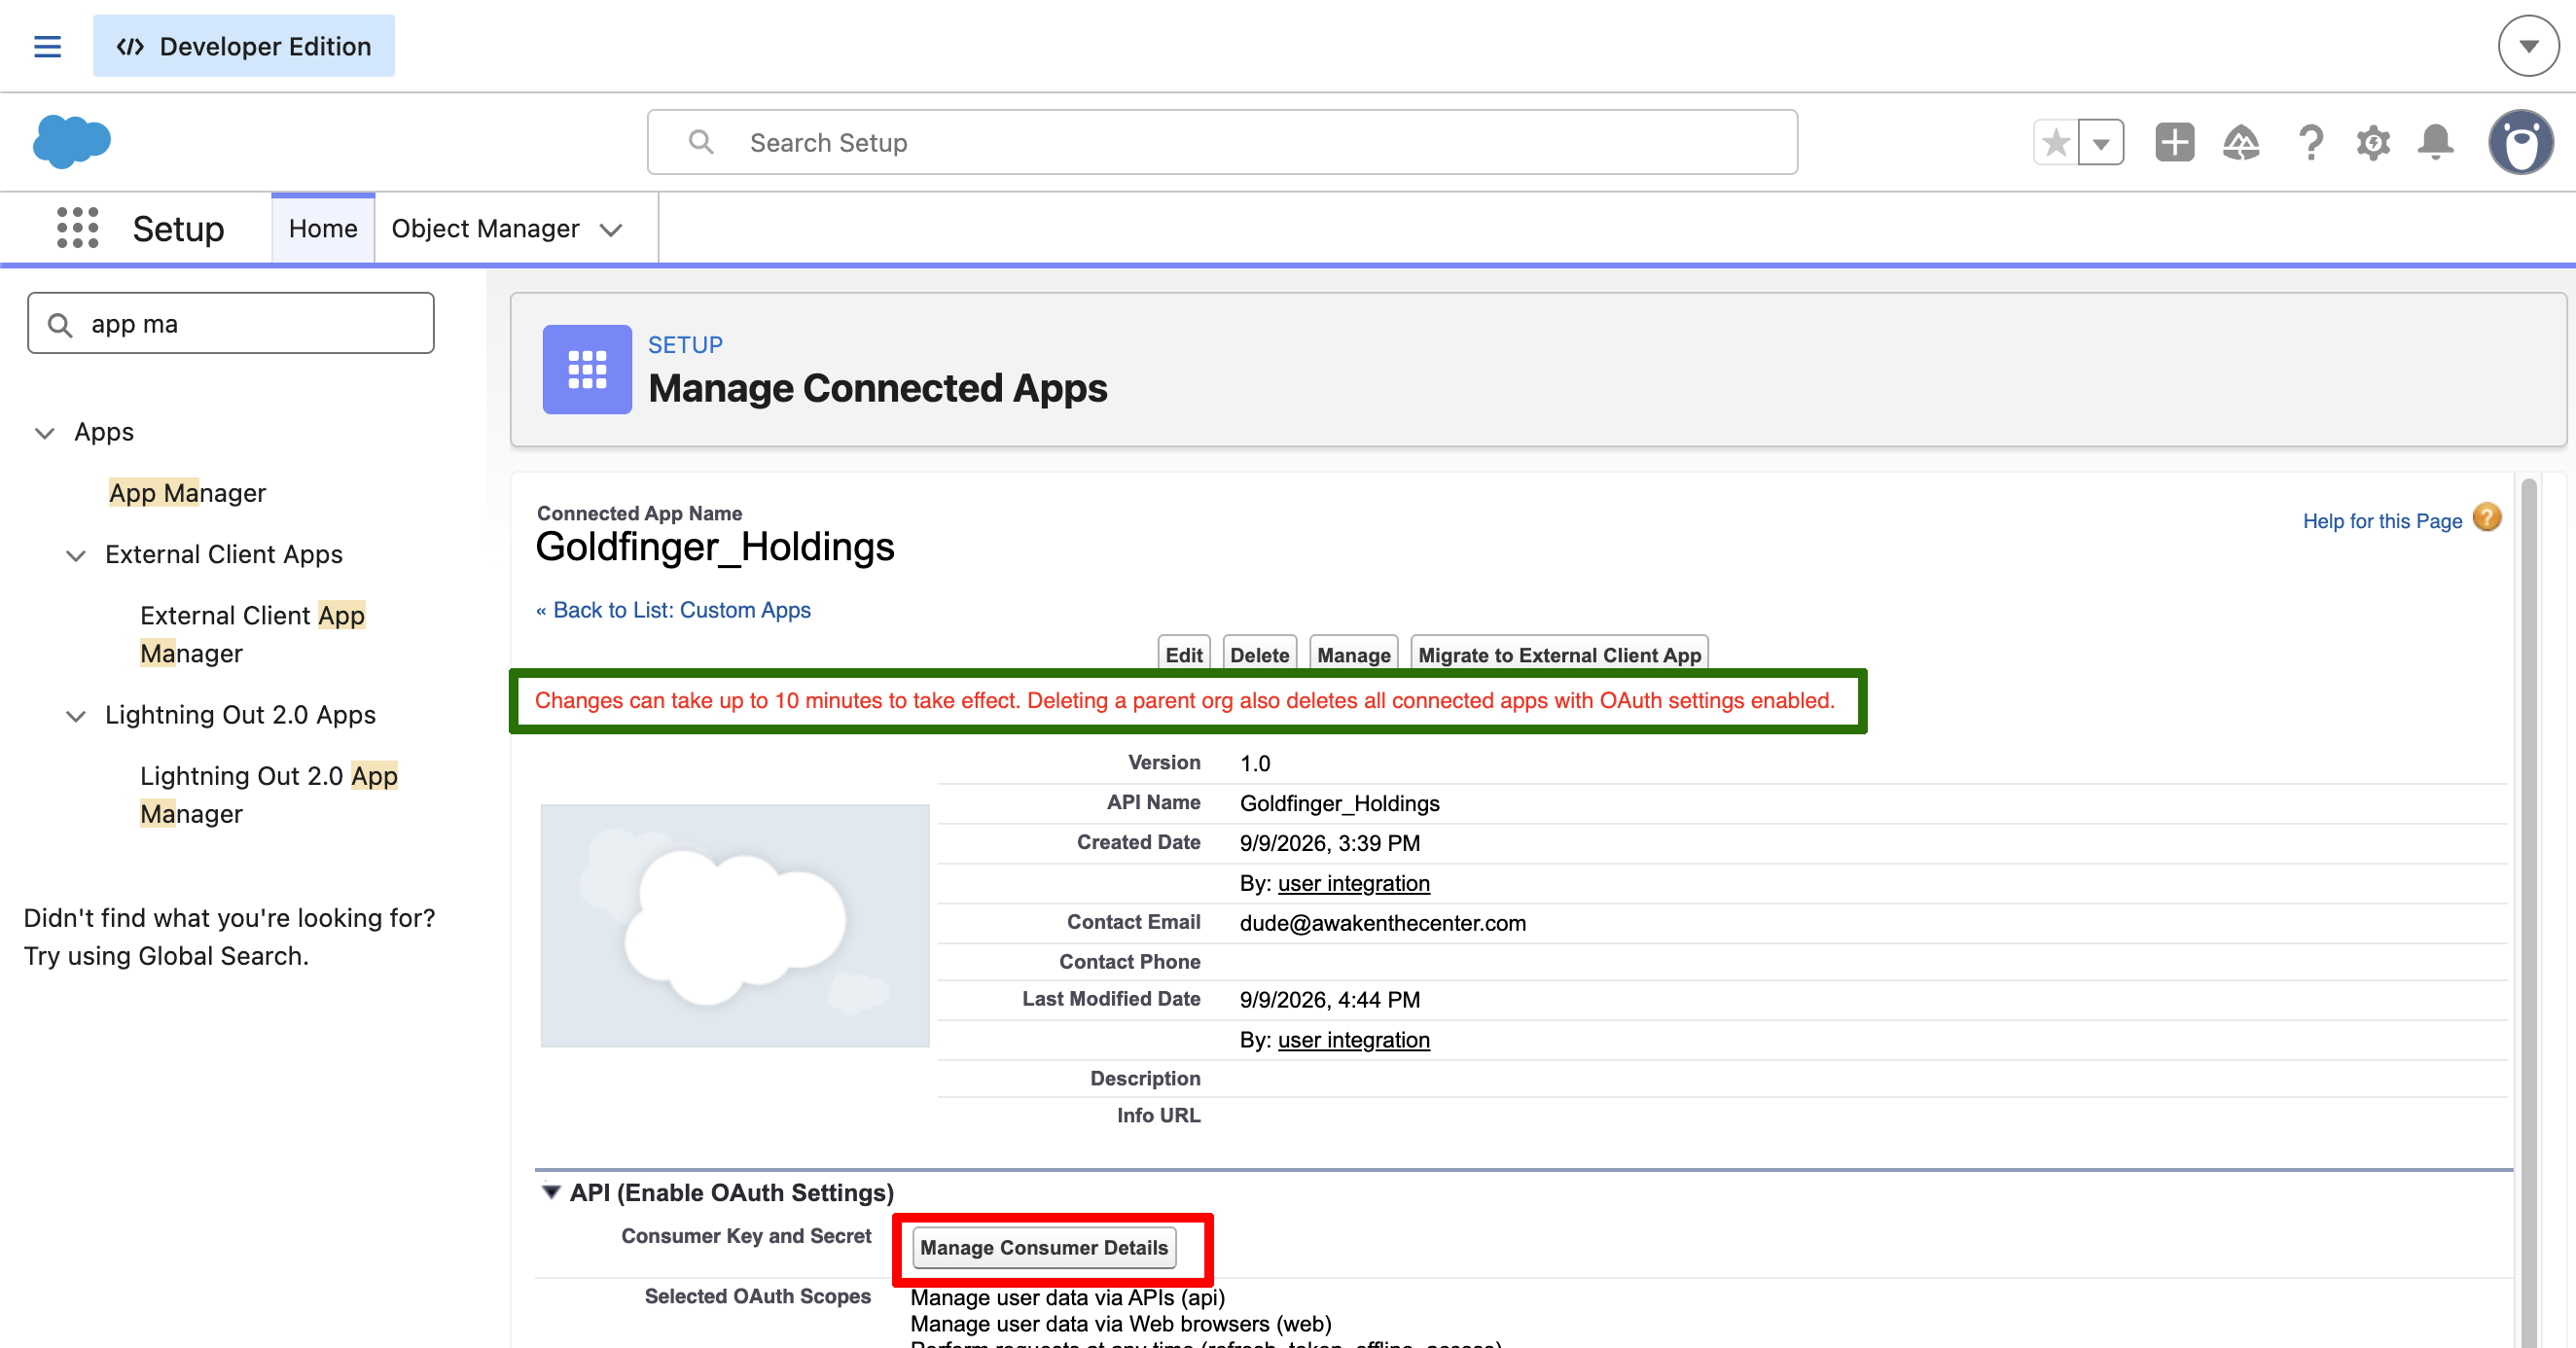
Once you save the preview page, you will be back at “Manage Connected Apps.” You may see a warning that you can ignore.
-
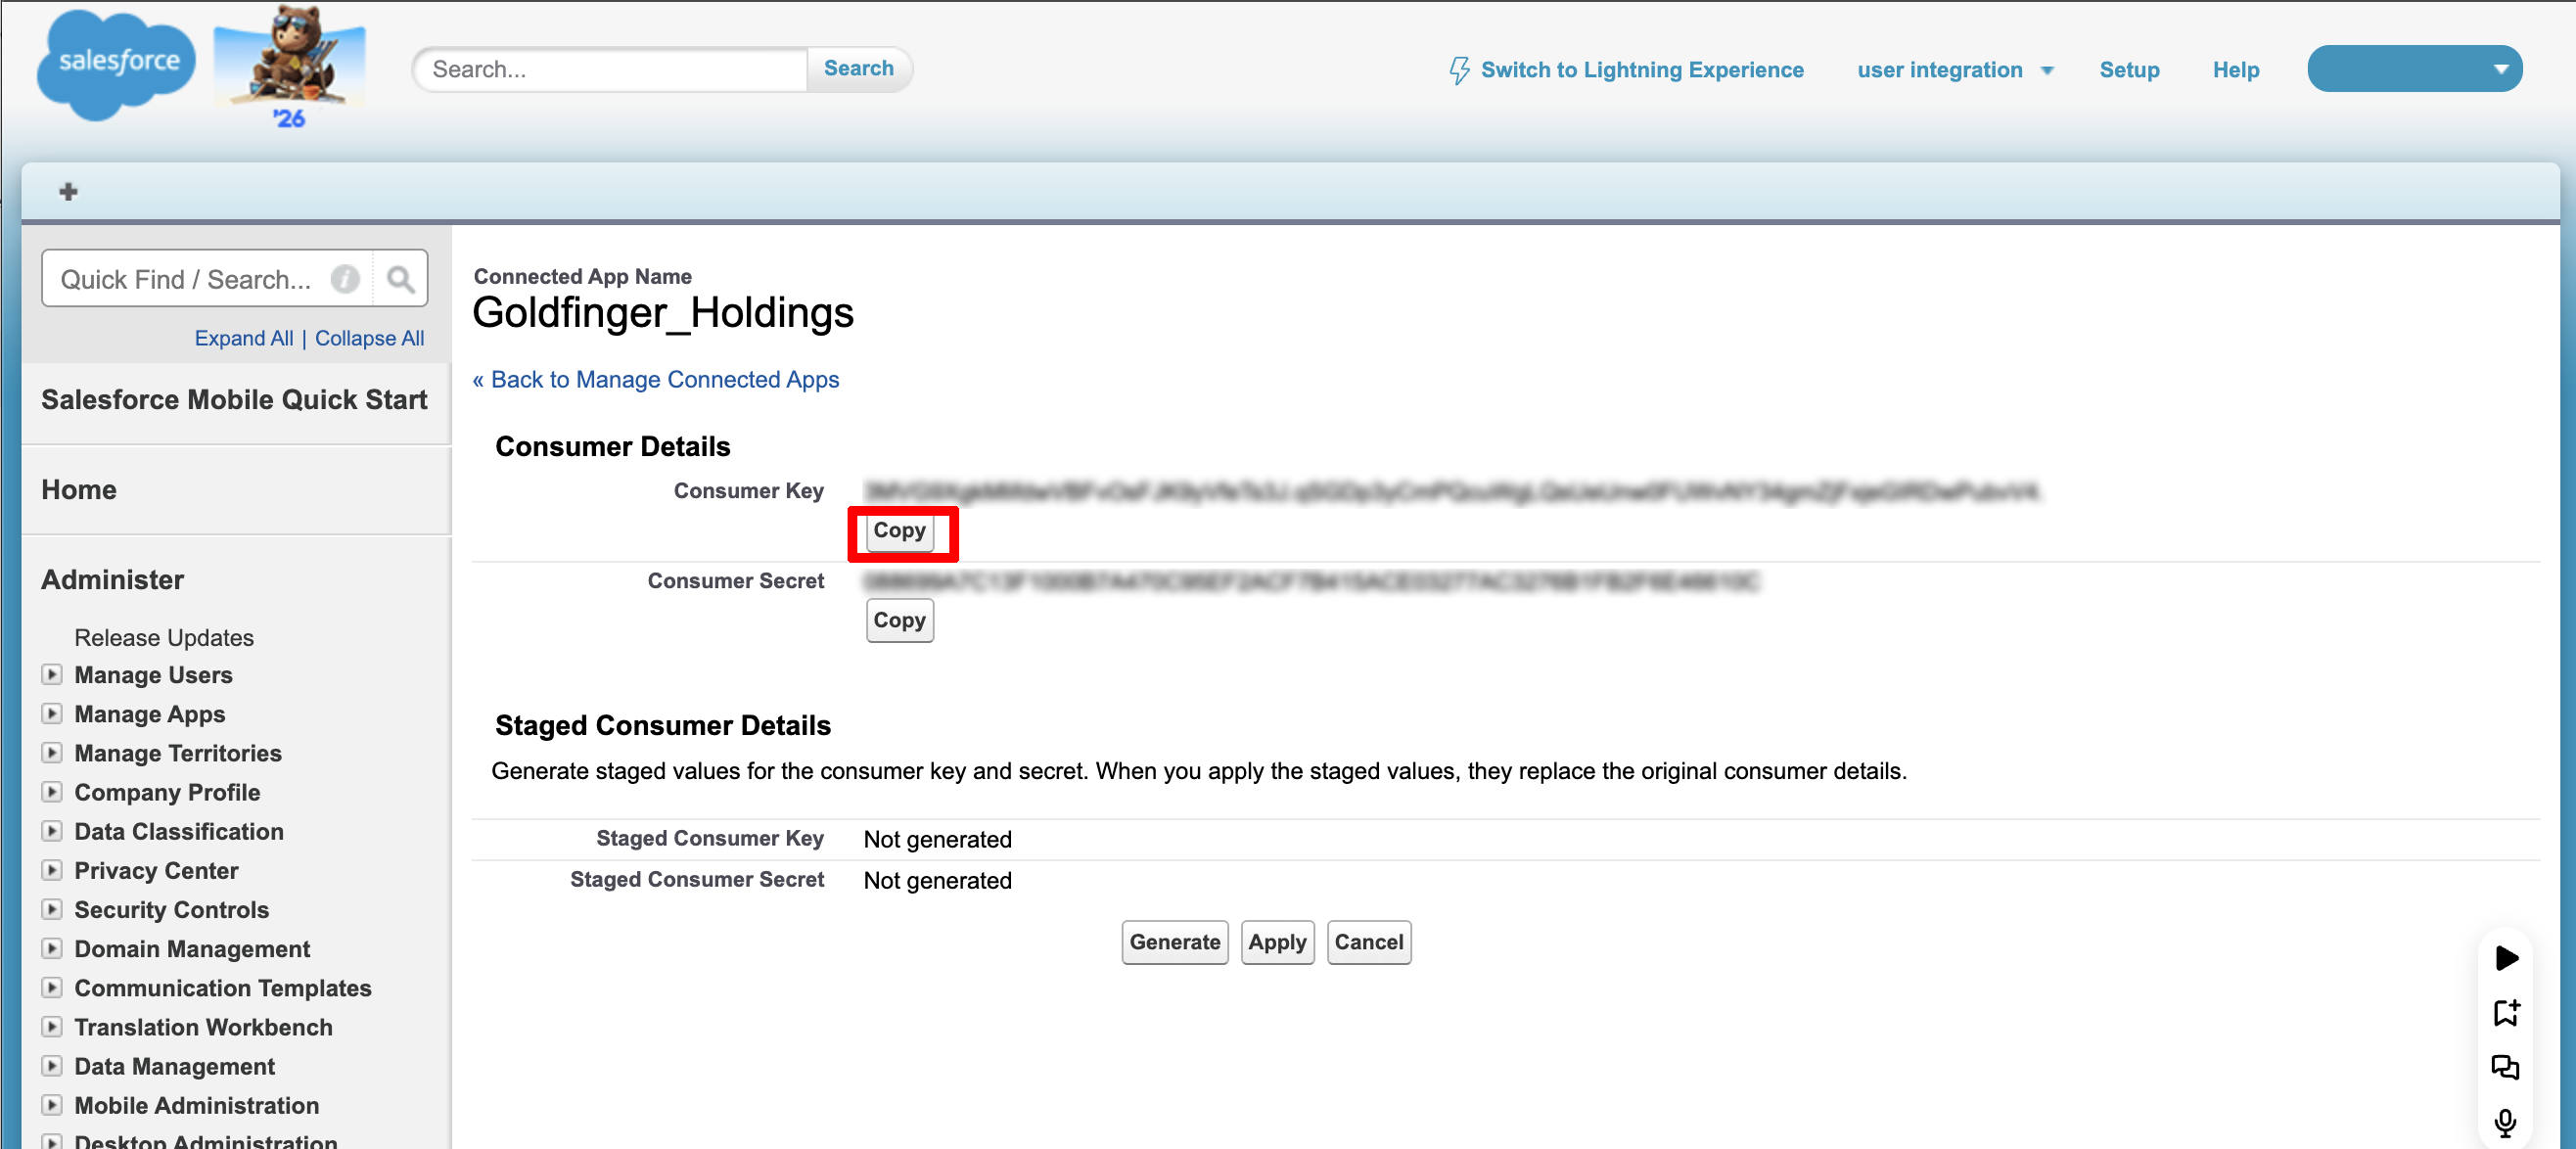
Click the “Manage Consumer Details” button, and on the next screen, copy the Consumer Key by clicking the “Copy” button. Save this key in a notepad, as you will need it when you create a connection.
Configure the Case layout:
-
Select “Setup” from the Gear icon at the top right og your Salesforce page
-
Click on the “Object Manager” tab in the “Quick Find” field, type “case”
-
Select “Case” from the left sidebar
-
Select “Case Page Layouts”
-
Select “Case layout”
-
With the fields object selected in the “Quick Find” field, type “jira”. From the filtered list, click and drag the “Jira Issue Key” field to the “Case Information” section of the layout (this field is where the connected Jira item link will display).
-
Click on the “Buttons” selection, and in “Quick Find,” type Jira again. Two items will be in your filtered list: a. “Create/Update Jira” and b. “Link/Unlink Existing Jira”. Drag both buttons to the “Case Details” section.
-
Save your changes
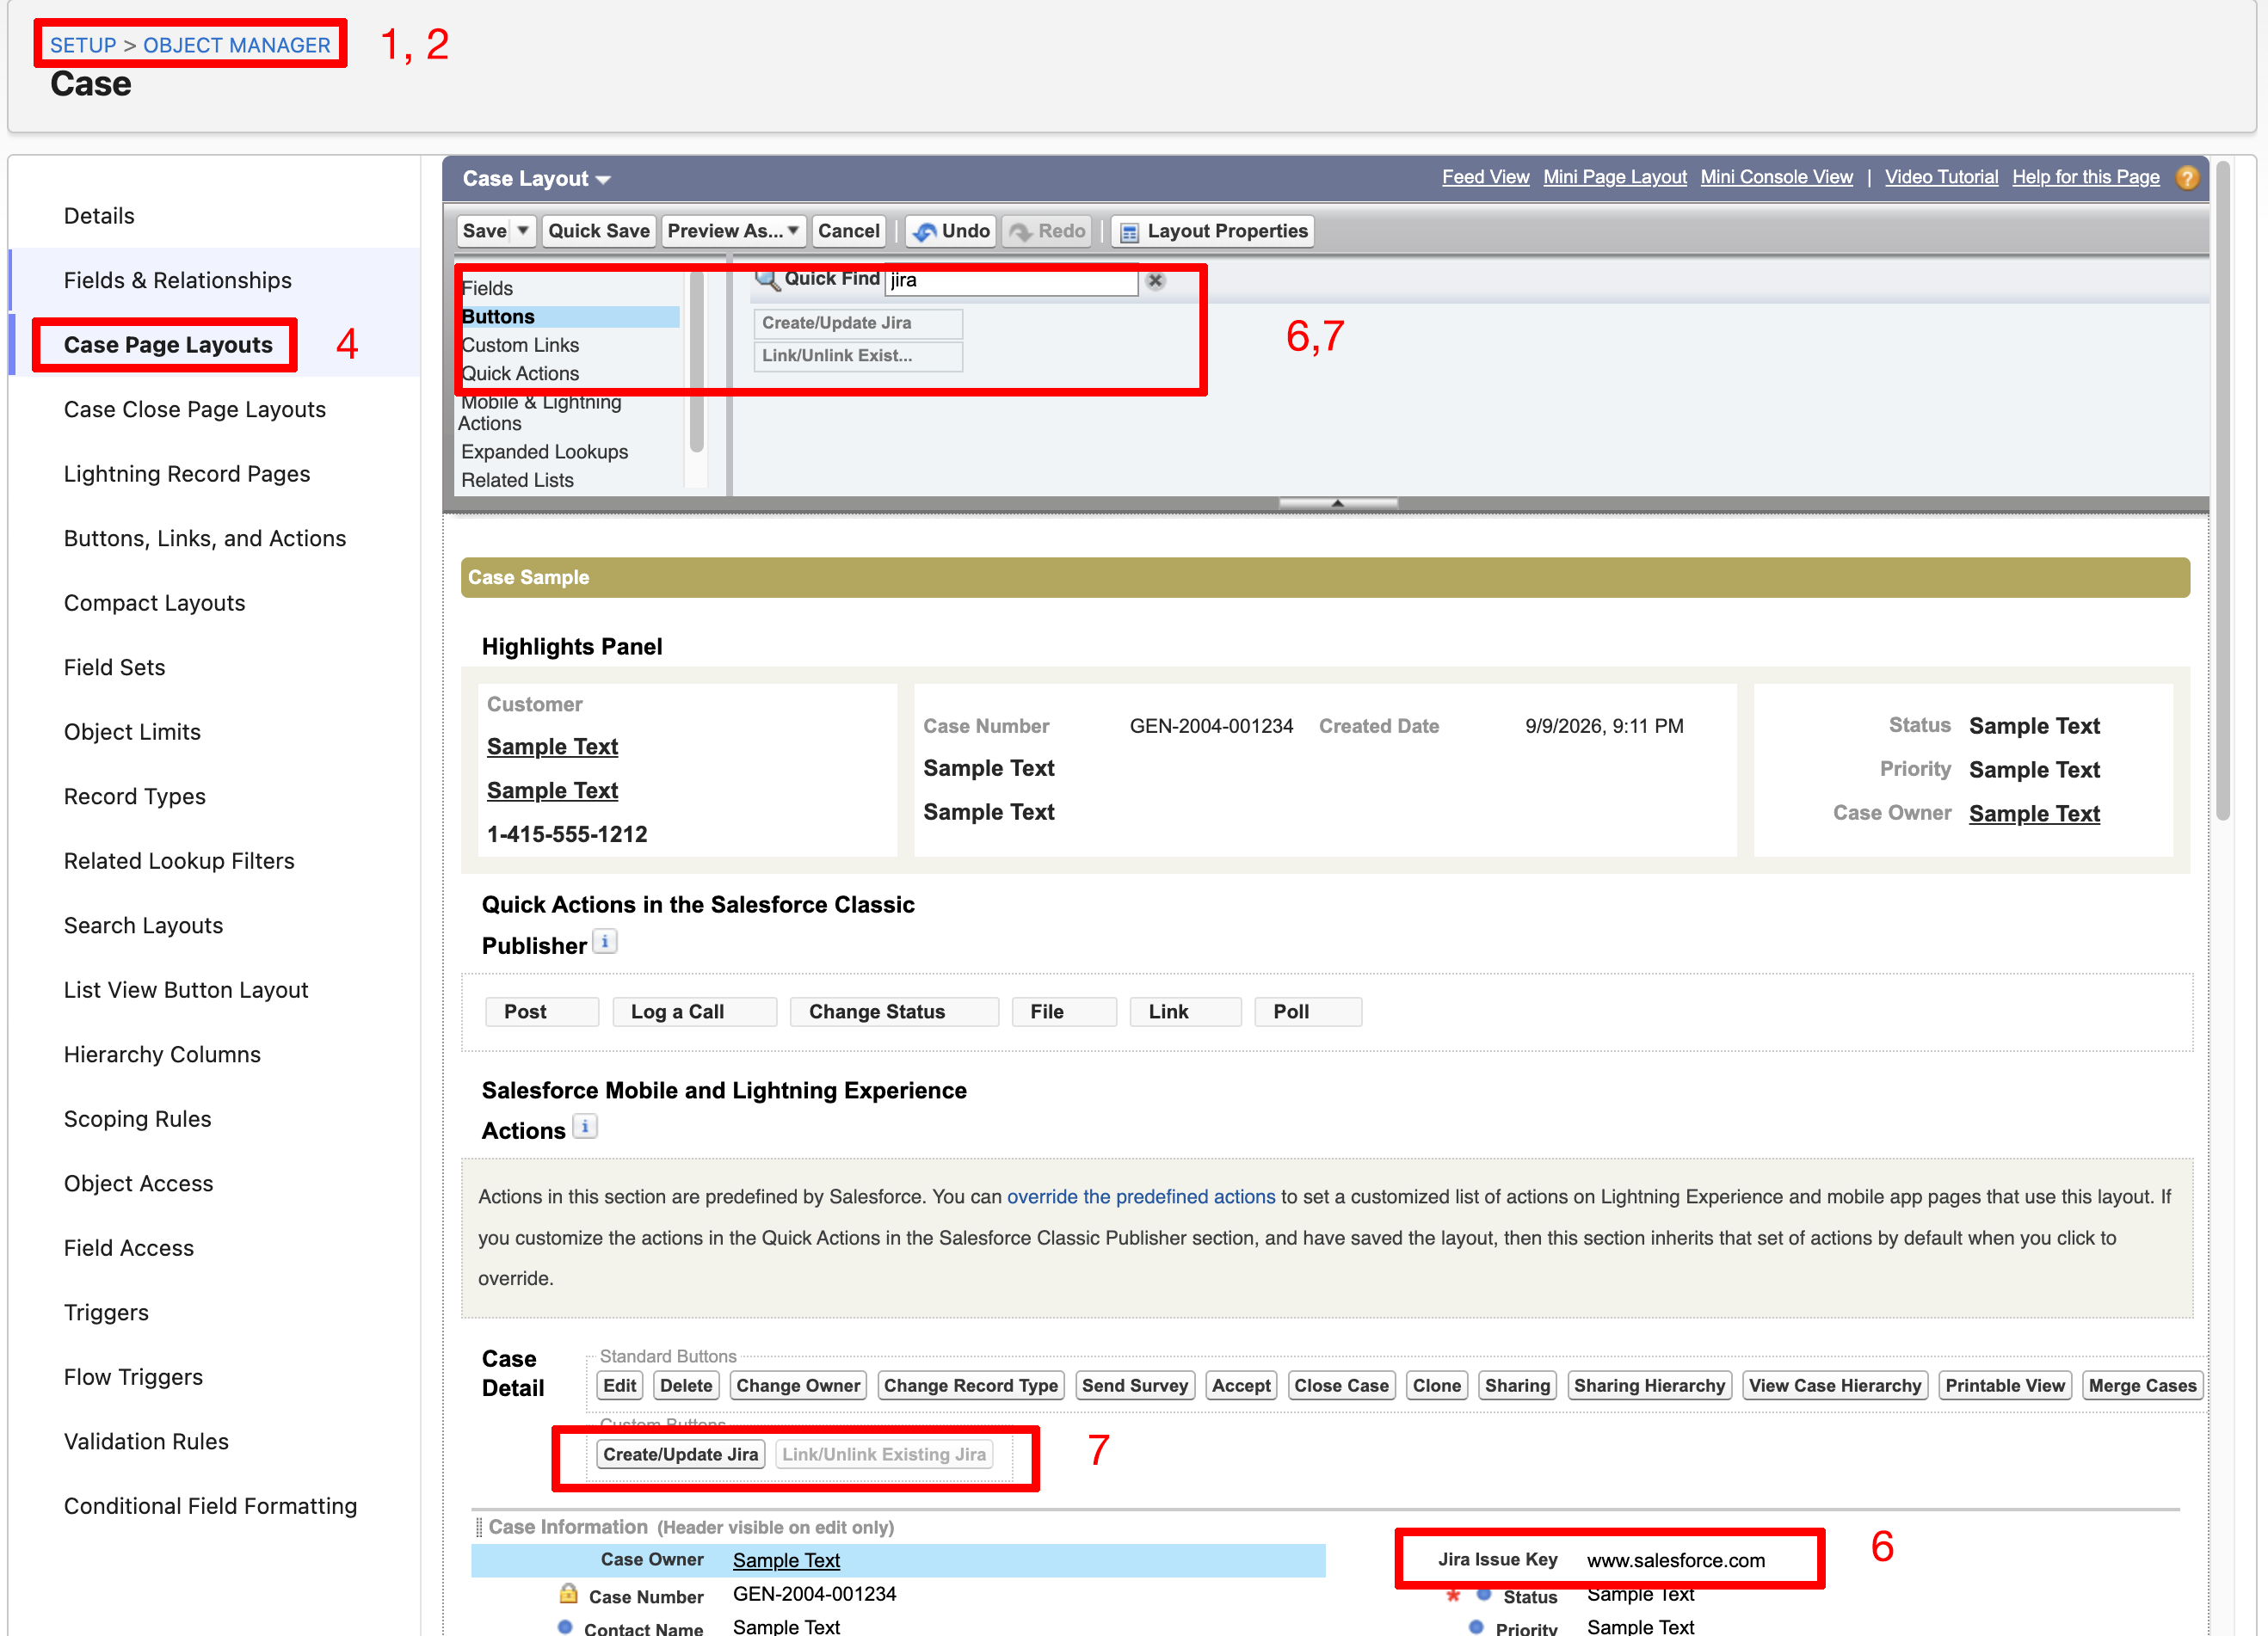
You can configure Salesforce to synchronize your records to Jira by pressing the buttons added in the previous steps, or you can automatically synchronize Salesforce records to Jira using triggers.
Add Plum CRM settings control:
-
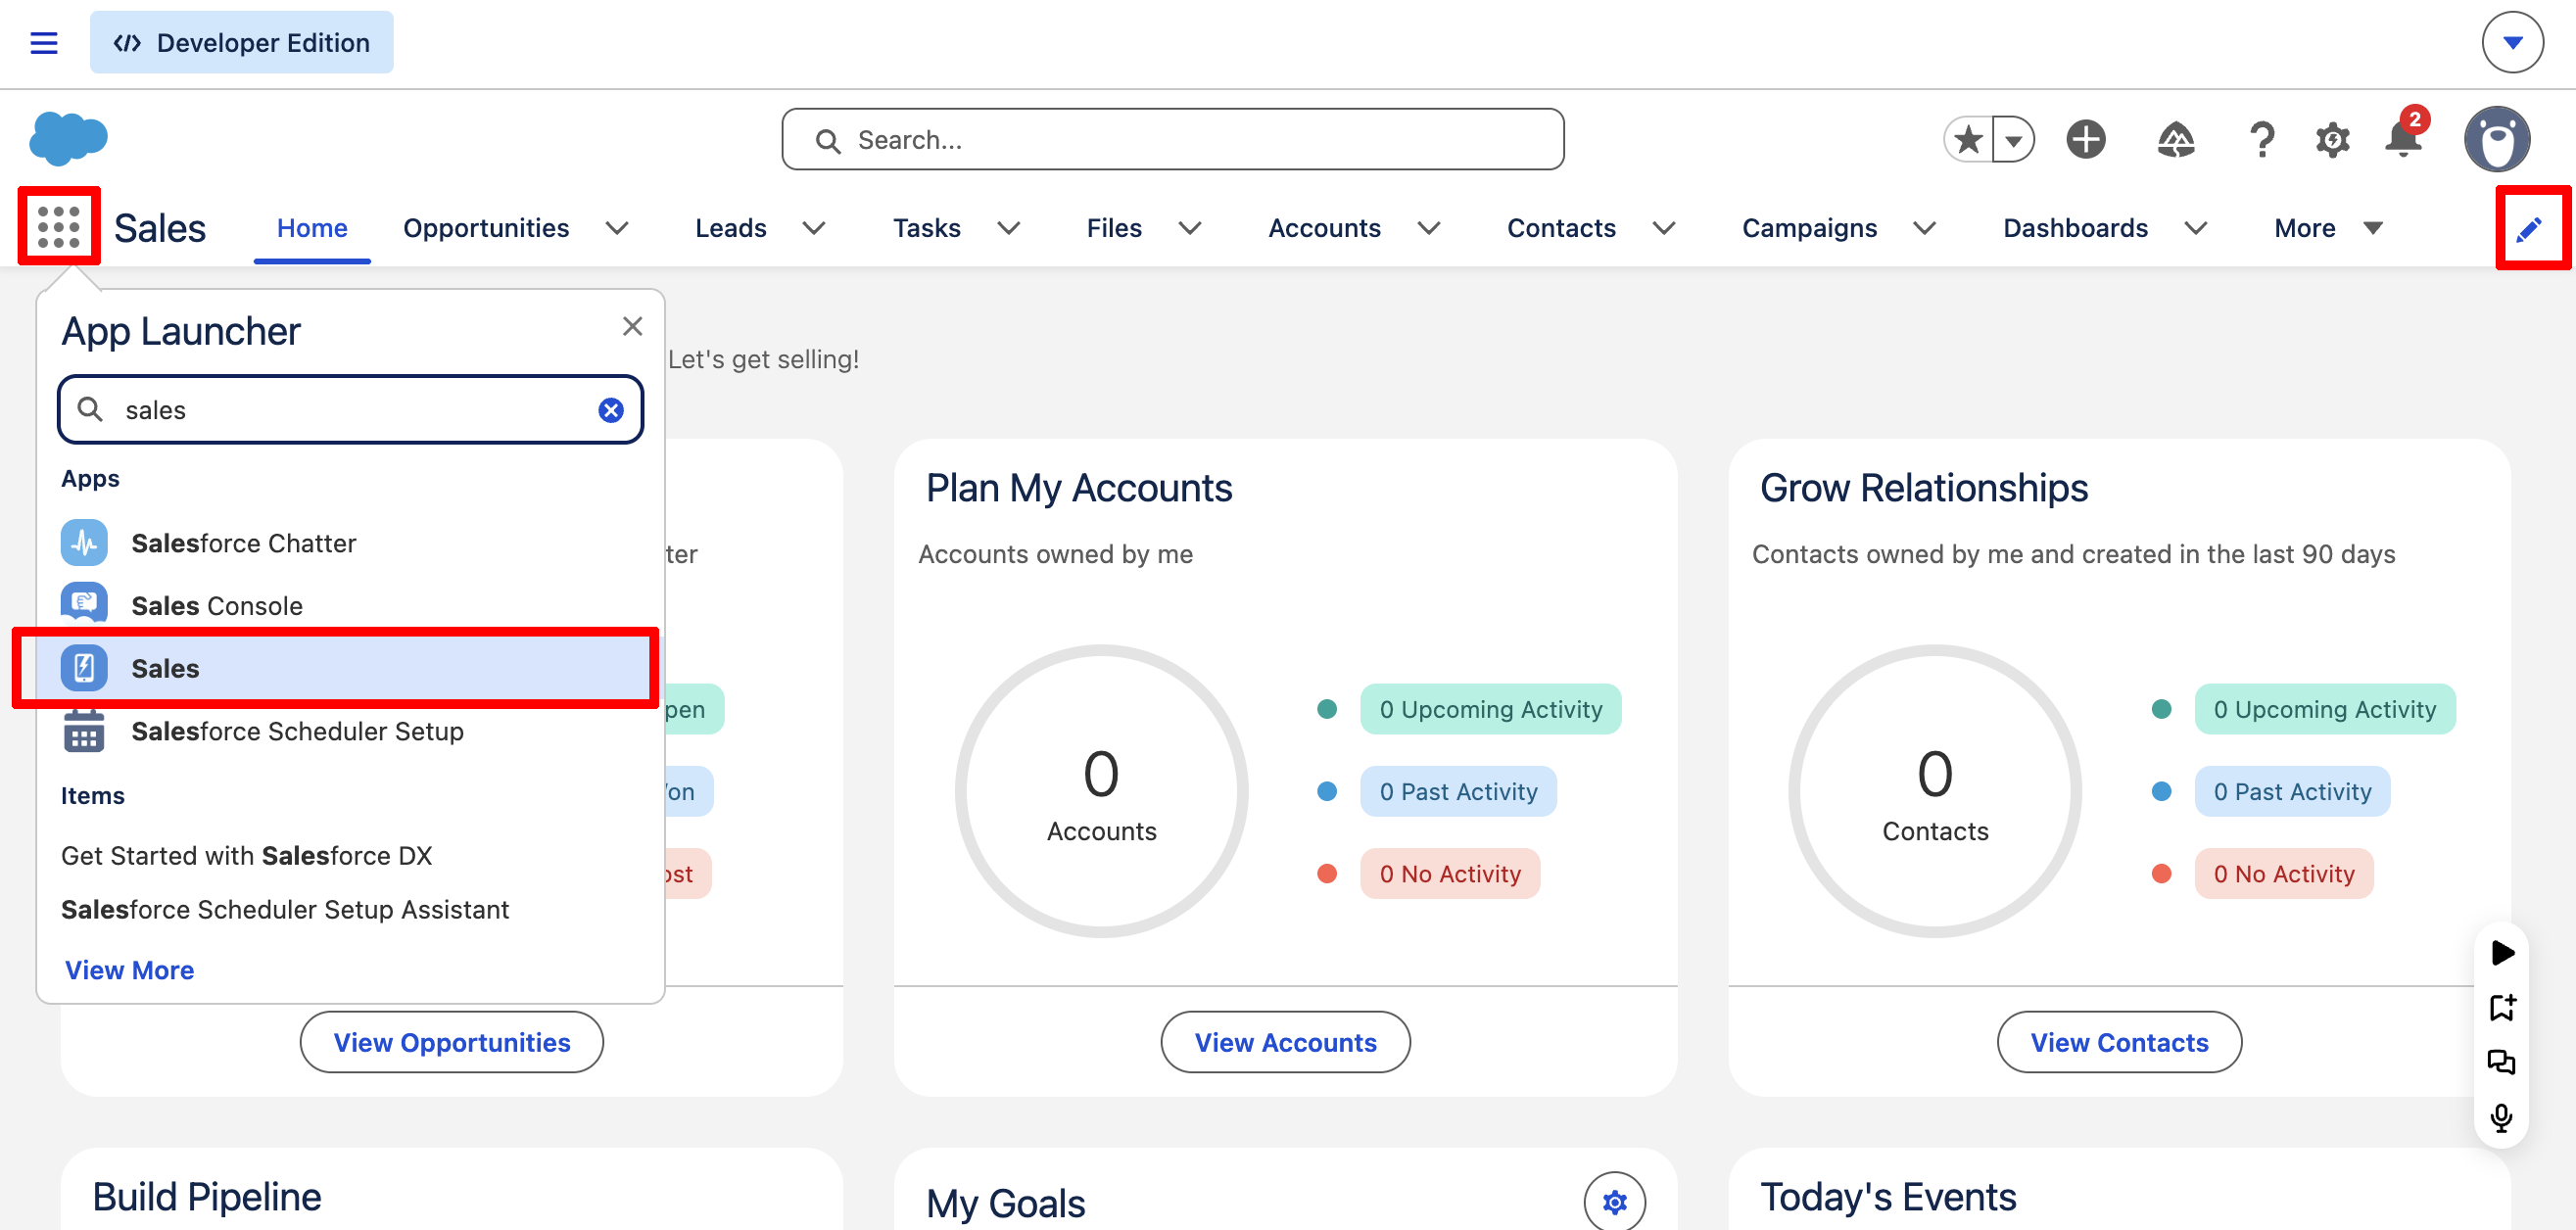
Click on the “App Launcher Icon,” and in the “Quick Search,” type Sales
-
Click on Sales.
-
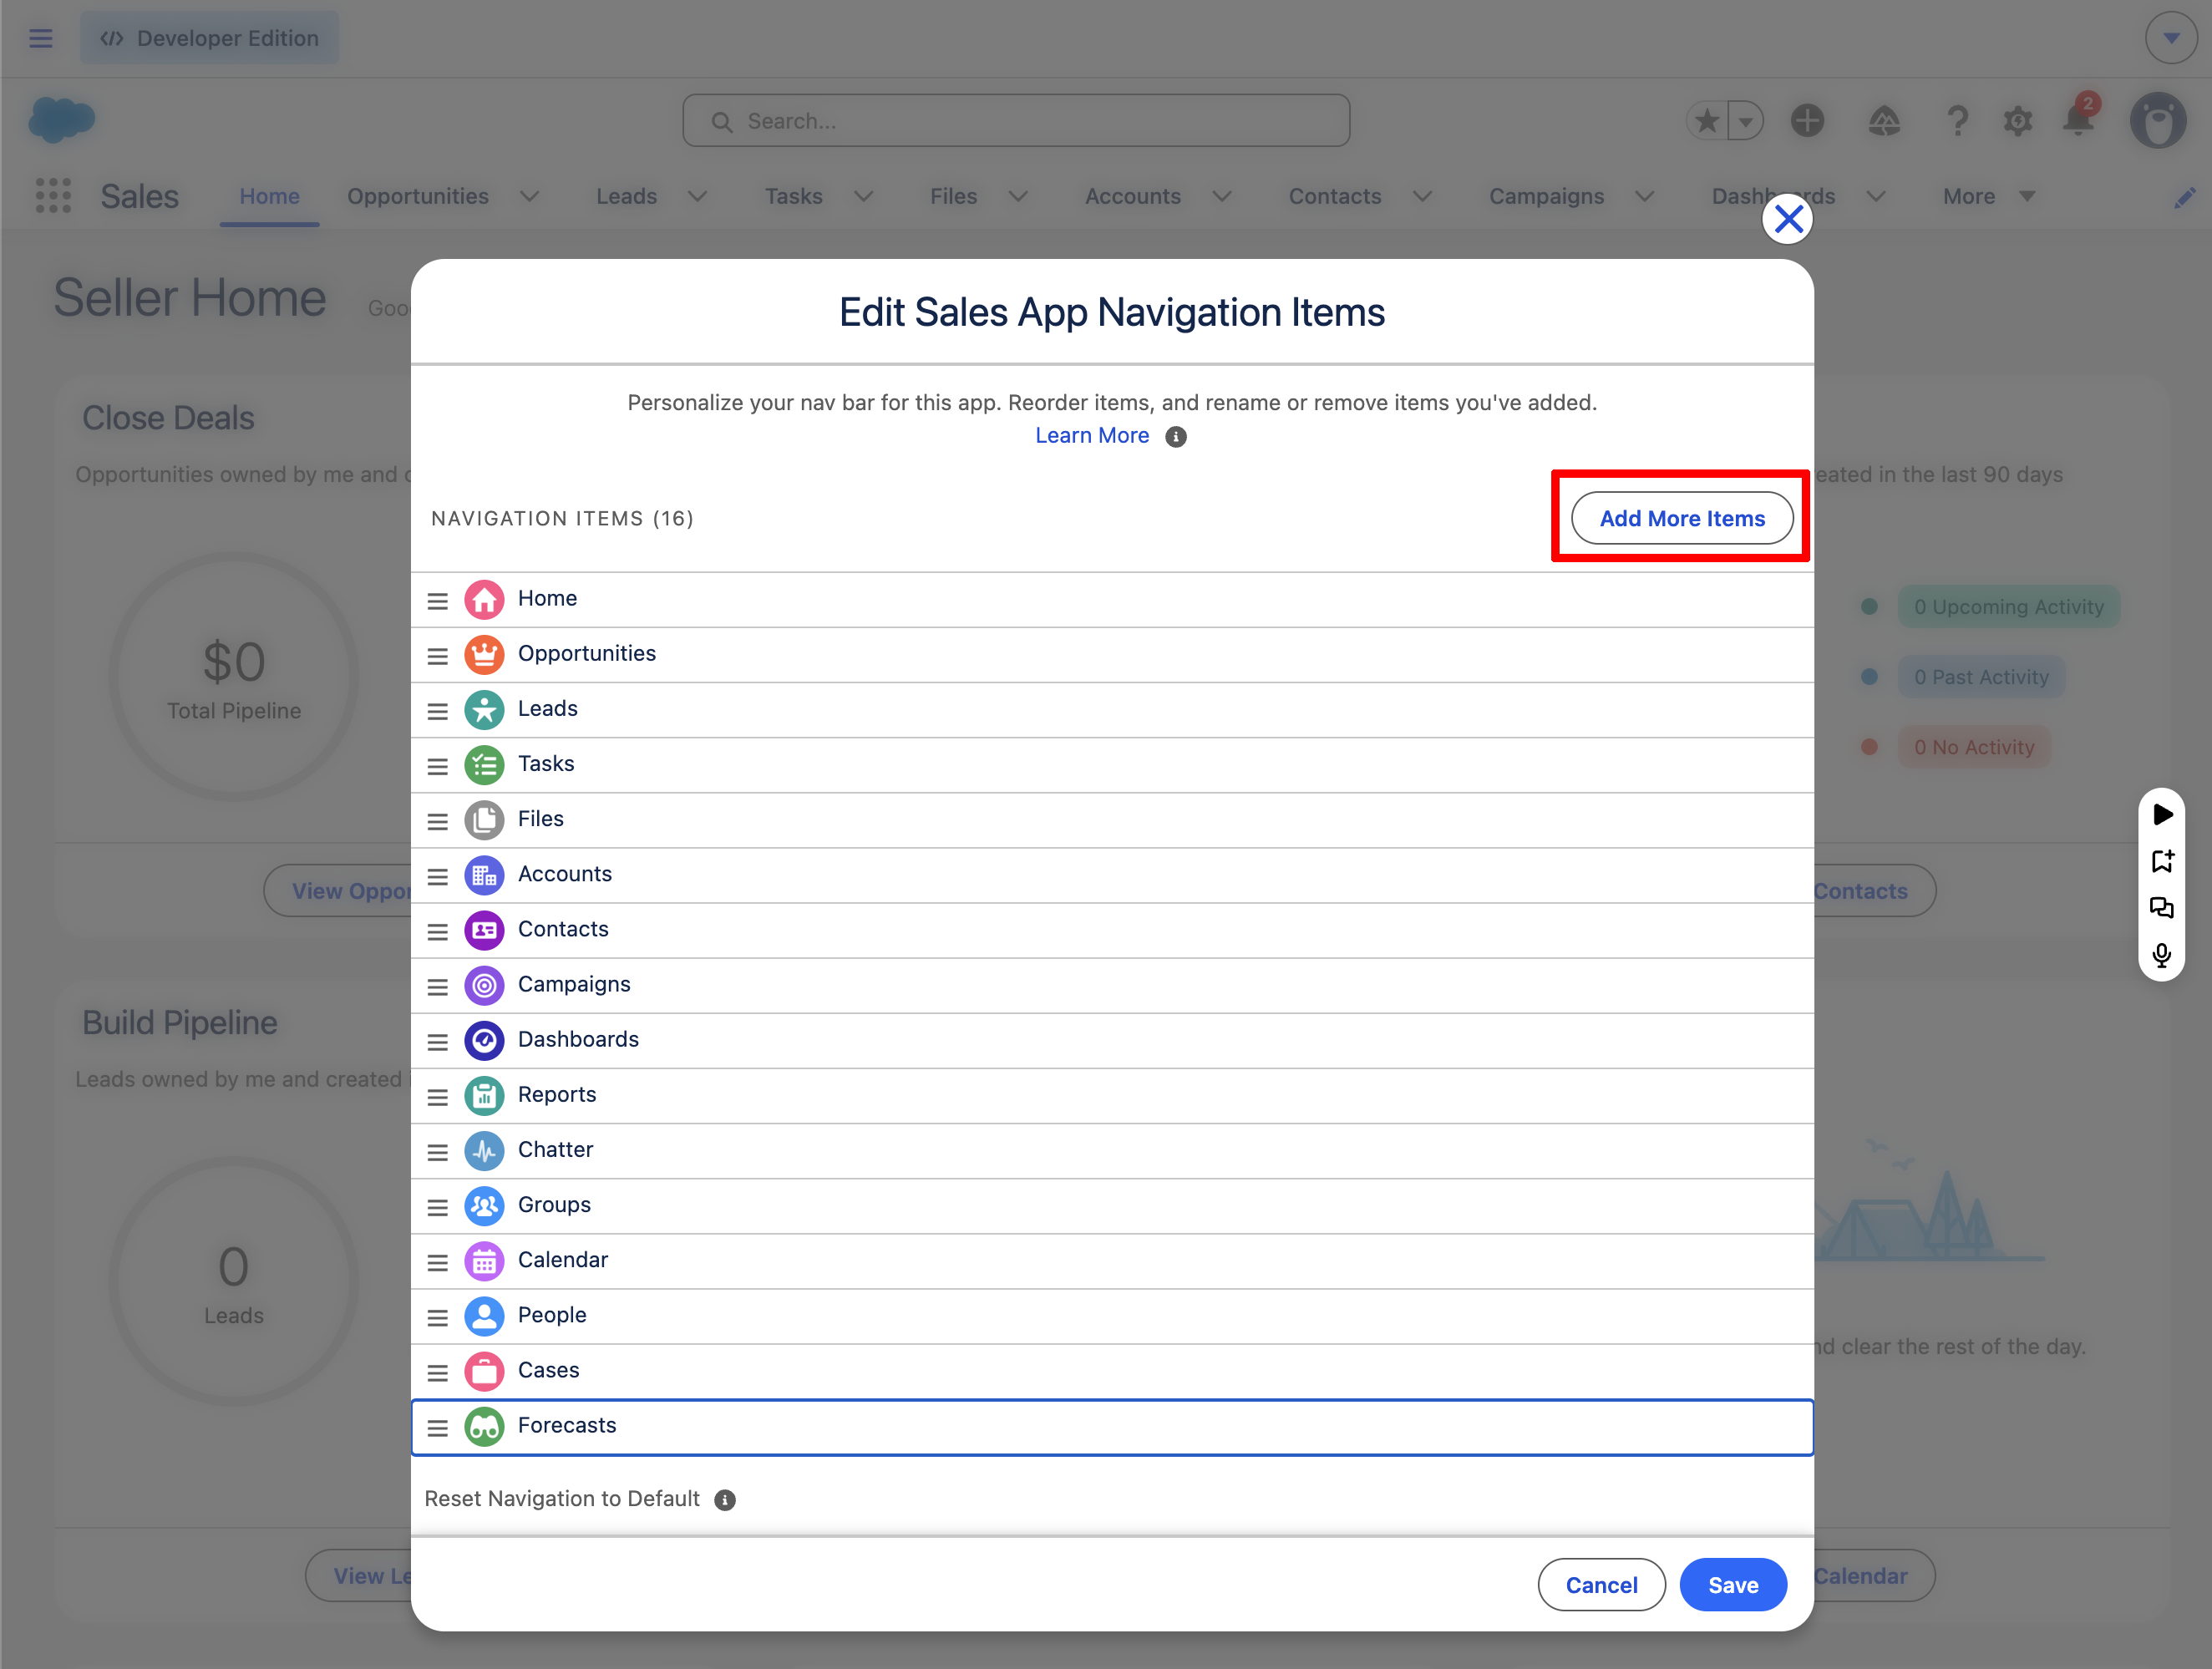
Click on the “Pencil” icon, and in the modal window, click on the “Add More Items” button
-
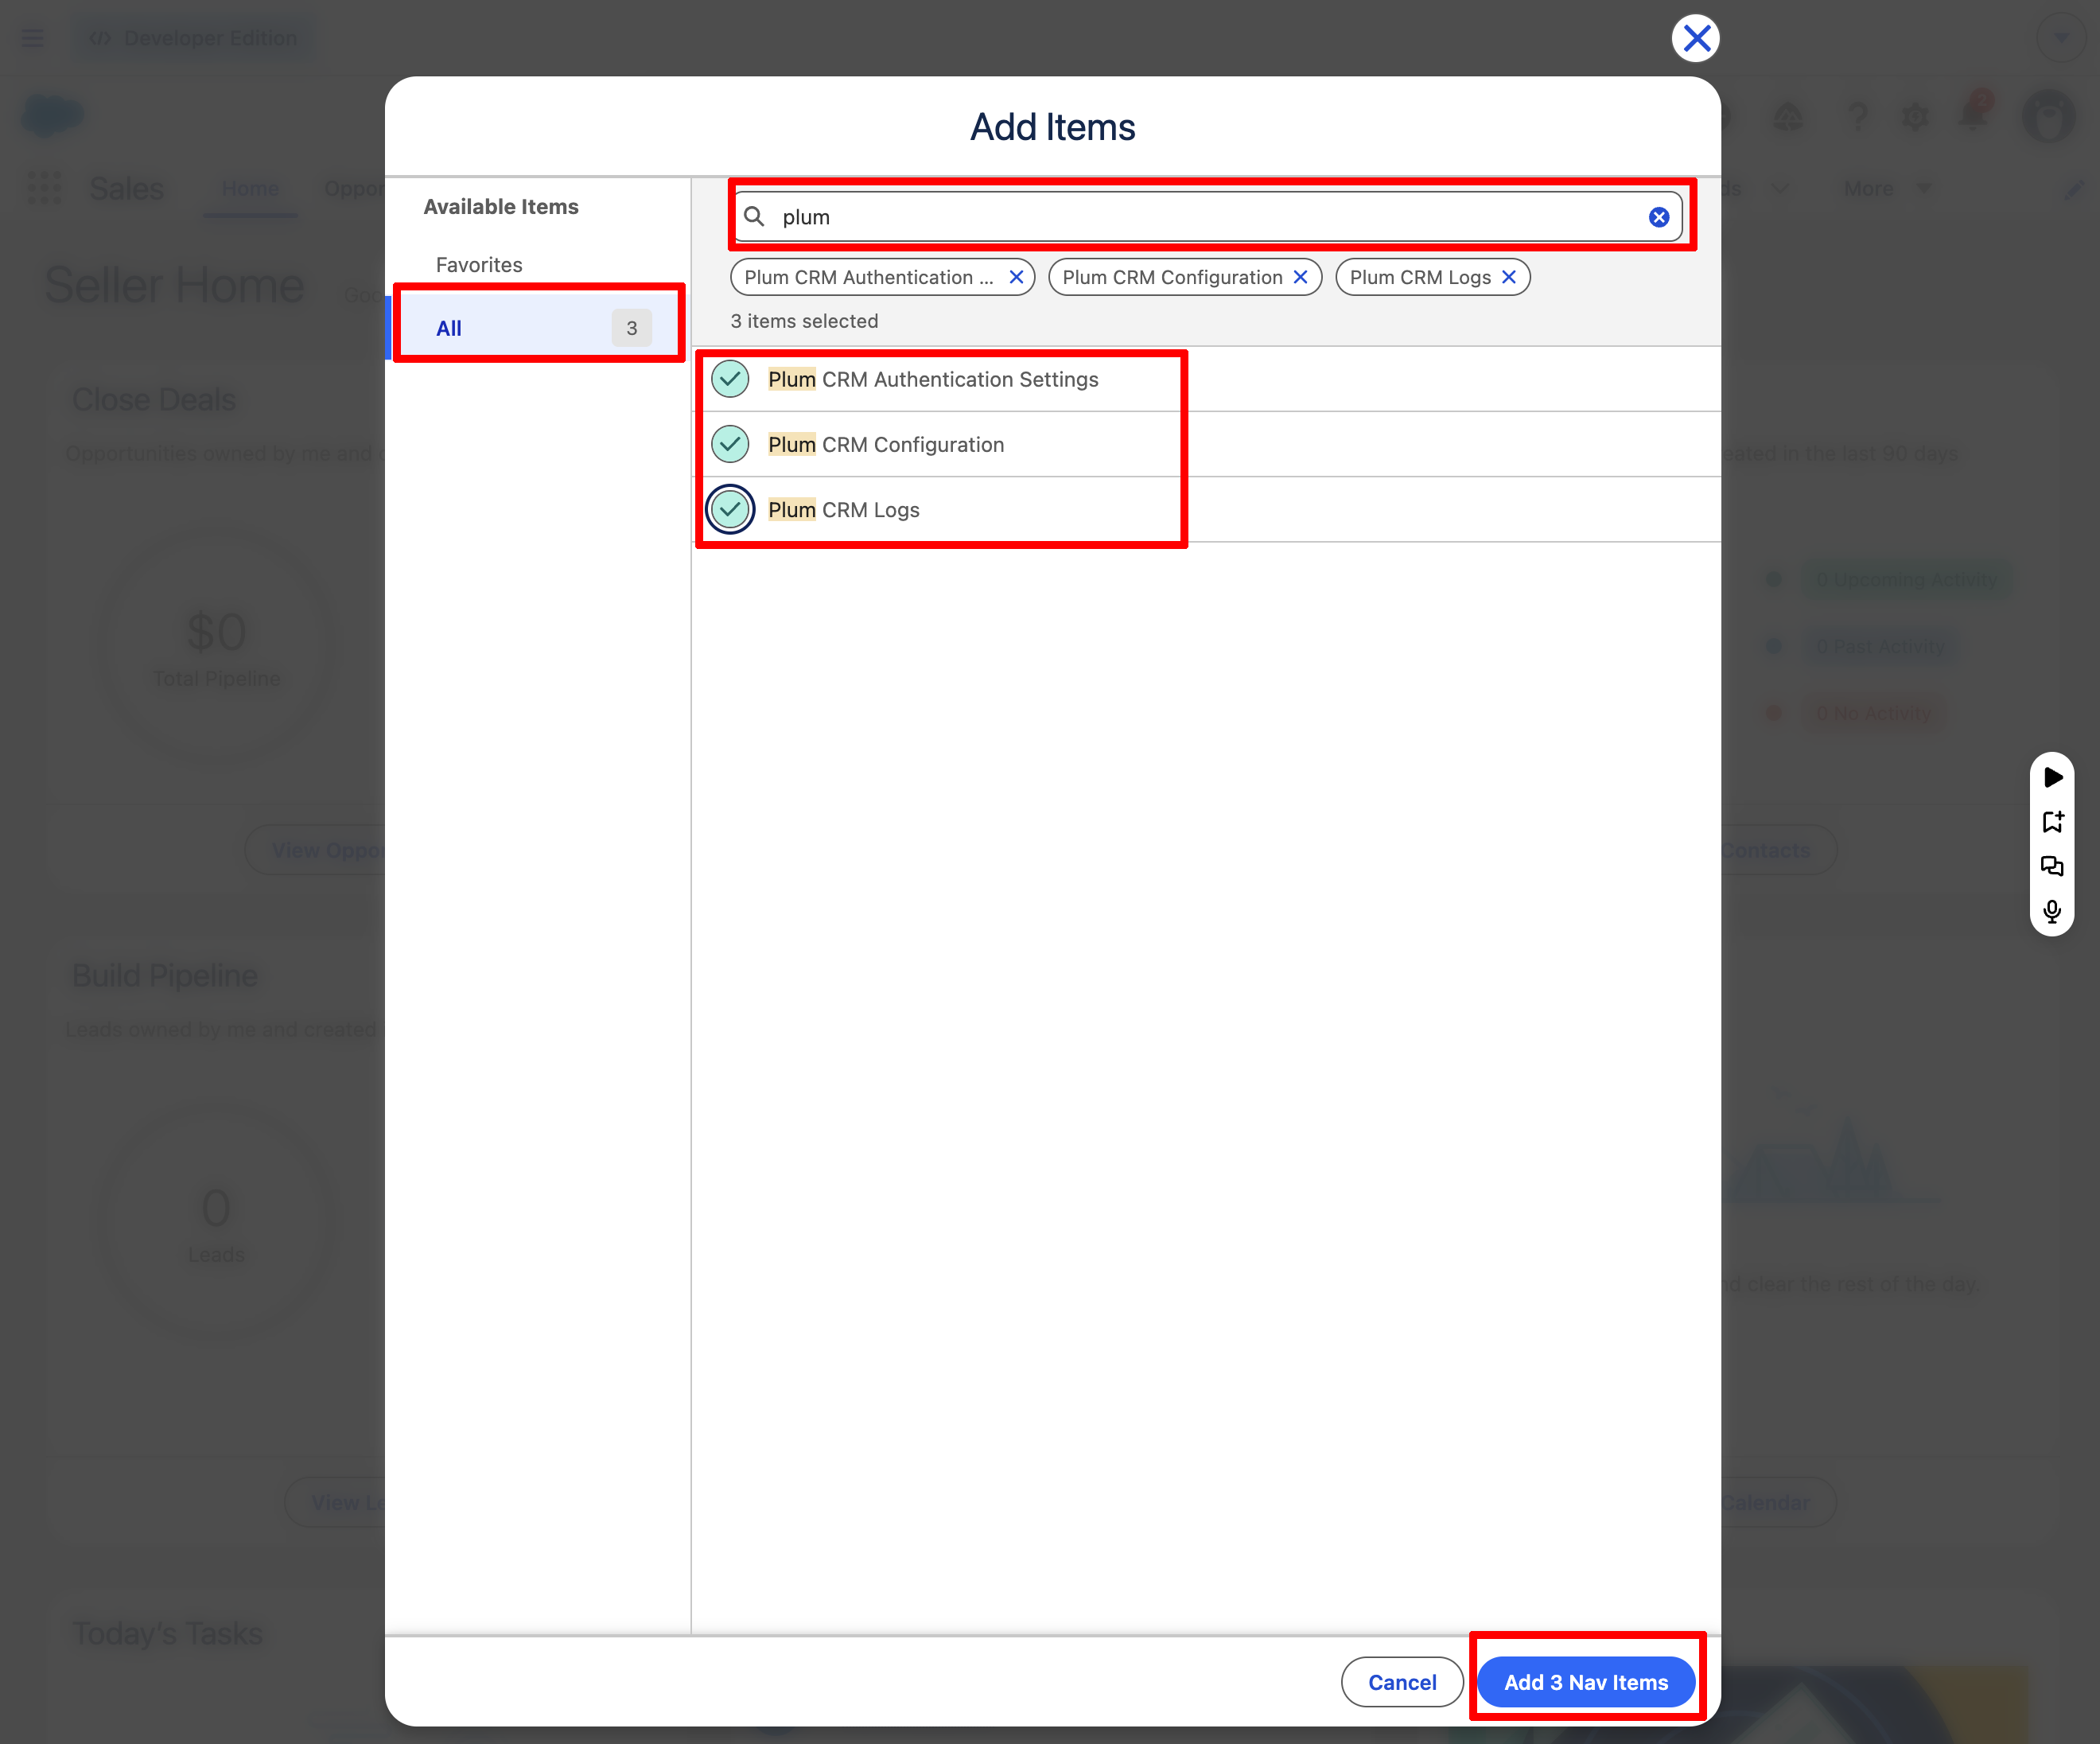
On the sidebar, select “All.” In the “Search Favorites” field, type “plum”
-
Select each item by clicking the plus button, and then click on “Add 3 Nav items”
-
Click “Save”
Configure Plum CRM
-
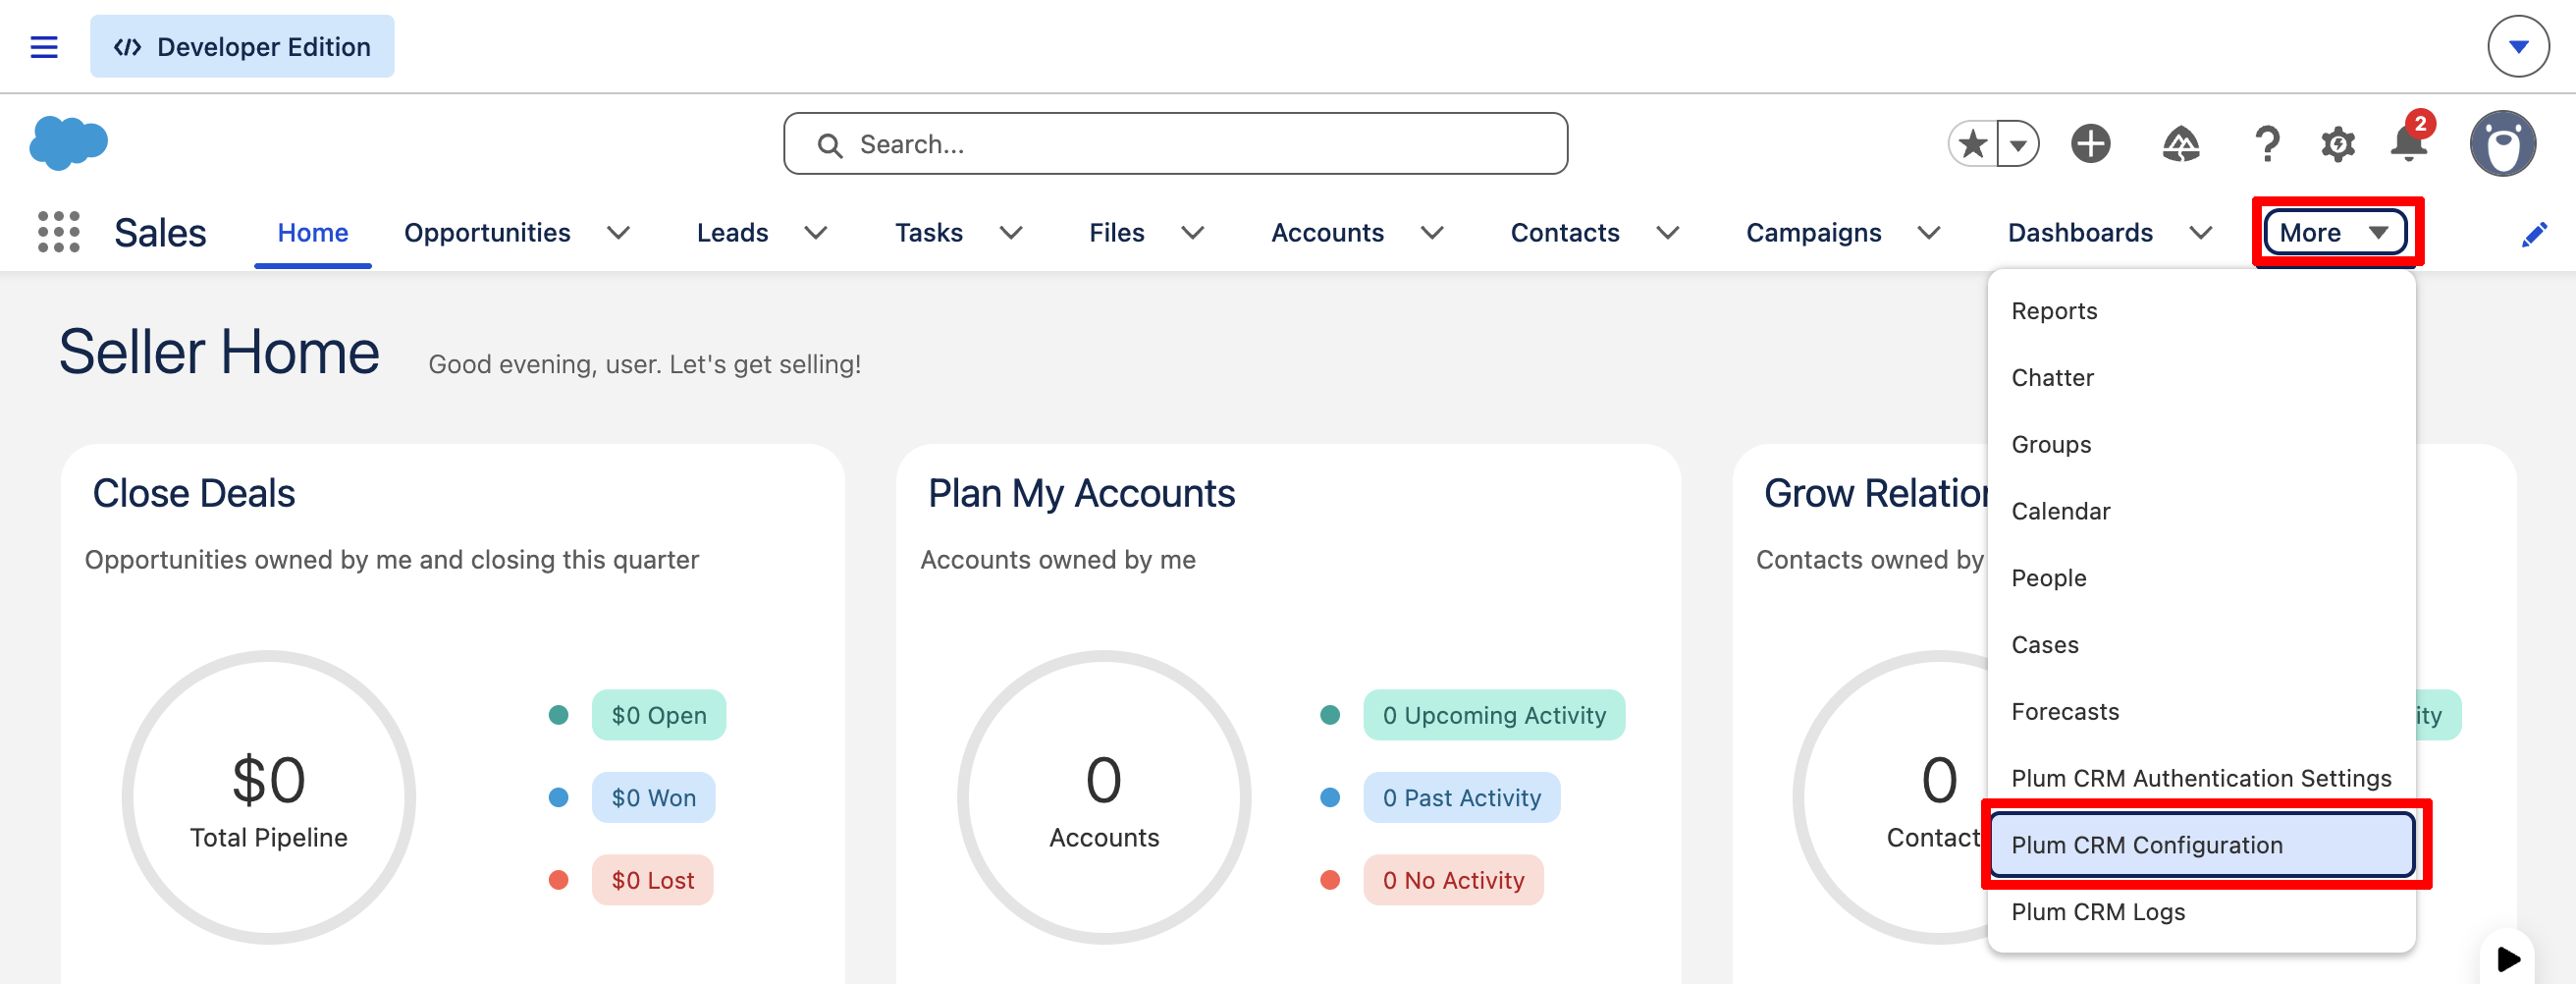
Click on the “More” menu tab and select “Plum CRM Configuration”
-
In Plum CRM “General Settings,” click Edit, then uncheck all checked boxes. You can leave the checkboxes clicked to automatically synchronize changes to Jira.
-
Click “Save”
Configure the Plum CRM Authentication Details
-
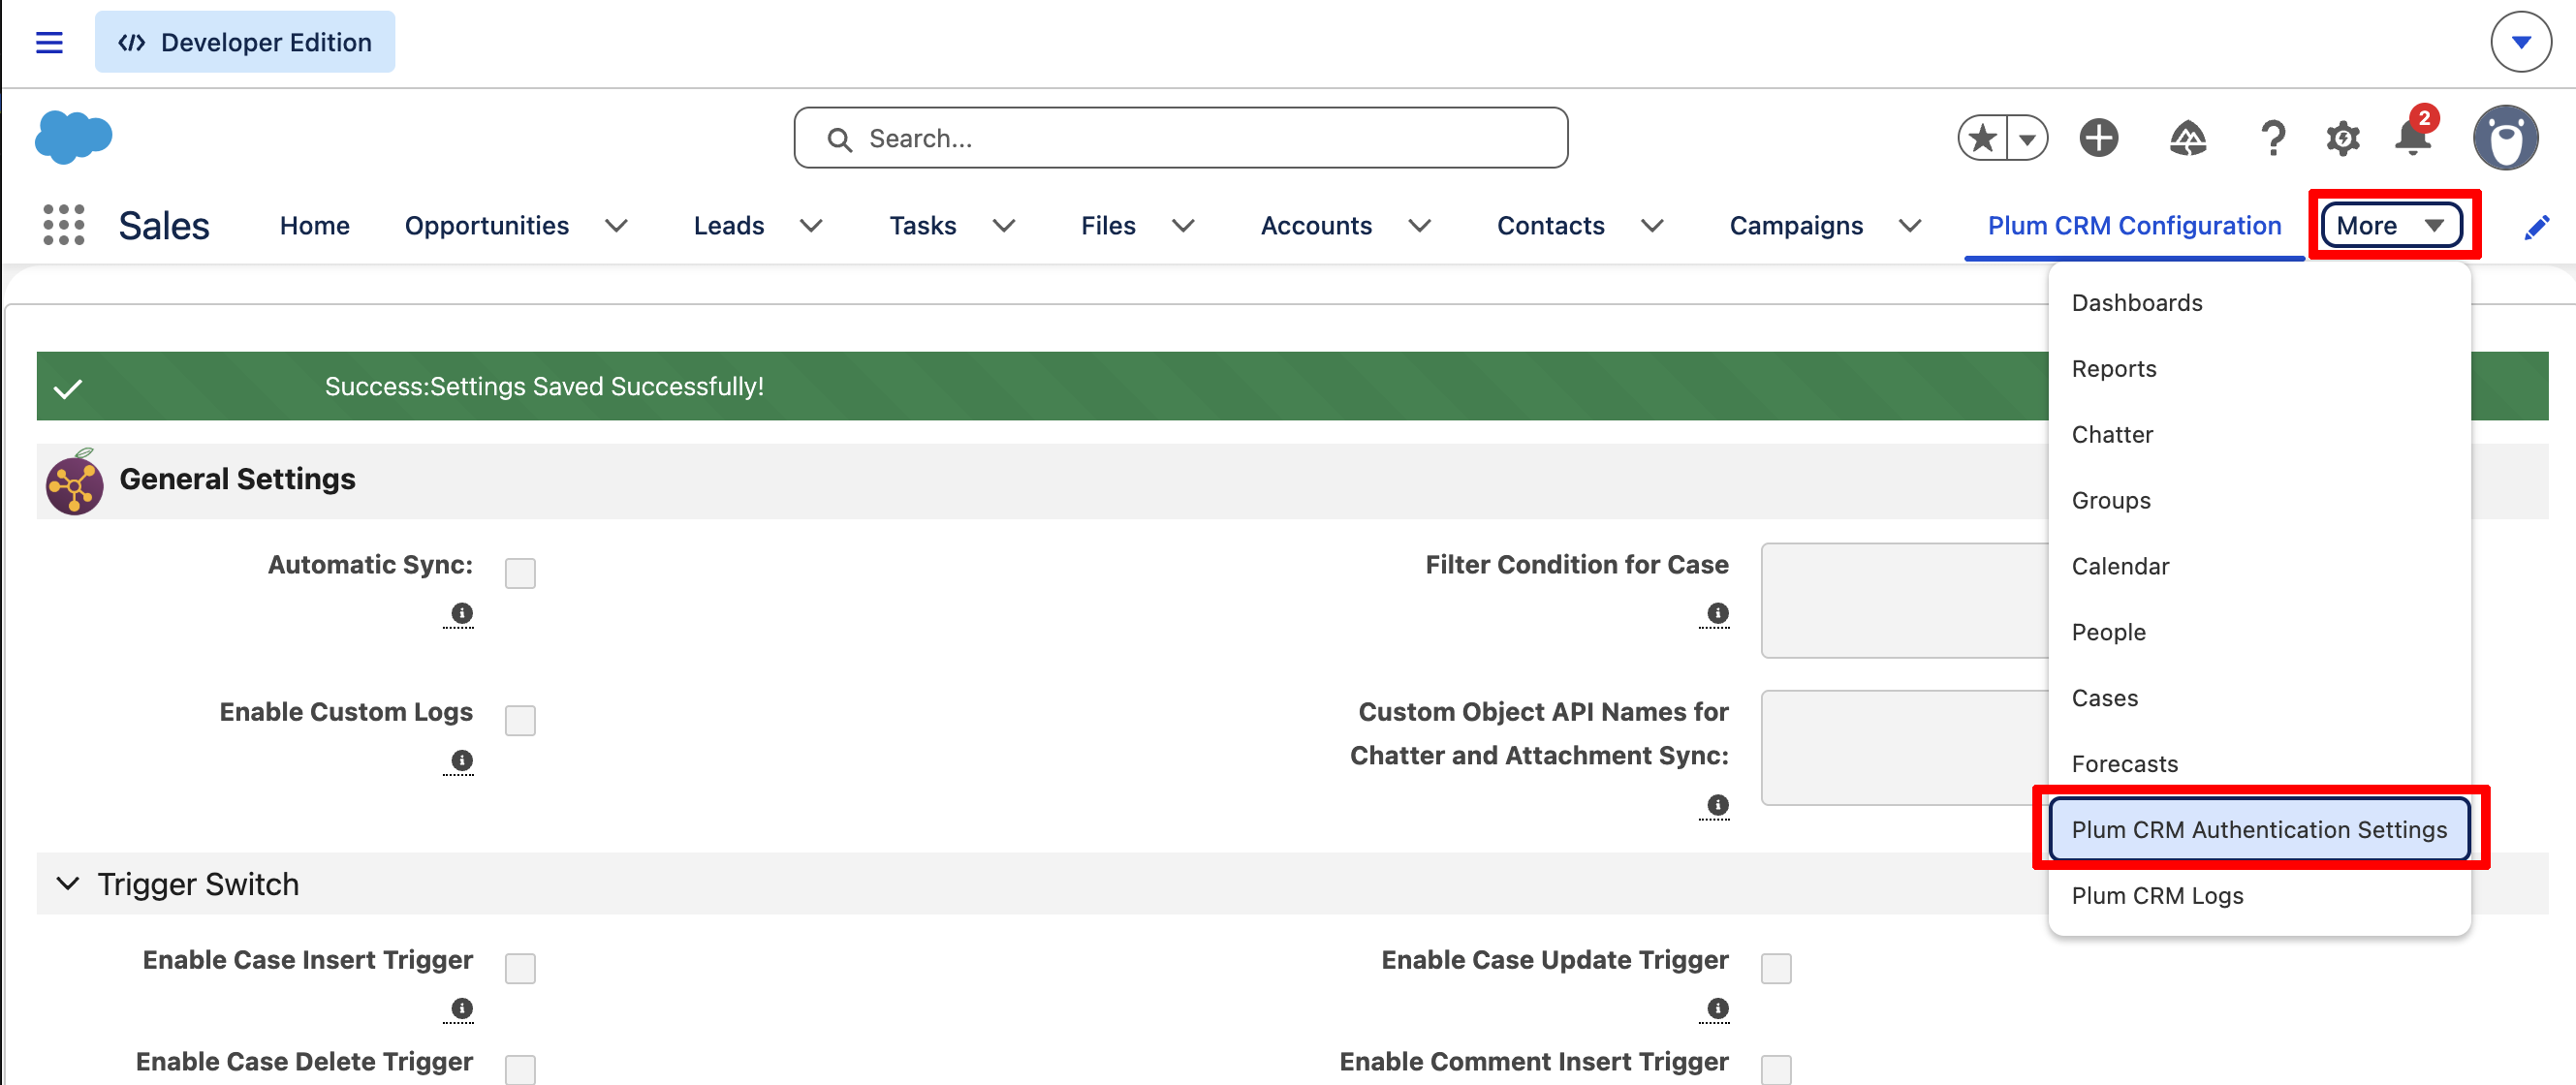
Click on the “More” menu and select “Plum CRM Authentication Settings”
-
Click “Edit” and enter the endpoint URL in the “Jira Gateway Server” field (https://crm.goldfingerholdings.onl)
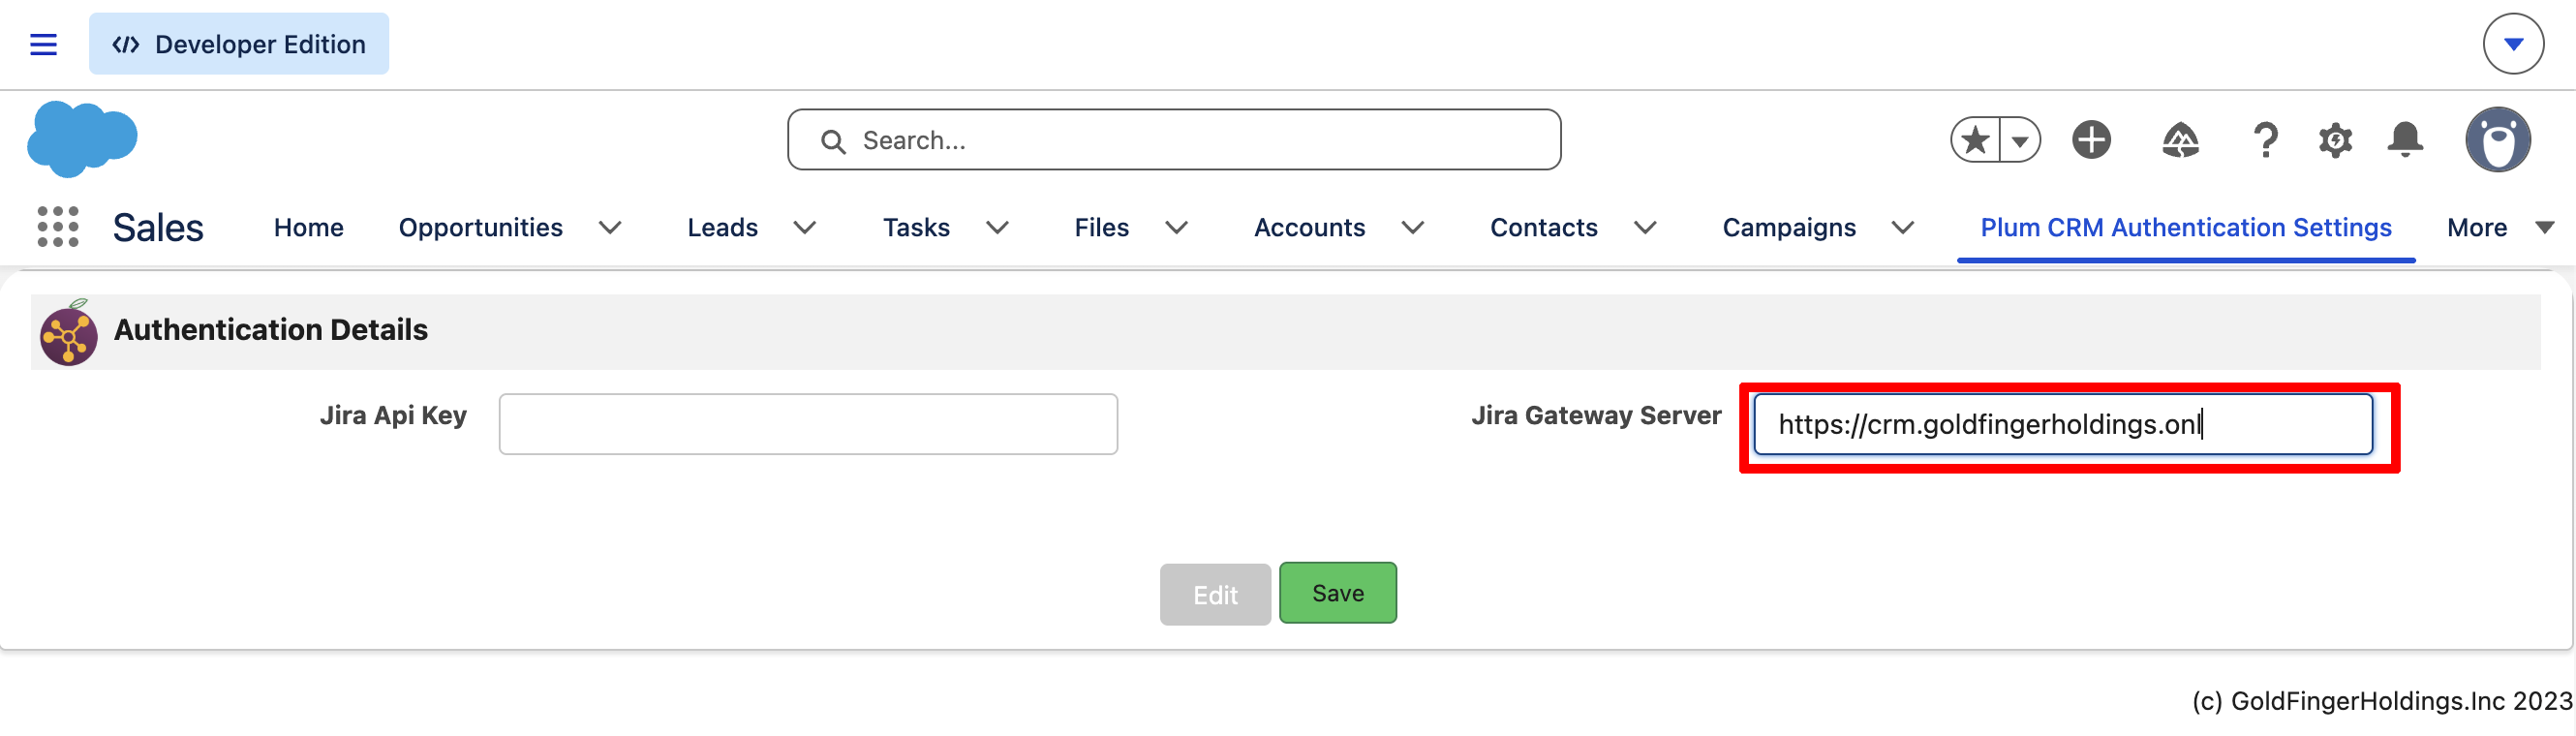
Note: After the connection is created and tested, you will come back and enter the Jira API Key -
Save
Next Step: Install Plum CRM in Jira