Installation
There are 3 general tasks required to set up the Microsoft Dynamics integration:
-
Create an App Registration in Azure
-
Create an Application User for Dynamics CRM with whatever permissions you need the CRM Plugin to have (i.e. ability to read and write Cases etc.)
-
Configure the CRM plugin in Jira
Create an App Registration in Active Directory
First, create an entry in your company's Azure Active Directory. This process generates a Tenant ID, an Application ID, and a Client Secret. These 3 values, along with the URL your CRM users use to log into Dynamics CRM, are specified in Jira on the CRM plugin's "Initial Setup" screen. This gives the CRM plugin the ability to authenticate with the Microsoft Cloud.
-
Using an account with administrator privileges, log into portal.azure.com
-
Go to the "Manage Active Directory" screen
-
Select "App registrations" in the left rail
-
Select "New registration", fill in the required fields and submit
-
On the resulting screen, you will see an Application ID and a Directory (tenant) ID; record these as you will need them in later steps
-
Select "Certificates & Secrets" in the left rail
-
Click the "New client secret" button, fill in the required fields, and click the "Add" button to save. You will see a generated client secret value, which you need to record, as you will need it later
-
Select "API permission" in the left rail
-
Click the "Add a permission" button, select "Dynamics CRM", check the "user_impersonation" check-box, and click the "Add permissions" button to save
Create and Authorize a Dynamics CRM Application User
At this point, you have only given the CRM Plugin the ability to authenticate with Microsoft Active Directory; you still need to authorize the plugin to perform operations in Dynamics CRM. This involves creating a Microsoft Dynamics CRM Application User account and giving that Application User the permissions required for the actions you need the CRM Plugin to perform.
The Microsoft UI is ever-changing, and the exact steps for your company may differ from the steps given here.
This task has three parts: creating an Application User, creating a custom Security Role for that user, and associating the security role with the application user.
Create an Application User
-
Log into an admin account in Dynamics CRM
-
In the 2nd drop-down menu at the top, select Settings -> Security and click the "Users" feature to get a screen listing current users
-
Click on the heading for the list of users to change the type of user to Application Users
-
Click NEW in the action bar at the top of the screen
-
Set User Name, Full Name, and Primary Email to anything you like (we suggest "CRMPlugin Application" for the Full Name), set Application ID to the Application ID you recorded when you created the app registration above.
-
Click SAVE & CLOSE in the action bar at the top of the screen
Create a custom Security Role
(while still using an admin account in Dynamics CRM)
-
In the 2nd drop-down menu at the top, select Settings -> Security and click the "Security Roles" feature to get a screen listing current security roles
-
Click New in the action bar at the top of the screen
-
Use something like "CRM Plugin" as the Role Name on the Details tab
-
On each of the remaining tabs, select the appropriate privileges that the CRM plugin needs to have (privileges described at https://docs.microsoft.com/en-us/power-platform/admin/security-roles-privileges)
(click on an Entity name to toggle all privileges for that entity)
(click on a Privilege heading to toggle that privilege for all entities)
Recommended privileges
|
Table |
Privileges |
|
Core Records |
All access for everything |
|
Marketing |
All access for everything |
|
Sales |
All access for everything |
|
Service |
All access for everything |
|
Business Management |
Read access for User |
|
Service Management |
Read access for Entitlement |
|
Customization |
Read access for Entity, Field, Process, Relationship, System Job |
Associate the Security Role with the Application User
(while still using an admin account in Dynamics CRM)
-
In the 2nd drop-down menu at the top, select Settings -> Security and click the "Users" feature to get a screen listing current users
-
Select the name of the user created earlier (CRMPlugin Application)
-
Click MANAGE ROLES in the action bar to get a popup dialog listing all User Roles
-
Check the box for the custom Security Role created earlier (CRM Plugin) and click the OK button
Dynamics/Jira Sync Setup:
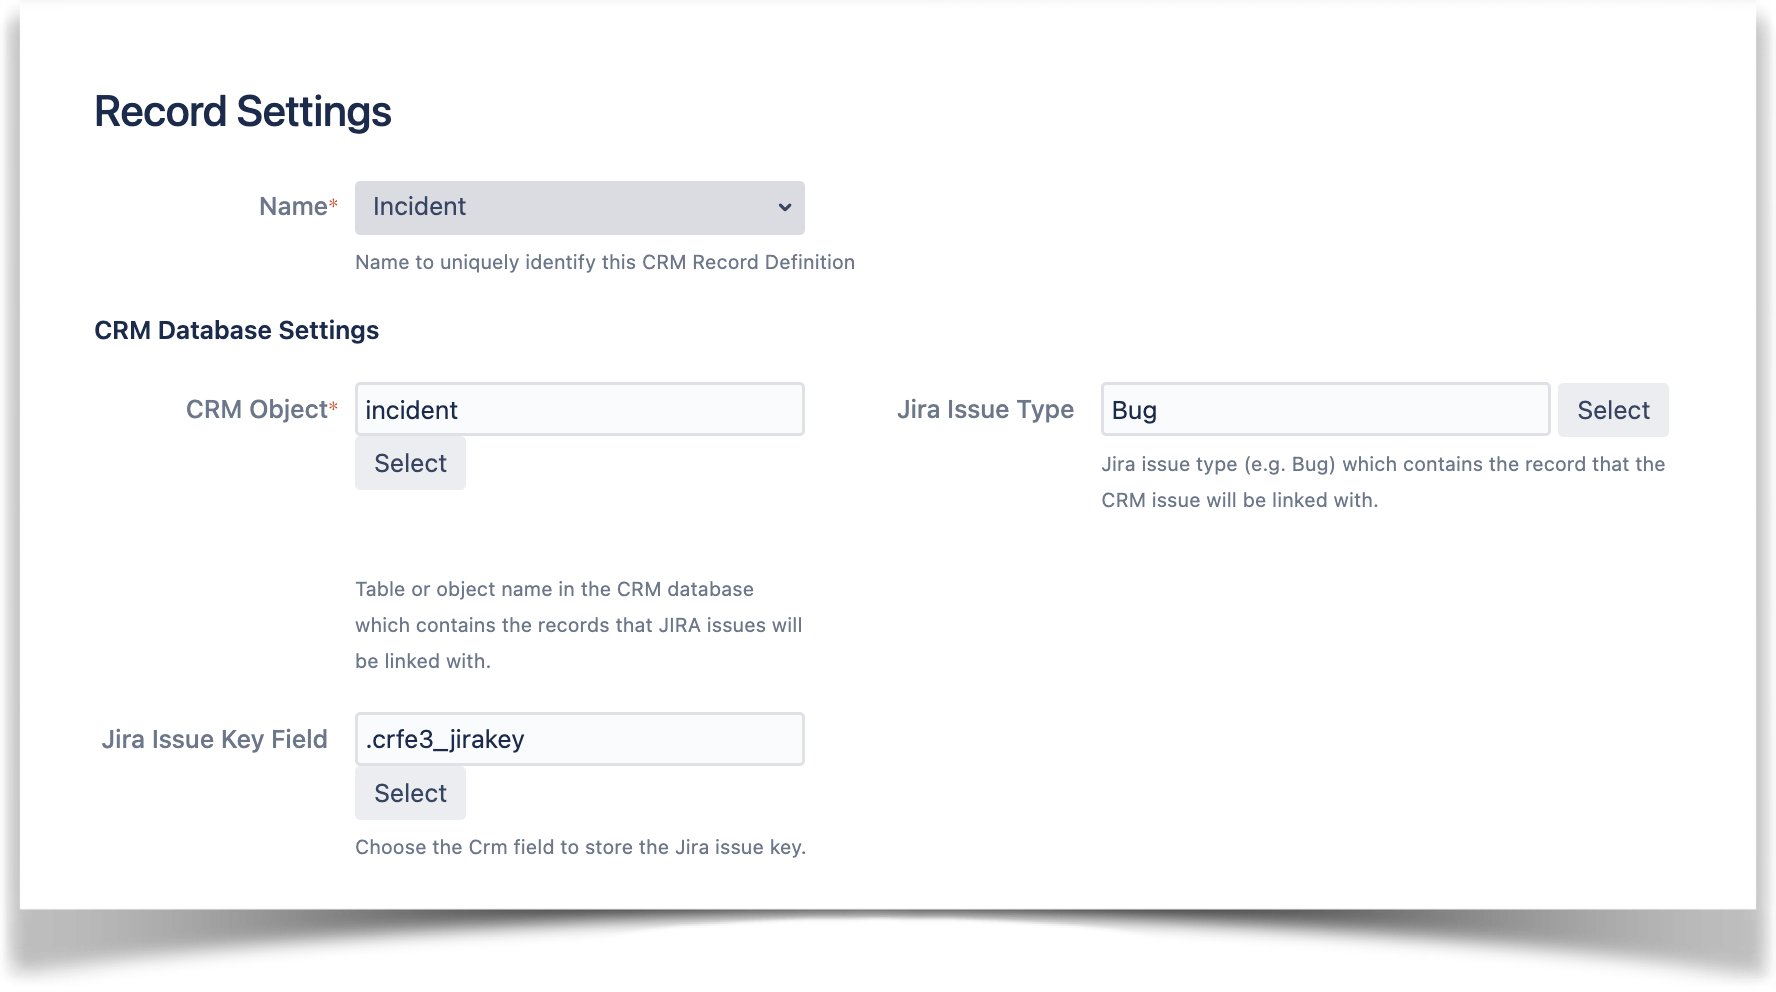
This is an example record setup for Dynamics:
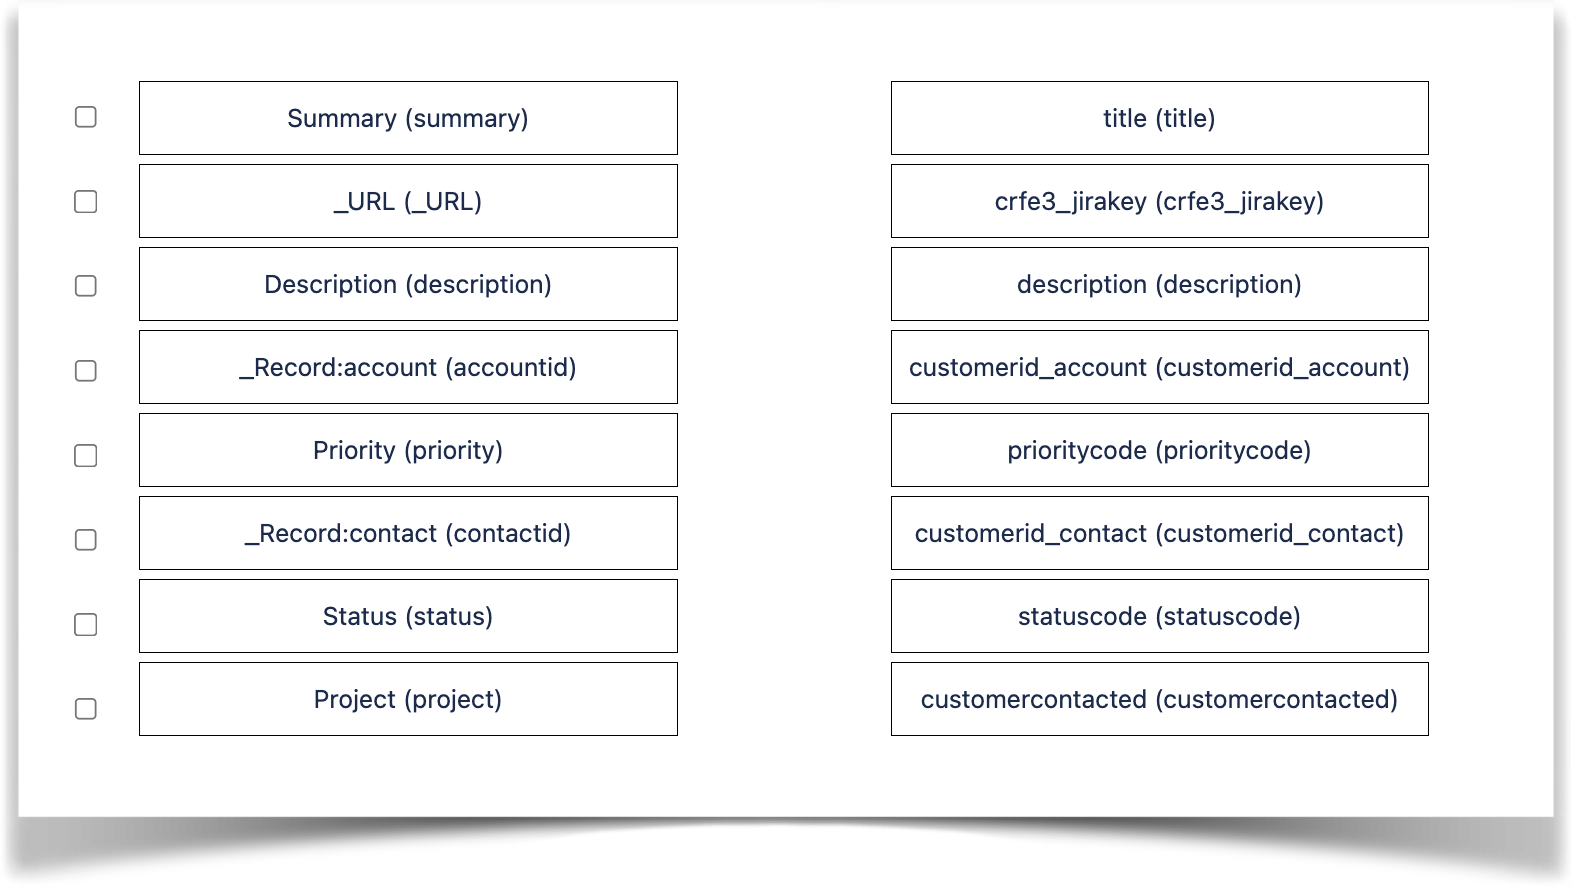
This is an example field map:
Trigger Setup
There are several approaches to configure a synchronization of MS Dynamics records and Jira records.
It is assumed you have already created a connection, and mapped the record types and fields in the Jira configuration screen.
The last step is to setup the Dynamics UI to push changes to Jira.
The information needed to do this setup:
URL: Either the QA URL or the Production URL. If you installed the Plum plugin from the Marketplace you MUST use the production URL.
Production URL: https://crm.goldfingerholdings.onl/rest/api/1/create-issue
QA URL: https://crm-qa.goldfingerholdings.onl/rest/api/1/create-issue
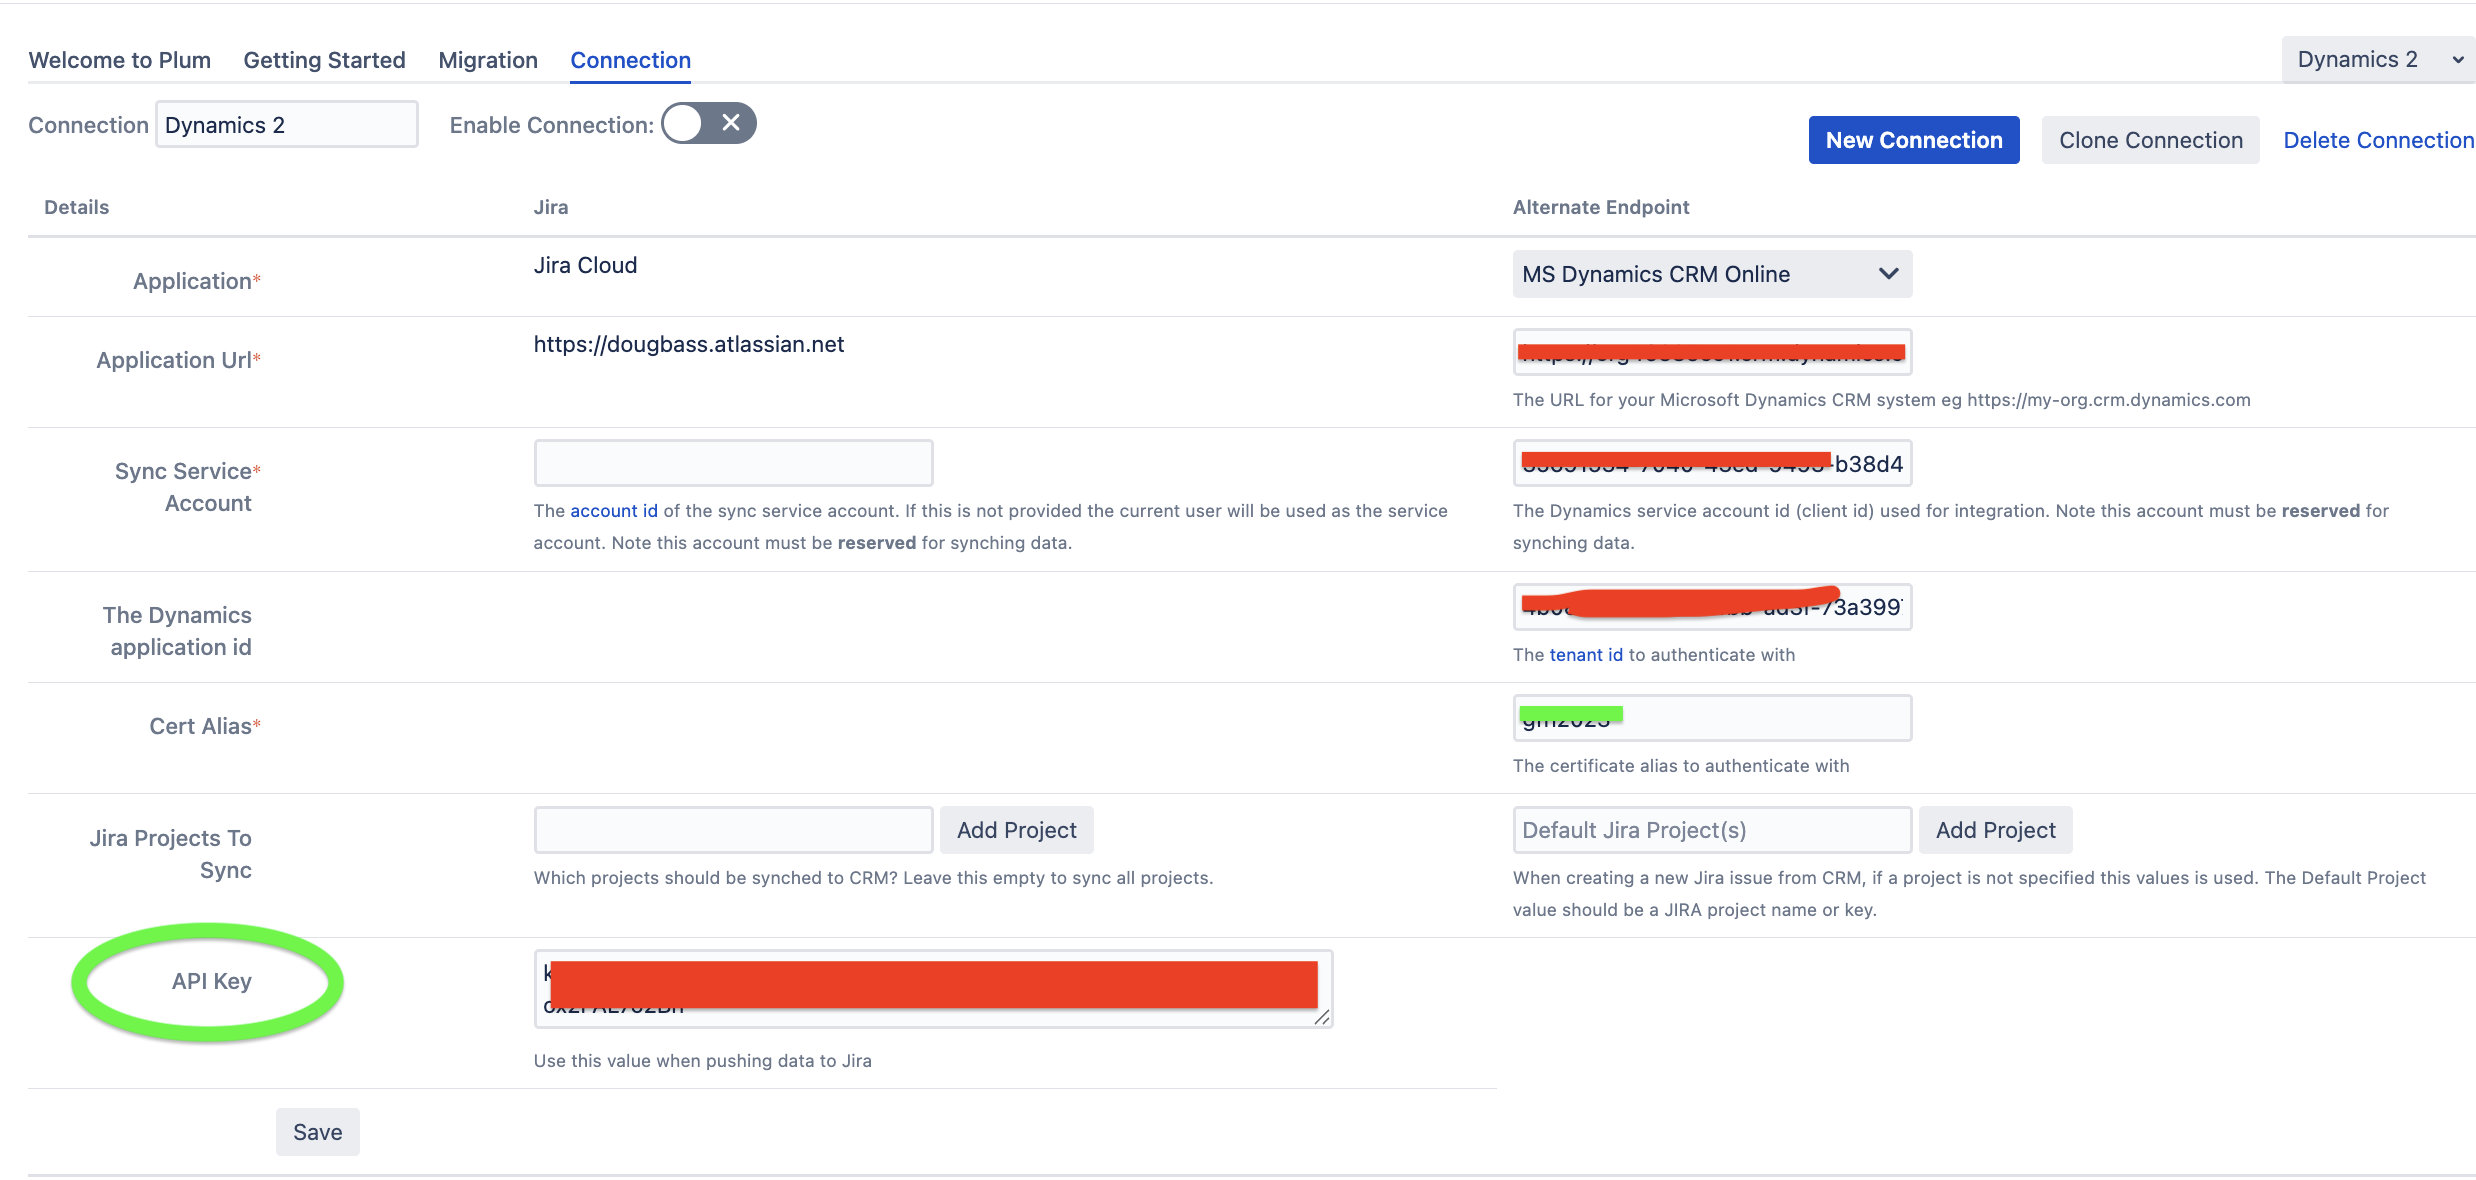
API Key: The api key displayed on the connection setup on the Jira config screen. An example of the screen is:
The changes can be synchronized automatically to Jira using automate flow to synchronize a dynamics record to Jira record.
To initiate the synchronization a POST message is sent to the URL discussed above with the following arguments:
|
recordType |
The record type being saved e.g. Incident |
|
api-key |
From jira config screen |
|
recordid |
The dynamics record id |
|
user |
Dynamics user saving the changed record |
For example to send the POST message to the production Jira the url would be:
The response from the message will be a success message in html with a link to the created Jira issue, or an error message if the request fails.
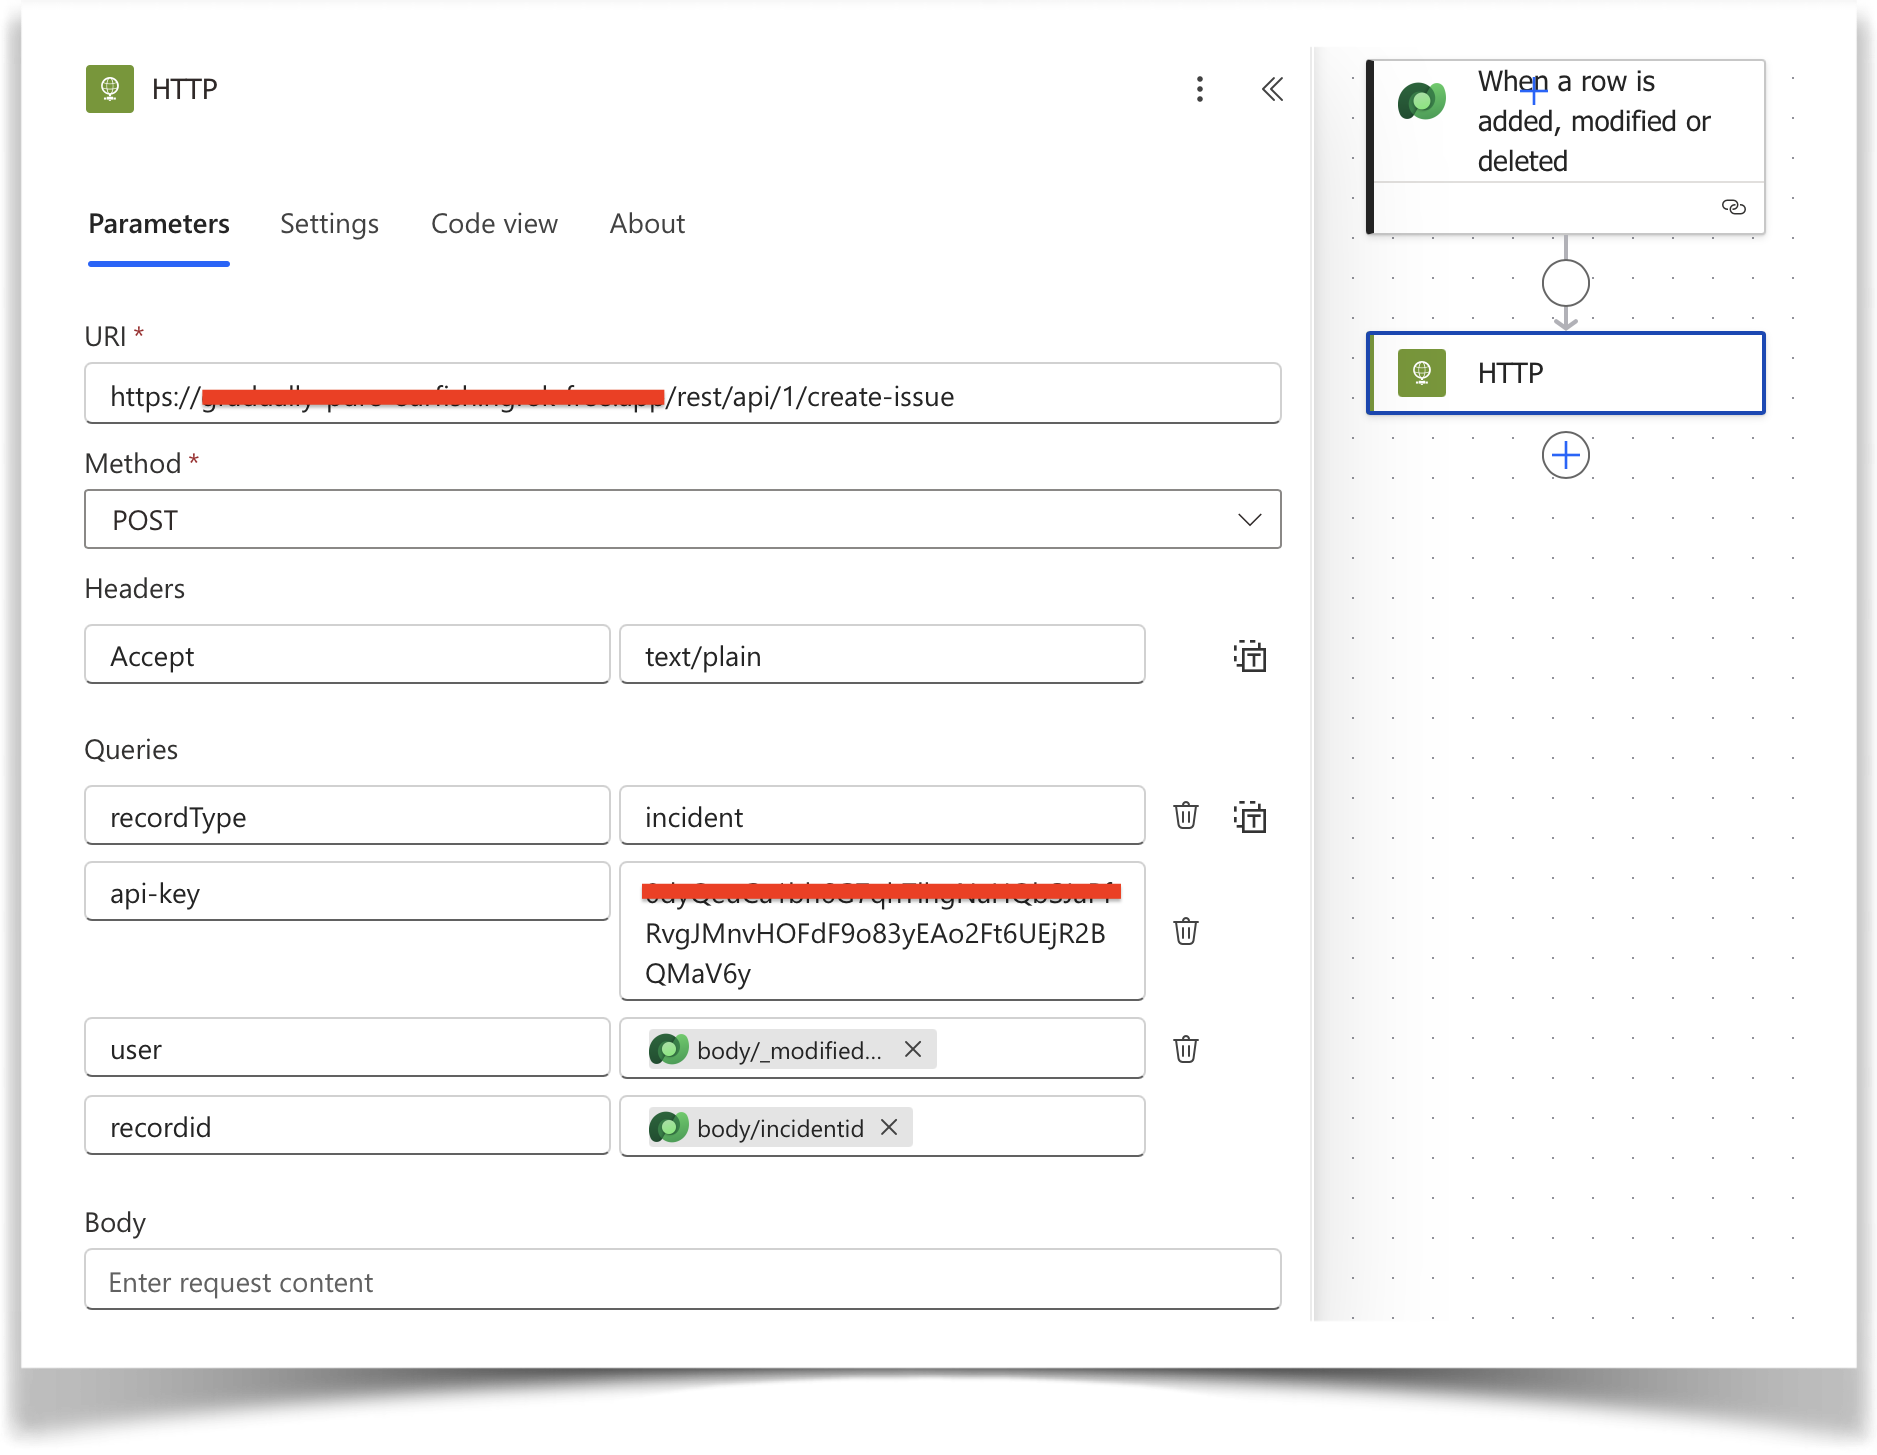
One way you can send the message is using automate flow. This screen shows the flow setup that will perform a synchronization whenever an incident is created or updated.
Instead of the “When a row is added” action it could be triggered only on create, or via a button added to a ribbon.